Using agents from chat
Written By Stanislas
Last updated 6 months ago
Invoke specialized AI agents directly from Chat to handle complex, specific tasks. Access pre-configured agents with their own knowledge bases, skills, and instructions—all without leaving Chat.
Agents in Chat let you leverage specialized expertise for tasks like document analysis, customer support, marketing strategy, or any custom workflow your team has built. Switch between agents instantly to match the task at hand.
Overview
Agents are custom AI assistants built for specific purposes. Each agent has its own:
Objectives and instructions – Guidance on what the agent should do
Knowledge base – Documents and data sources the agent can access
Skills – Tools and integrations the agent can use (like sending emails, querying databases, etc.)
Using agents from Chat means you can access all this specialized capability without navigating away from your conversation interface. You simply select an agent and start chatting with it.
Prerequisites
To use agents from Chat, you need:
A Swiftask account (sign up at swiftask.ai)
Access to Chat
Agents created or shared with you in your workspace
Agents are available to all Swiftask users. If you don't see any agents, you may need to create one first or ask a teammate to share an agent with you.
Step-by-step guide
1. Open Chat
Navigate to Chat in the left sidebar. You're now in the Chat interface where you can interact with AI models and agents.
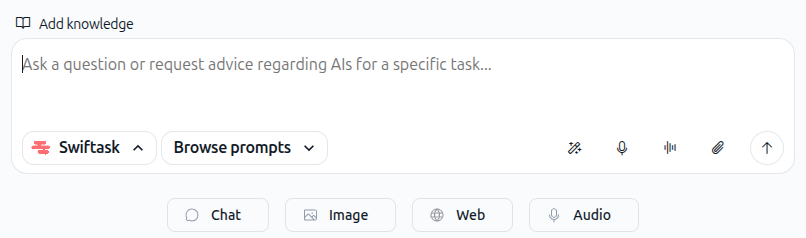
2. Locate the Model/agent selector
In the Chat input area, look for the agent selector dropdown on the left side of the input field. By default, it shows "Swiftask" as the active agent.
3. Click on an agent card to switch to that agent
Select "My agents" section
Select a different agent from the list
Each agent card shows:
Agent name – The name of the agent (e.g., "Georges - Analyse documentaire")
Agent description – A brief explanation of what the agent does
Agent avatar – A visual icon representing the agent
Cost indicator – Shows the cost per interaction (e.g., "2 / word")
Click any agent card to switch to that agent instantly. The agent becomes active, and you can now chat with it.
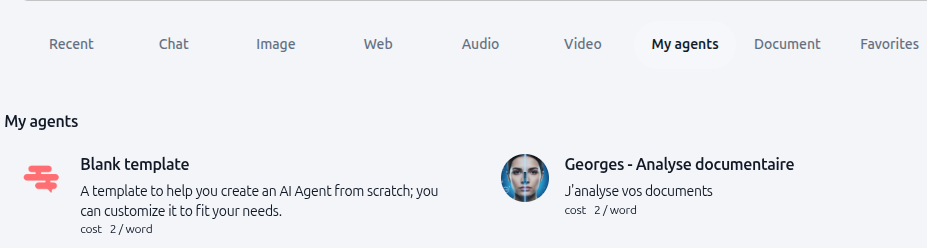
As shown in the image above, the "My agents" section displays agent cards with their names, descriptions, avatars, and cost information. Click any card to start using that agent.
4. Start chatting with the agent
Once you've selected an agent, the Chat interface switches to that agent. You can now:
Type your message in the input field
Ask the agent to perform tasks related to its specialty
Attach files for the agent to analyze (if configured)
Use all standard Chat features (voice input, file uploads, etc.)
The agent will respond using its configured knowledge base, skills, and instructions.
5. Switch to a different agent
You can switch to another agent at any time in the same conversation.
Practical use cases
Document analysis with a specialized agent
You have a document analysis agent configured with access to your company's knowledge base. In Chat, click the agent card to switch to it, then attach a quarterly report. Ask: "Summarize the key challenges and opportunities from this report."
The agent analyzes the document using its specialized knowledge and returns a structured summary with actionable insights.
Customer support agent
Your support agent has skills to access your customer database and ticketing system. Switch to it from Chat and ask: "What are the top 3 issues customers reported this week?"
The agent retrieves and analyzes the data for you, providing a real-time snapshot of customer concerns without manual research.
Marketing strategy agent
You've built a marketing agent with access to market research documents and competitor analysis. Click the agent in Chat and ask: "Create a Q1 marketing strategy for our new product launch."
The agent uses its knowledge base to generate a tailored recommendation based on your specific market data and competitive landscape.
Custom workflow agent
Your team built an agent that automates a specific workflow (e.g., generating contracts, analyzing compliance documents, etc.). Access it from Chat to handle routine tasks without switching tools.
Instead of using multiple applications, you can orchestrate complex processes directly from Chat, saving time and reducing context switching.
Tips & best practices
Agents are faster for specialized tasks
If you need analysis, document processing, or a specific workflow, use an agent instead of a general model. Agents are pre-configured for their purpose and often produce better results.
Check agent descriptions
Each agent card shows what the agent does. Read the description to understand its specialty before using it. This helps you choose the right agent for your task.
Use agent knowledge bases
If an agent has a knowledge base attached, it can access specific documents and data. Leverage this by asking questions about those resources. The agent will reference relevant information from its knowledge base.
Switch agents for different tasks
Don't hesitate to switch agents. Each agent is optimized for specific work. Use the right agent for each task. This ensures you get the best possible results for each type of work.
Keep conversations focused
Each agent conversation is separate. If you want to switch to a completely different task with a different agent, start a new chat with that agent. This keeps your conversation history organized and makes it easier to track work.
What's next
Now that you know how to use agents from Chat, explore:
Using an agent for the first time – Create your first custom agent
Browse and change AI models – Learn when to use different AI models vs. agents
Attaching files & documents – Upload files for agents to analyze
Agent features – Learn more about building and configuring agents
Additional resources
Agents section – Create, browse, and manage all your agents
Ready to use agents from Chat? Click on an agent card now and start chatting with a specialized AI assistant.