Import from Cloud (Google Drive, Dropbox, SharePoint)
Written By Stanislas
Last updated 6 months ago
Import documents directly from Google Drive, SharePoint, or Dropbox into your Swiftask knowledge base. Connect your cloud storage once, select the files or folders you need, and Swiftask automatically processes and indexes them for AI-powered search and agent access.
This feature eliminates manual downloading and re-uploading. Connect to your cloud storage, choose what to import, and keep your knowledge base synchronized with your latest documents.
Overview
The cloud storage import feature connects Swiftask to your existing cloud storage services—Google Drive, SharePoint, and Dropbox. Once connected, you can browse your cloud files directly from Swiftask, select individual files or entire folders, and import them into your knowledge base.
After the initial import, you control when to sync changes. Click the Resync button to manually update documents when they change in your cloud storage, or configure automatic synchronization to keep everything up to date without manual intervention.
Swiftask processes imported files the same way it handles local uploads: text extraction, OCR for scanned documents, chunking, and vector embedding. Your cloud documents become searchable, referenceable knowledge sources for your AI agents and team members.
Prerequisites
To import documents from cloud storage, you need:
A Swiftask account (sign up at swiftask.ai)
Access to the Knowledge section
A Google Drive, SharePoint, or Dropbox account with documents you want to import
Permission to authorize Swiftask to access your cloud storage
Permission to create data sources in your workspace
Supported file types
Swiftask supports the following file types from cloud storage:
Google Drive:
Google Sheets
Google Docs
Google Slides
PDF
Excel
PowerPoint
Word
SharePoint and Dropbox:
PDF
Excel
PowerPoint
Word
And other standard document formats
Step-by-step guide
1. Navigate to knowledge
Click Knowledge in the left sidebar. You'll see the knowledge interface with all your data sources and folders.
2. Click the import button
In the Knowledge section, locate and click the Import button. A dropdown menu appears with multiple import options.
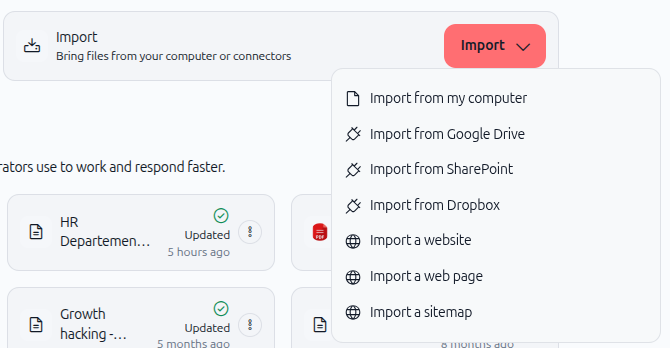
From the import dropdown menu, choose your cloud storage provider:
Google Drive
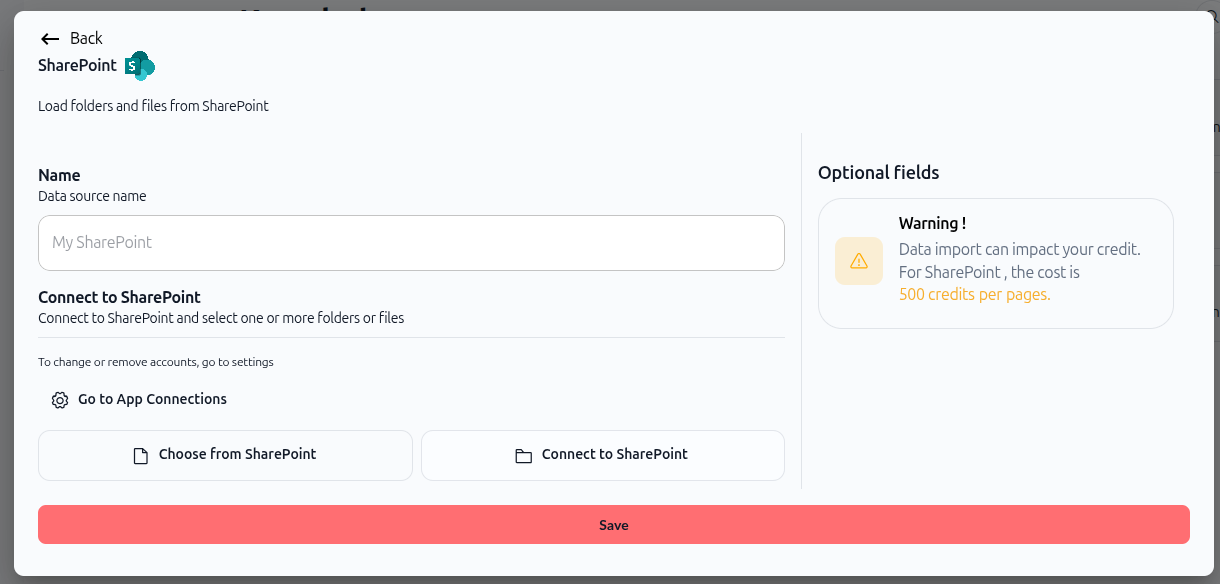
SharePoint
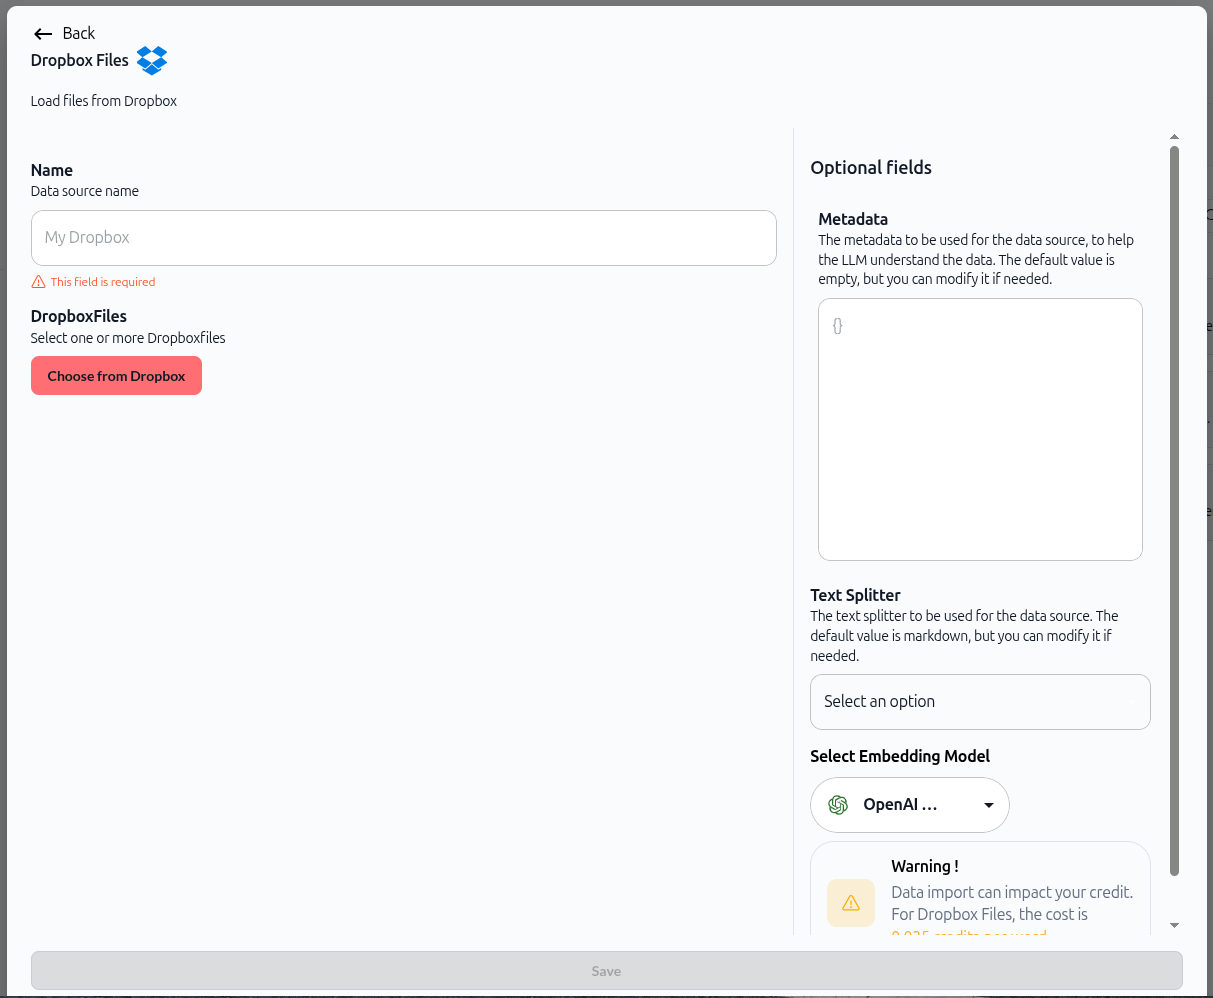
Dropbox
The process is the same for all three services. This guide uses Google Drive as the example.
4. Authenticate and grant permissions
If this is your first time connecting to the cloud service, Swiftask prompts you to authenticate and grant necessary permissions.
Follow the authentication flow for your chosen service:
Google Drive: Sign in with your Google account and authorize Swiftask to access your Drive files
SharePoint: Sign in with your Microsoft account and authorize access
Dropbox: Sign in with your Dropbox account and authorize access
Once authenticated, your account appears in the connection list. The Google Drive connector displays which Google account is attached for easy identification.
5. Select files or folders
After authentication, a file picker modal opens showing your cloud storage contents.
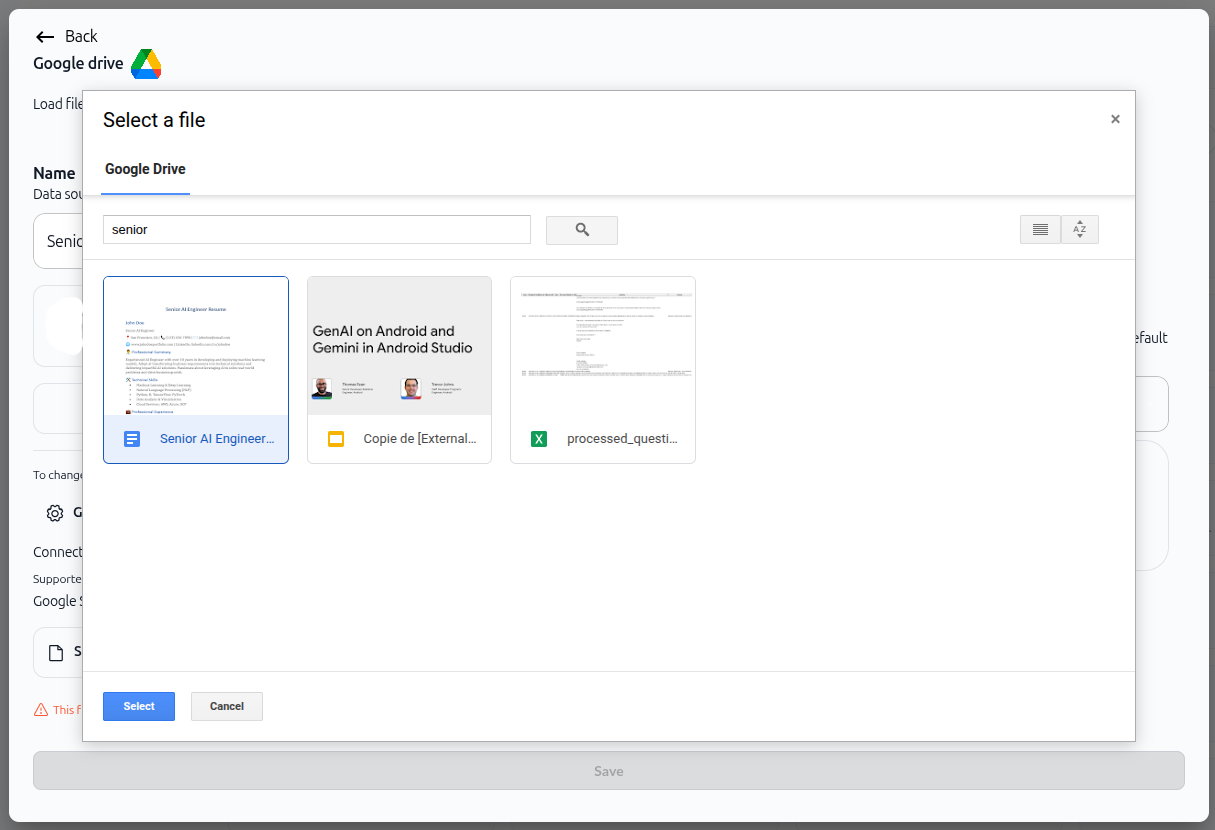
What you'll see:
A search bar to find specific files
Thumbnail previews of your documents
File names and types
Grid or list view options
To select files:
Click on individual files to select them
Selected files show a blue border
To select folders:
Click the Select folder(s) button
Browse and choose entire folders to import all contents at once
Once you've made your selection, click the Select button at the bottom of the modal.
6. Configure import settings
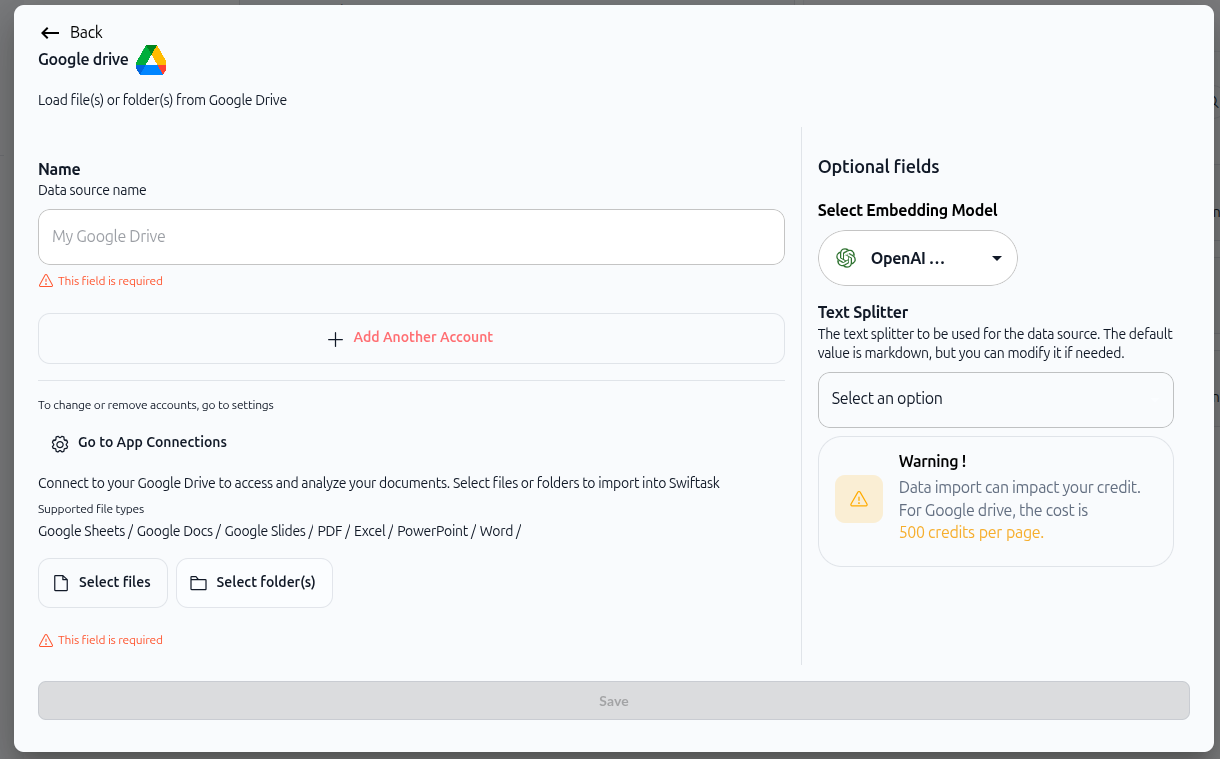
After selecting your files, you will return to the import configuration screen.
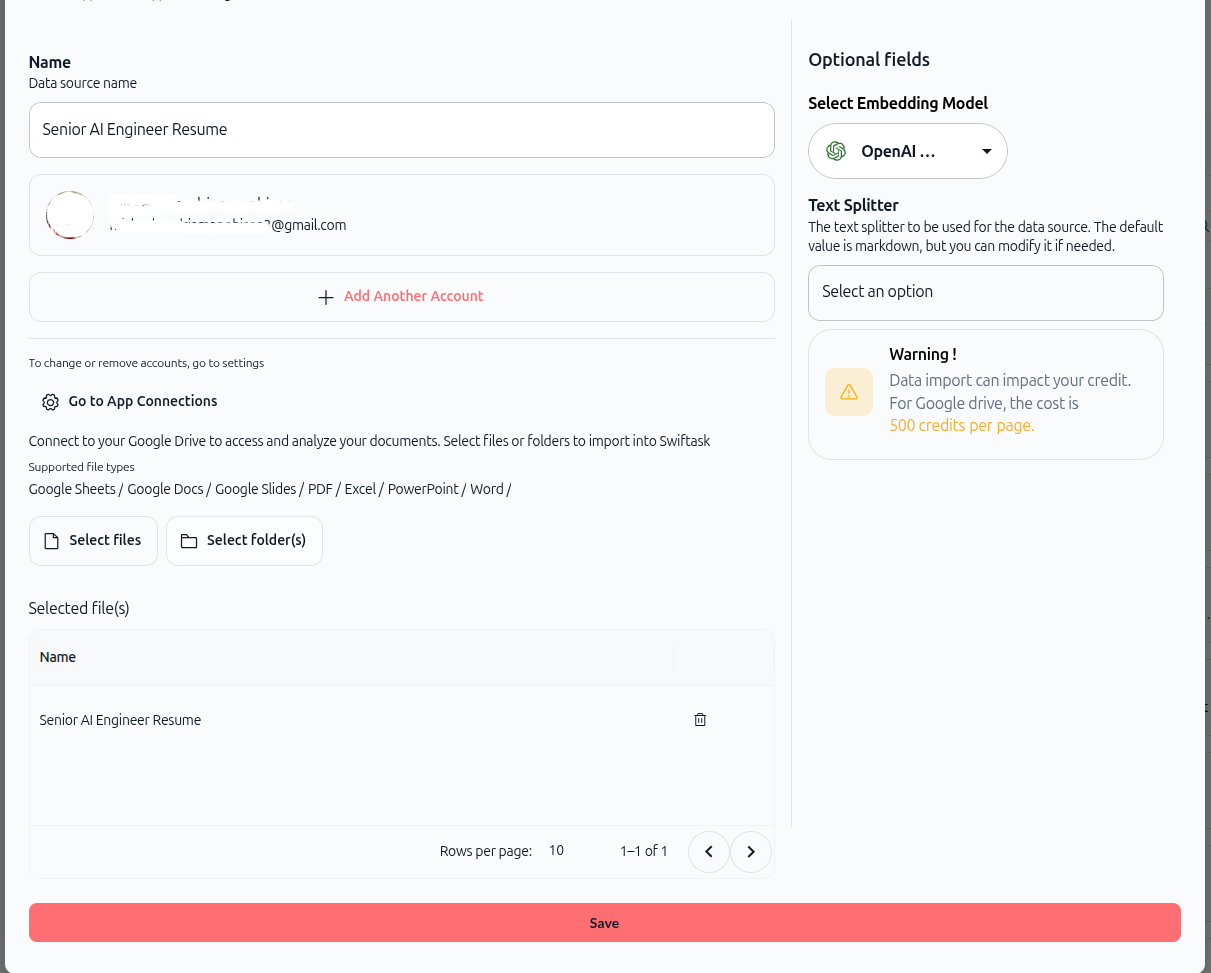
Left section: Basic settings
Name: Enter a descriptive name for this data source. This name appears in your knowledge base list.
Connected account: Shows which cloud account is connected (e.g., your Gmail address for Google Drive). To add another account, click Add Another Account.
To remove accounts, click Go to App Connections.
Select files or folders: Two buttons let you choose what to import:
Select Files – Choose individual files
Select folder(s) – Choose entire folders
Selected file(s): Lists all files you've selected for import. Each file shows its name and a delete icon (trash) if you need to remove it from the selection.
Right section: Optional fields
Select embedding model: Choose the AI model used to create vector embeddings (default: OpenAI Text Embedding 3 Small). This determines how your content is indexed and searched.
Text splitter: Choose the method for splitting text content. The default is markdown, but you can select other options from the dropdown.
Warning: A cost indicator shows: "Data import can impact your credit. For Google drive, the cost is 500 credits per page."
7. Save and process
Once your files are selected and settings configured, click the Save button at the bottom of the screen.
Swiftask processes your files in the background:
Text is extracted from documents
Google Sheets, Docs, and Slides are converted to searchable format
Content is split into chunks based on your text splitter setting
Chunks are embedded using the selected embedding model
The data source is indexed and made searchable
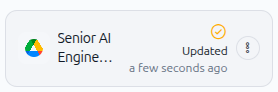
You'll see a progress indicator:
Orange checkmarl icon – Import in progress
Green checkmark icon – Import complete
8. View your imported documents
After processing, navigate back to the Knowledge section. Your new cloud storage data source appears in the list.
Click on the data source to view details:
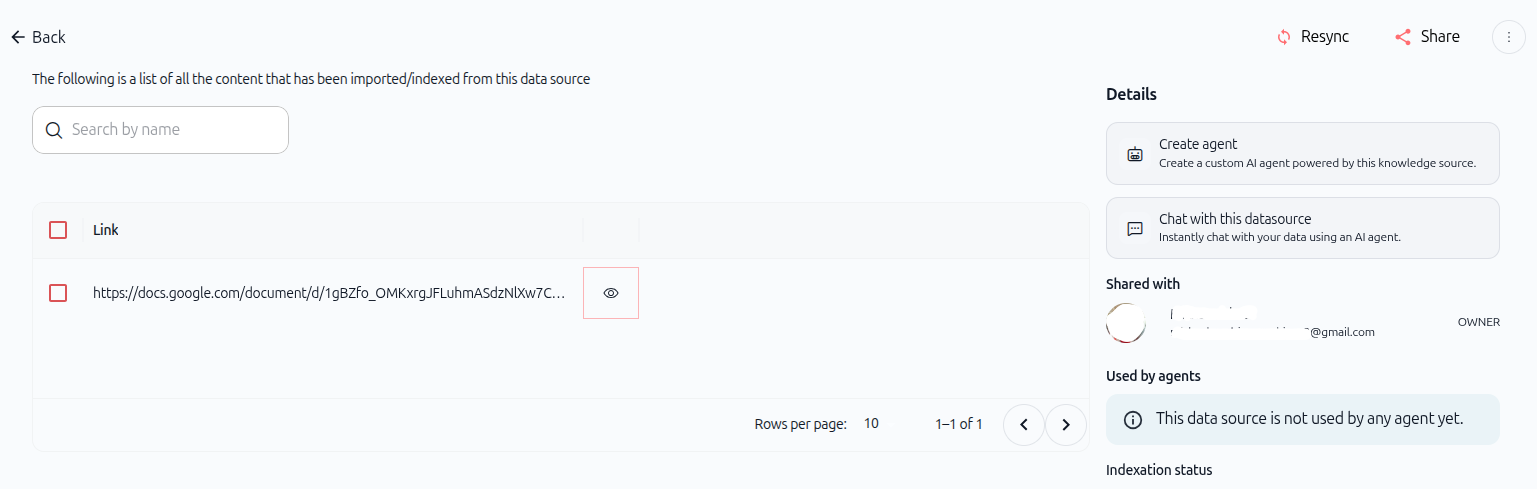
Left section: Imported content list
A list of all imported files
A search bar to filter by name
Each item shows a link to the original cloud file and an eye icon to preview extracted content
Right section: Details panel
Create agent – Build a custom AI agent powered by this knowledge source
Chat with this datasource – Instantly query your documents
Shared with – Shows who has access
Used by agents – Lists agents using this data source
Indexation status – Shows processing progress
Top bar: Sync and share
Resync button – Click to manually update documents when changes are made in your cloud storage
Share button – Give team members access to this data source
Three dot icon button - To configure automatic synchronisation or to delete the document.
How cloud storage sync works
Manual sync
When you make changes to files in your cloud storage (edit, add, or delete), those changes do not automatically appear in Swiftask. To update your knowledge base:
Navigate to the imported data source in your knowledge section
Click the Resync button in the top-right corner
Swiftask re-processes the connected files and updates the indexed content
Use manual sync when you want full control over when updates occur.
Automatic sync
You can configure automatic synchronization to keep your knowledge base up to date without manual intervention. Automatic sync periodically checks your cloud storage for changes and updates your data source automatically.
Automatic sync configuration is covered in detail in the Automatic synchronization section of the documentation.
Practical use cases
Import team documentation from Google Drive
Your team stores all documentation in a shared Google Drive folder. Connect Swiftask to that folder, import everything at once, and create an agent that references your team docs. When documentation updates, click Resync to keep your agent's knowledge current.
Import client files from SharePoint
Your organization uses SharePoint for client project files. Import specific client folders into Swiftask, then build agents that can answer questions about client contracts, specifications, and deliverables using your actual project documents.
Import research papers from Dropbox
You maintain a Dropbox folder with industry research papers and reports. Import the folder into Swiftask, then create a research agent that can analyze trends, summarize findings, and reference specific papers when generating insights.
Tips & best practices
Organize cloud storage before importing
Before connecting to Swiftask, organize your cloud storage into clear folders. Import specific folders rather than your entire Drive to keep your knowledge base focused and relevant.
Use descriptive data source names
Name your data sources clearly so you can identify them later. Instead of "Google Drive Import 1," use "Marketing Team Documentation" or "Q1 2025 Client Contracts."
Start with a small test import
If you're connecting to cloud storage for the first time, start by importing a small folder to verify the process works correctly. Once confirmed, import larger collections.
Click resync after major updates
After making significant changes to your cloud files (adding new documents, updating key files), click Resync to ensure your agents have the latest information.
Monitor credit usage
Cloud imports consume 500 credits per page. Before importing large folders, estimate the total page count to understand credit impact.
Manage connected accounts
To change which cloud account is connected, or to remove old connections, go to Settings → App Connections. This keeps your integrations organized and secure.
What happens next
Once you've imported your cloud storage documents, you're ready to:
Create an agent – Build a custom AI agent powered by your cloud documents
Chat with your data – Use the "Chat with this datasource" feature to instantly query your documents
Share with teammates – Give team members access to your knowledge base
Connect to agents – Link your data source to existing agents to enhance their capabilities
Configure automatic sync – Set up automatic synchronization to keep your knowledge base updated (see Automatic synchronization section)
Your cloud documents are now indexed, searchable, and ready to power AI-driven workflows across your workspace.
Additional resources
Knowledge base – Introduction – Learn what knowledge base is and why it matters
Import documents / files – Upload files from your computer
Import website and web pages – Add web content to your knowledge base
Automatic synchronization – Configure automatic updates for cloud storage sources
Permissions and access – Control who can see and use your knowledge base
Creating an agent – Build an agent and connect it to your knowledge base
Ready to import your first cloud storage files? Click Knowledge in the sidebar, then Import → Import from cloud storage. Choose your provider, authenticate, select your files, and let Swiftask handle the rest.