Import website / webpage
Written By Stanislas
Last updated 6 months ago
Add web content to your knowledge base so AI agents can access and reference information from websites. Swiftask automatically extracts, processes, and indexes web content, making it searchable and available to agents across your workspace.
Whether you need to import a single webpage or an entire website with multiple pages, Swiftask handles the extraction and indexing automatically. Import once, and your agents can instantly reference the content when answering questions or completing tasks.
Overview
The import website and webpage feature lets you add web-based content directly to your knowledge base. Swiftask automatically scrapes the content, processes it into searchable chunks, and indexes everything for instant AI-powered search and retrieval.
You can import two types of web content:
Website – Import multiple pages from a website by scanning and following links automatically
Webpage – Import content from a single specific webpage URL
Each import creates a data source in your knowledge base that agents and team members can access. Your agents use this web content to provide accurate, up-to-date responses based on the information you've imported.
Understanding the difference
Website import:
Extracts content from multiple pages of a website
Follows links automatically to discover and import related pages
Ideal for importing documentation sites, blogs, or entire sections of a website
Allows you to control depth and scope of the crawl
Webpage import:
Extracts content from a single webpage only
Imports only the specific URL you provide
Ideal for importing specific articles, product pages, or individual documents
Faster and more precise when you need specific content
Prerequisites
To import web content to your knowledge base, you need:
A Swiftask account (sign up at swiftask.ai)
Access to the Knowledge section
The URL of the website or webpage you want to import
Permission to create data sources in your workspace
Web content import is available to all Swiftask users.
Step-by-step guide
1. Navigate to Knowledge
Click Knowledge in the left sidebar. You'll see the Knowledge interface with all your data sources and folders.
2. Click the Import button
In the Knowledge section, locate and click the Import button. A dropdown menu appears with multiple import options.
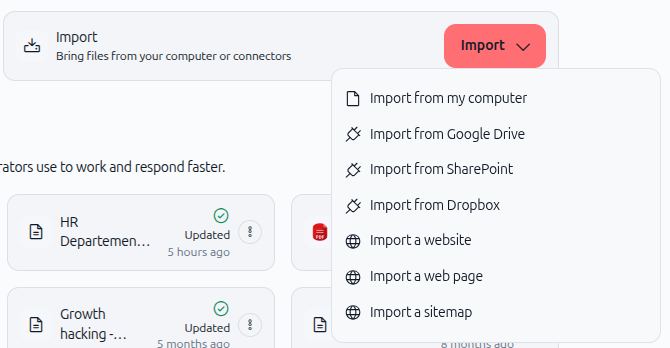
3. Choose your import type
Select either Import a website or Import a web page depending on your needs.
Importing a website
Use this option when you want to import multiple pages from a website.
1. Select "Import a website"
From the Import dropdown menu, click Import a website.
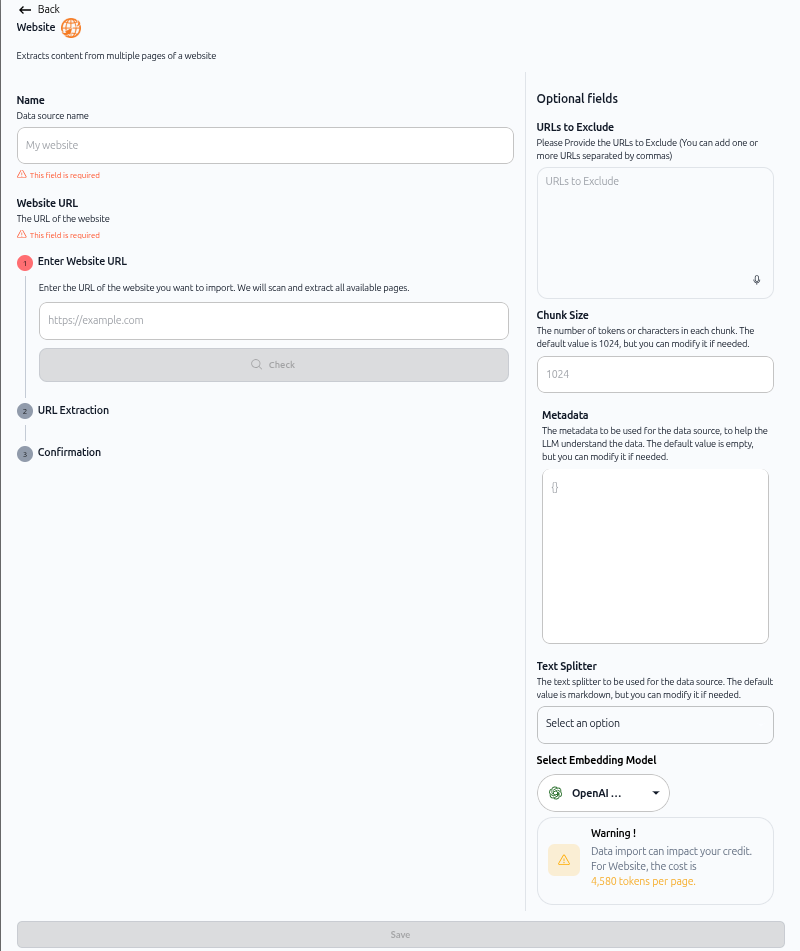
The website import configuration screen opens. As shown in the image above, the screen displays:
Name – Data source name field
Website URL – The URL of the website (marked as required)
2. Enter website details
Name field: Enter a descriptive name for your data source (e.g., "Wikipedia").
Website URL field:
Enter the complete URL of the website you want to import
Include the protocol (https://)
The field shows a required indicator
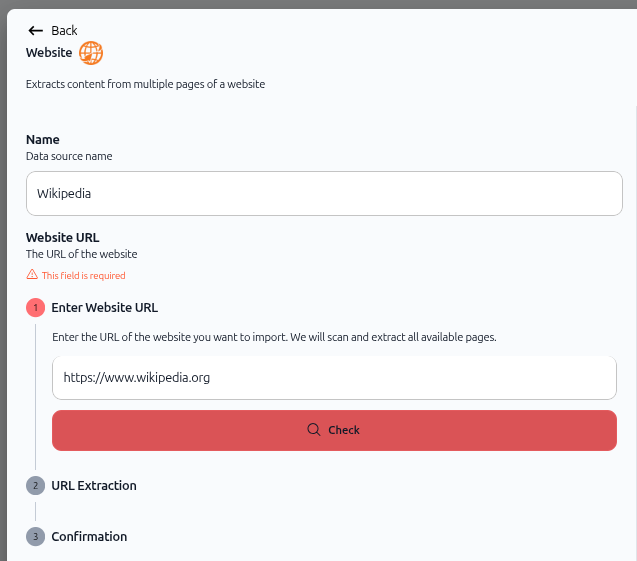
Example: https://www.wikipedia.org
3. Click "Check" to validate the URL
After entering the URL, click the Check button. Swiftask scans the website and discovers available pages.
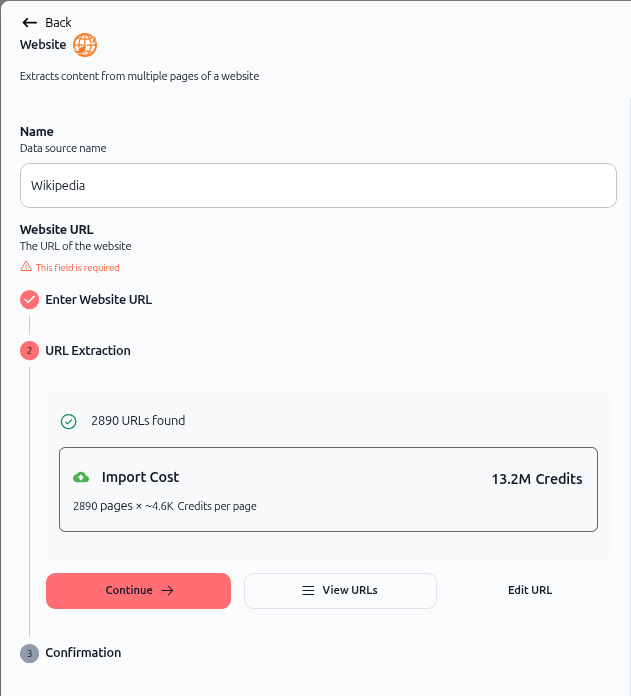
As shown in the image above, once validation is complete:
A green checkmark appears next to "Enter Website URL"
URL Extraction section displays the number of page found (e.g., "2890 pages found")
Import Cost shows the estimated credit consumption
Continue button becomes available
4. Review import cost and URLs
The screen displays:
Import Cost:
Total credit estimate (e.g., "13.2M Credits")
Breakdown: "2890 pages × ~4.6K Credits per page"
Optional actions:
View URLs – Click to see the list of discovered pages
Edit URL – Modify the website URL if needed
5. Configure optional settings (if needed)
On the right side of the screen, you'll find optional configuration fields:
URLs to Exclude:
Enter URLs you want to exclude from import
Separate multiple URLs with commas
Useful for skipping irrelevant sections
Chunk Size:
The number of tokens or characters in each chunk
Default value is 1024
Modify if needed for your use case
Metadata:
Add custom metadata to help the LLM understand the data
Default value is empty
Modify if needed
Text Splitter:
Select the method for splitting text content
Choose from the dropdown options
Select Embedding Model:
Choose the embedding model (default: OpenAI)
A warning shows the cost: "For Website, the cost is 4,580 tokens per page"
6. Click "Continue" and confirm
Once you've reviewed the settings, click the Continue button.
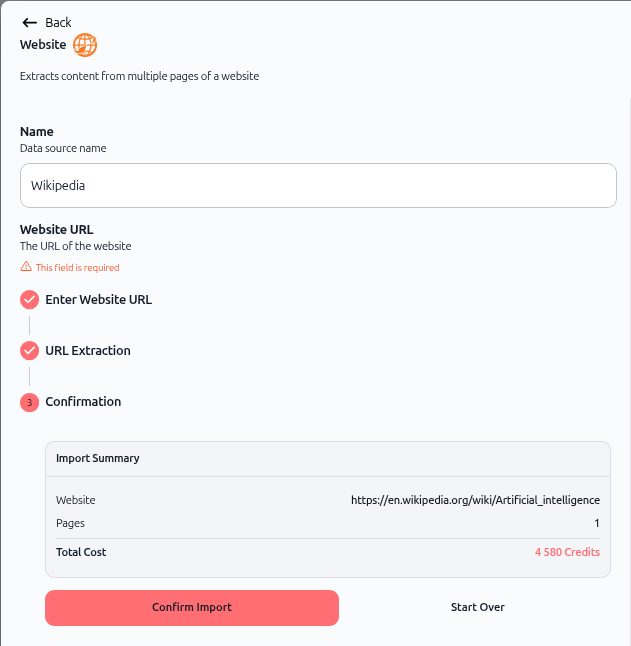
The confirmation screen displays:
Import Summary:
Website: The URL you're importing
Pages: Number of pages (e.g., "1")
Total Cost: Credit consumption (e.g., "4,580 Credits")
Actions:
Confirm Import – Proceed with the import
Start Over – Cancel and restart the process
Click Confirm Import and Save to proceed
7. Monitor import progress
Swiftask processes the website in the background:
Content is extracted from each discovered page
Text is split into chunks based on your settings
Chunks are embedded using the selected embedding model
The data source is indexed and made searchable
You'll see a progress indicator:
Orange checkmarl icon – Import in progress
Green checkmark icon – Import complete
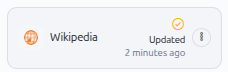
8. View your imported website
After processing, navigate back to the Knowledge section. Your new data source appears in the list.

As shown in the images above, the imported data source displays:
Left panel: Content list
A list of all pages imported from the website
Search bar to find specific pages by name
Each item shows a checkbox and an eye icon for viewing details
Right panel: Details
Create agent – Build a custom AI agent powered by this knowledge source
Chat with this datasource – Instantly query your web content
Shared with – Shows who has access (e.g., "Karen Lee - OWNER")
Used by agents – Lists agents using this data source
Indexation status – Shows "Up to date"
Embedding model – Displays the model used (e.g., "OpenAI - Text Embedding 3 Small")
Name – Data source name (e.g., "Wikipedia")
Category – Shows "Website"
Url – Displays the source URL
Text Splitter – Shows the splitting method used (e.g., "recursive")
Creation date and Last updated – Timestamps for tracking changes
Indexing status – Expandable section showing indexing progress (e.g., "Indexing 1 data source(s): success")
Importing a webpage
Use this option when you want to import content from a single specific webpage.
1. Select "Import a web page"
From the Import dropdown menu, click Import a web page.
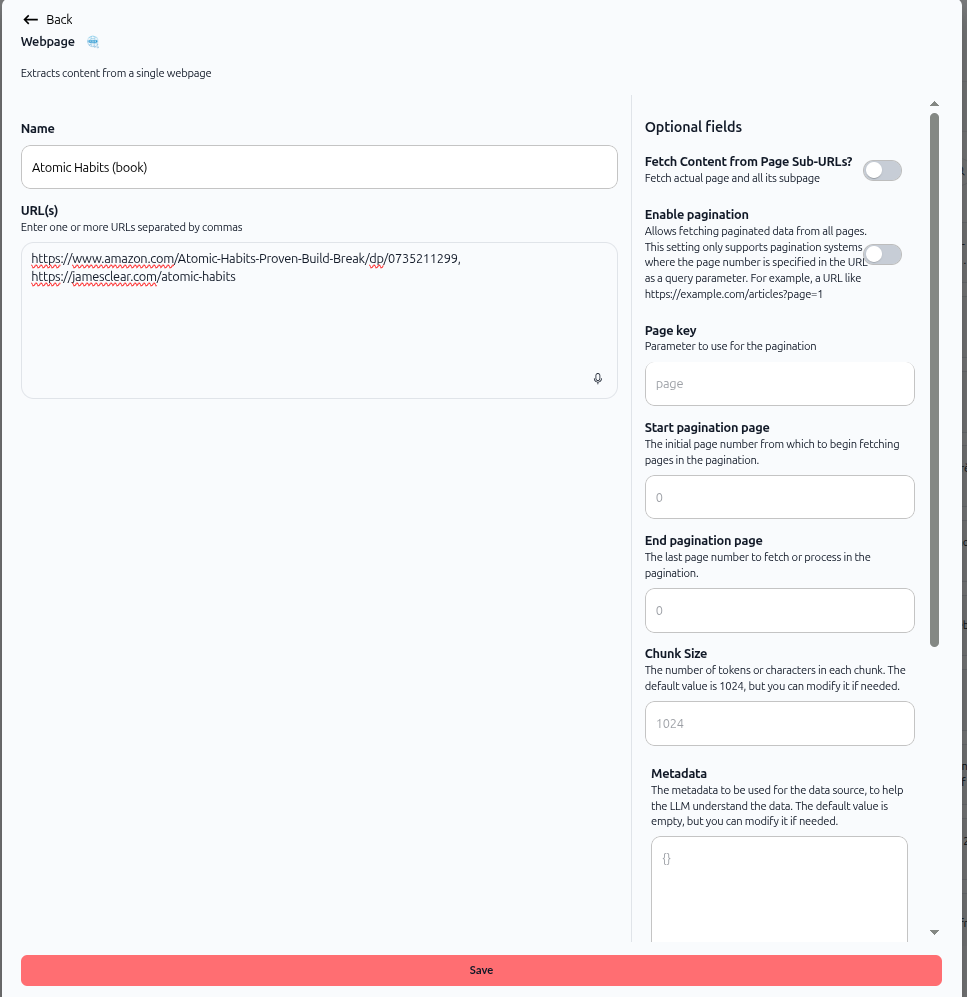
The webpage import configuration screen opens. As shown in the image above, the screen displays:
Main fields:
Name – Data source name
URL(s) – Enter one or more URLs separated by commas
Optional fields (right panel):
Fetch Content from Page Sub-URLs? – Toggle to fetch subpages
Enable pagination – For paginated content
Page key – Parameter to use for pagination
Start pagination page – Initial page number
End pagination page – Last page number
Chunk Size – Default value is 1024
Metadata – Custom metadata field
Text Splitter – Choose splitting method
Select Embedding Model – Choose embedding model
2. Enter webpage details
Name field: Enter a descriptive name for your data source (e.g., "Atomic Habits (book)").
URL(s) field: Enter the complete URL(s) of the webpage(s) you want to import. You can enter multiple URLs separated by commas.
Example:
https://www.amazon.com/Atomic-Habits-Proven-Build-Break/dp/0735211299, https://jamesclear.com/atomic-habits 3. Configure optional settings (if needed)
Fetch Content from Page Sub-URLs:
Toggle ON to fetch actual page and all its subpages
Useful for pages with linked content
Enable pagination:
Toggle ON for paginated content
Allows fetching multiple pages in pagination systems
Specify URL parameter (e.g., "page")
Pagination settings:
Page key: Parameter for pagination (e.g., "page")
Start pagination page: Initial page number (e.g., "0")
End pagination page: Last page number to fetch
Chunk Size:
Default value is 1024
Modify if needed
Metadata:
Add custom metadata to help the LLM understand the data
Default value is empty
Text Splitter:
Select splitting method from dropdown
Select Embedding Model:
Choose the embedding model (default: OpenAI)
4. Click "Save"
Once you've configured your settings, click the Save button at the bottom of the screen.
Swiftask processes the webpage(s) in the background:
Content is extracted from the specified URL(s)
Text is split into chunks
Chunks are embedded using the selected model
The data source is indexed and made searchable
5. Monitor import progress
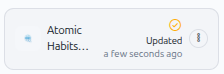
You'll see a progress indicator showing the import status. Once complete, the status changes to green with a success indicator.
6. View your imported webpage
After processing, navigate back to the Knowledge section. Your new data source appears in the list.
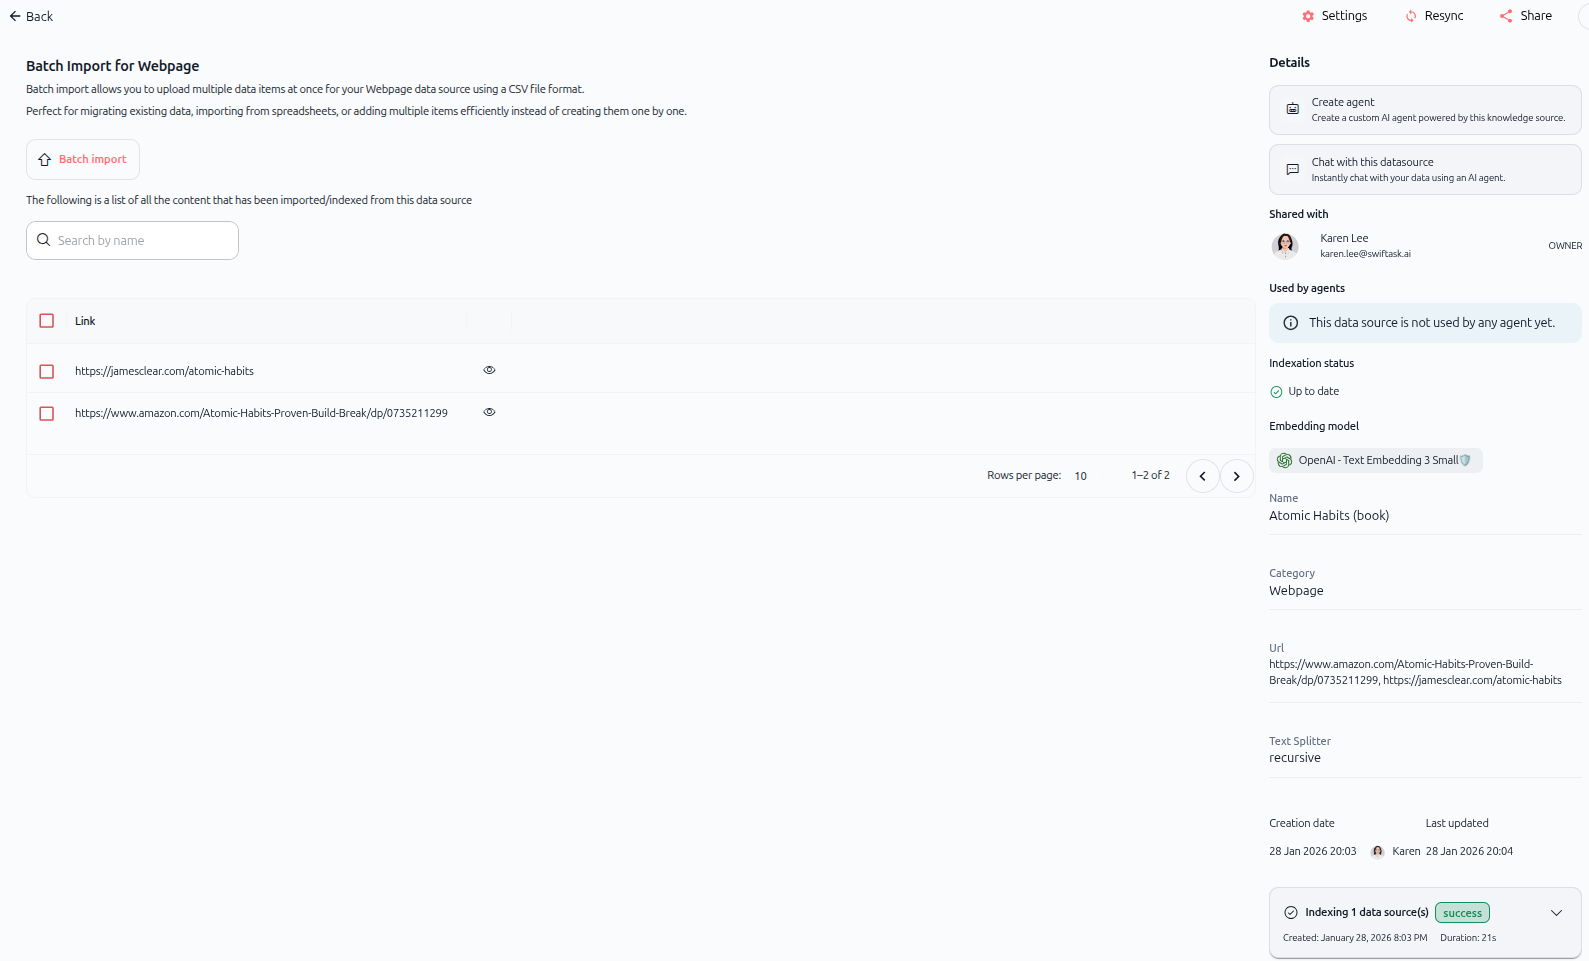
As shown in the image above, the imported data source displays:
Left panel: Content list
A list of all content imported from the webpage(s)
Each URL appears as a separate item
Eye icon for viewing details
Right panel: Details
Create agent – Build a custom AI agent
Chat with this datasource – Query your content instantly
Shared with – Access control information
Used by agents – Shows which agents use this data
Indexation status – Shows "Up to date"
Embedding model – Model used for embedding
Name – Data source name (e.g., "Atomic Habits (book)")
Category – Shows "Webpage"
Url – Displays the source URL(s)
Text Splitter – Splitting method used (e.g., "recursive")
Creation date and Last updated – Timestamps
Indexing status – Progress indicator
Practical use cases
Import product documentation Import your company's product documentation website. Your support agent can reference accurate, up-to-date information when answering customer questions about features, troubleshooting, and specifications.
Import competitor websites Import competitor product pages or marketing content. Your marketing agent can analyze competitor positioning, features, and messaging to inform your strategy.
Import industry news and research Import specific articles or research papers from industry websites. Your research agent can reference the latest trends, data, and insights when generating reports.
Import help center content Import your help center or FAQ pages. Your customer support agent can provide instant, accurate answers based on your official support documentation.
Tips & best practices
Use descriptive names Name your data sources clearly so you can identify them later. Instead of "Website 1," use "Product Documentation 2025" or "Competitor Analysis - CompanyX."
Start with specific pages If you're unsure about importing an entire website, start with webpage import for specific URLs. Test the results, then expand to full website import if needed.
Exclude irrelevant pages Use the "URLs to Exclude" field to skip pages like login screens, shopping carts, or navigation pages that don't contain useful content.
Monitor credit usage Website imports can consume significant credits depending on the number of pages. Check the import cost estimate before confirming.
Update regularly Web content changes frequently. Re-import your data sources periodically to keep your agents' knowledge current. Delete the old data source and create a new import, or use the resync feature if available.
Test your agent after importing After connecting web content to an agent, test it by asking questions that should reference the imported content. Verify that the agent cites accurate information from your web sources.
Troubleshooting
"URL validation failed"
Cause: The URL is invalid, inaccessible, or blocked by the website
Fix: Verify the URL is correct and publicly accessible. Some websites block automated scraping. Try a different URL or contact the website owner.
"No content found"
Cause: The webpage contains no extractable text (e.g., image-only pages, JavaScript-heavy sites)
Fix: Verify the page contains readable text content. Some dynamic websites may not be fully compatible with scraping.
"Import cost too high"
Cause: The website has thousands of pages, resulting in high credit consumption
Fix: Use the "URLs to Exclude" field to skip unnecessary pages, or import specific pages using webpage import instead.
"Agent not finding imported content"
Cause: The data source is not connected to the agent, or indexing is incomplete
Fix: Verify the data source is connected to your agent in the agent's knowledge base settings. Check that indexing status shows "Up to date."
What happens next
Once you've imported your web content, you're ready to:
Create an agent – Build a custom AI agent powered by your web content
Chat with your data – Use the "Chat with this datasource" feature to instantly query your imported content
Share with teammates – Give team members access to your knowledge base
Connect to agents – Link your data source to existing agents to enhance their capabilities
Your web content is now indexed, searchable, and ready to power AI-driven workflows across your workspace.
Additional resources
Knowledge base – Introduction – Learn what knowledge base is and why it matters
Import documents / files – Upload files from your computer
Import from Google Drive – Sync files from cloud storage
Permissions and access – Control who can see and use your knowledge base
Creating an agent – Build an agent and connect it to your knowledge base
Ready to import your first website? Click Knowledge in the sidebar, then Import → Import a website or Import a web page. Enter your URL, configure your settings, and let Swiftask handle the rest.