Record meeting
Written By Stanislas
Last updated 6 months ago
Capture and transcribe your meetings in real-time with AI assistance. Start recording, speak naturally, and get an instant transcript with key insights automatically generated.
Overview
Recording a meeting in Swiftask is simple. Click the “Record Meeting” button, select an AI assistant to help, and start recording. Swiftask captures your audio and transcribes it automatically. You can then ask it to summarize the discussion, extract action items, identify decisions, generate reports, create mind maps, or compile lists.
This is a quick guide to get you started. We'll cover the basics of recording your first meeting.
Prerequisites
To record a meeting, you need:
Swiftask desktop application installed on your computer (we'll cover installation in another section)
A Swiftask account (sign up at swiftask.ai)
A microphone on your computer (built-in or external)
Once you have the desktop app running, you're ready to record.
Step-by-step guide
1. Open the Meetings section
Click Meetings in the left sidebar of Swiftask.
The Meetings interface opens, showing all your recorded meetings, personal recordings, and shared meetings.
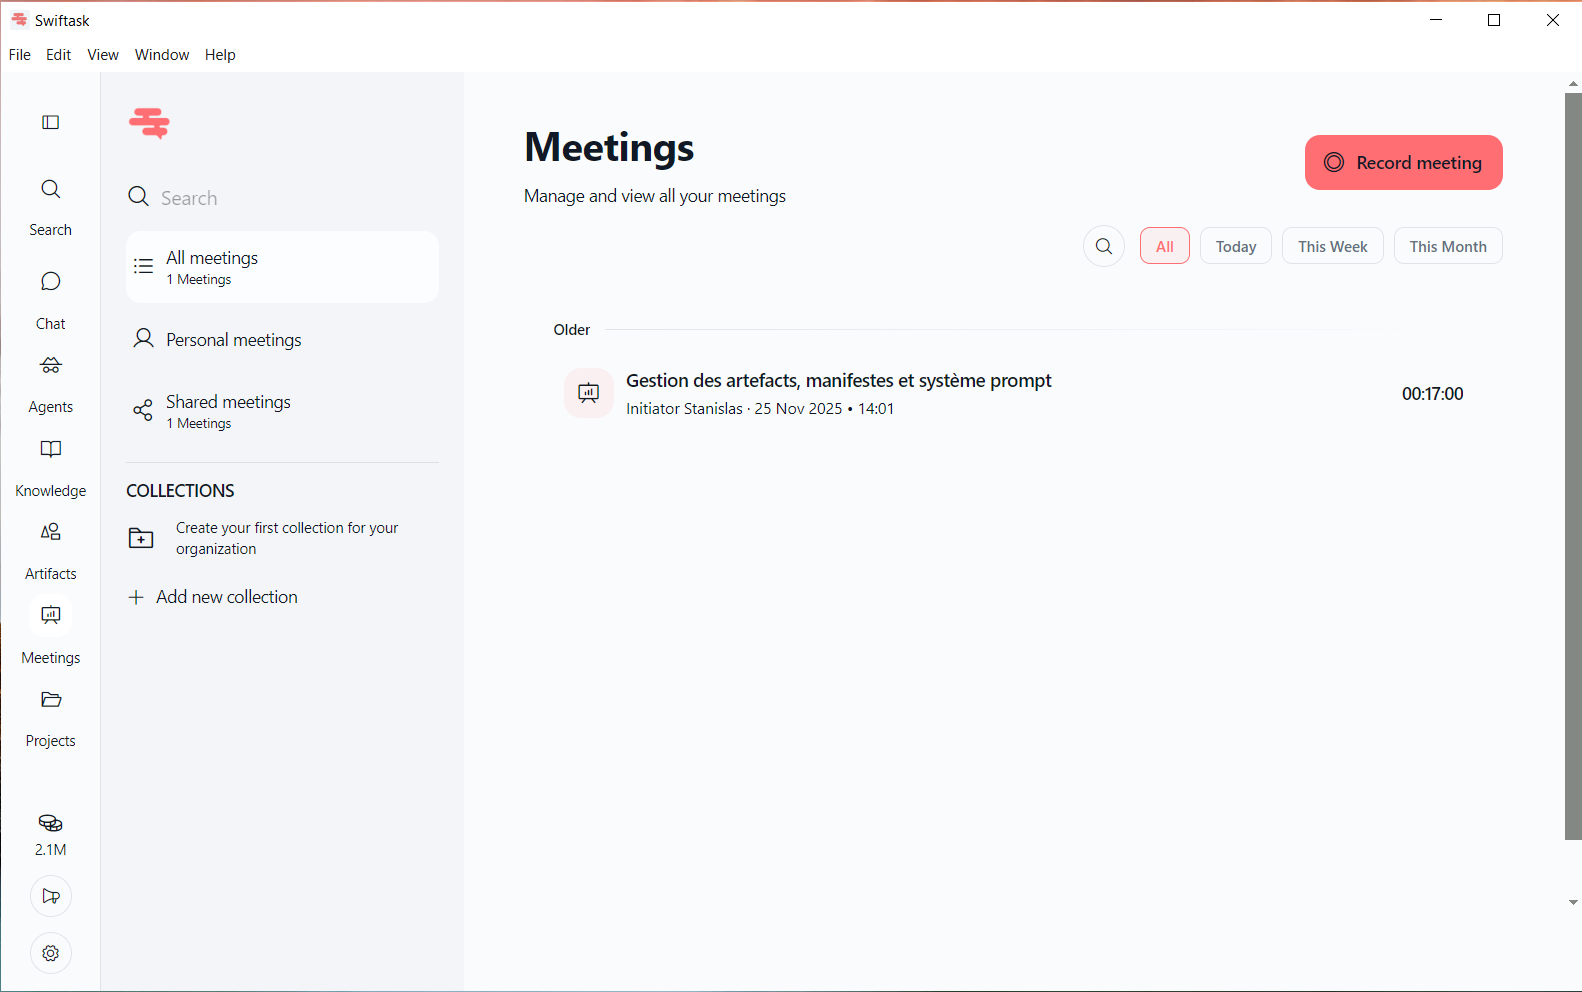
2. Click the "Record meeting" button
In the top right corner, click the red Record meeting button.
A dialog box appears titled "Start your meeting" with options to configure your recording.
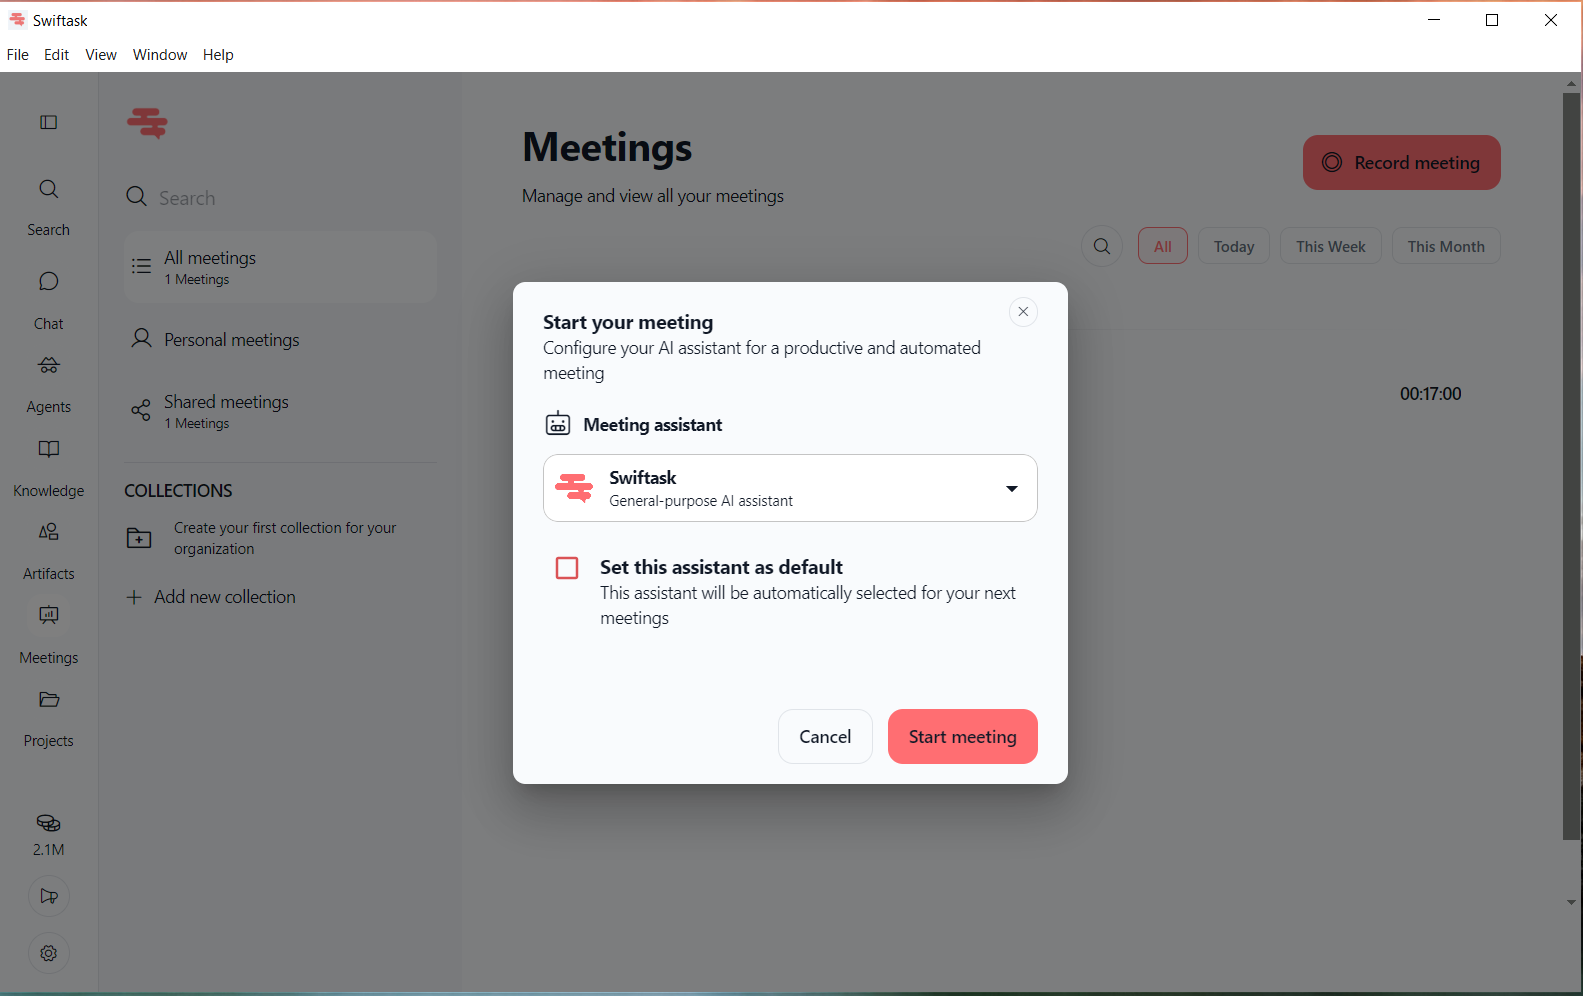
3. Select an AI assistant (optional)
The dialog shows a dropdown menu with AI assistants available to help during your meeting. By default, Swiftask (the general-purpose AI assistant) is selected.
You can:
Keep the default selection and click Start meeting
Click the dropdown to choose a different assistant if available
Check Set this assistant as default if you want this assistant selected automatically for future meetings
4. Click "Start meeting"
Click the red Start meeting button to begin recording.
Your microphone activates, and the recording interface opens. You'll see a timer counting up, a red waveform indicator showing audio input, and a red stop button in the center.
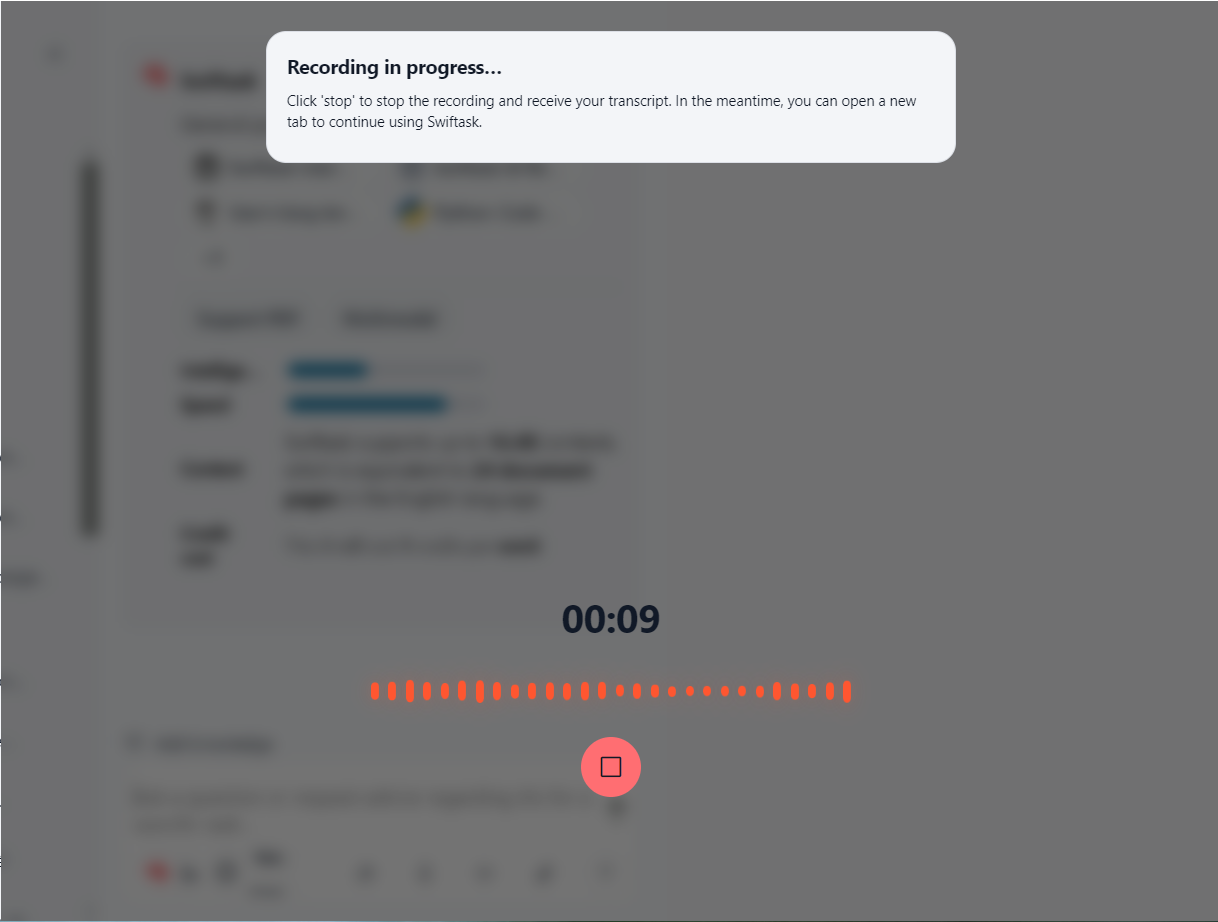
5. Speak naturally
Start your meeting and speak naturally. You don't need to rush—Swiftask captures everything and will transcribe it accurately.
The waveform updates in real-time as you speak, confirming that your audio is being recorded.
6. Stop recording when finished
When your meeting discussion is complete, click the red stop button (square icon) at the bottom of the recording interface.
Swiftask stops recording and begins processing your audio. A message appears: "Recording in progress... Click 'stop' to stop the recording and receive your transcript. In the meantime, you can open a new tab to continue using Swiftask."
7. Wait for transcription
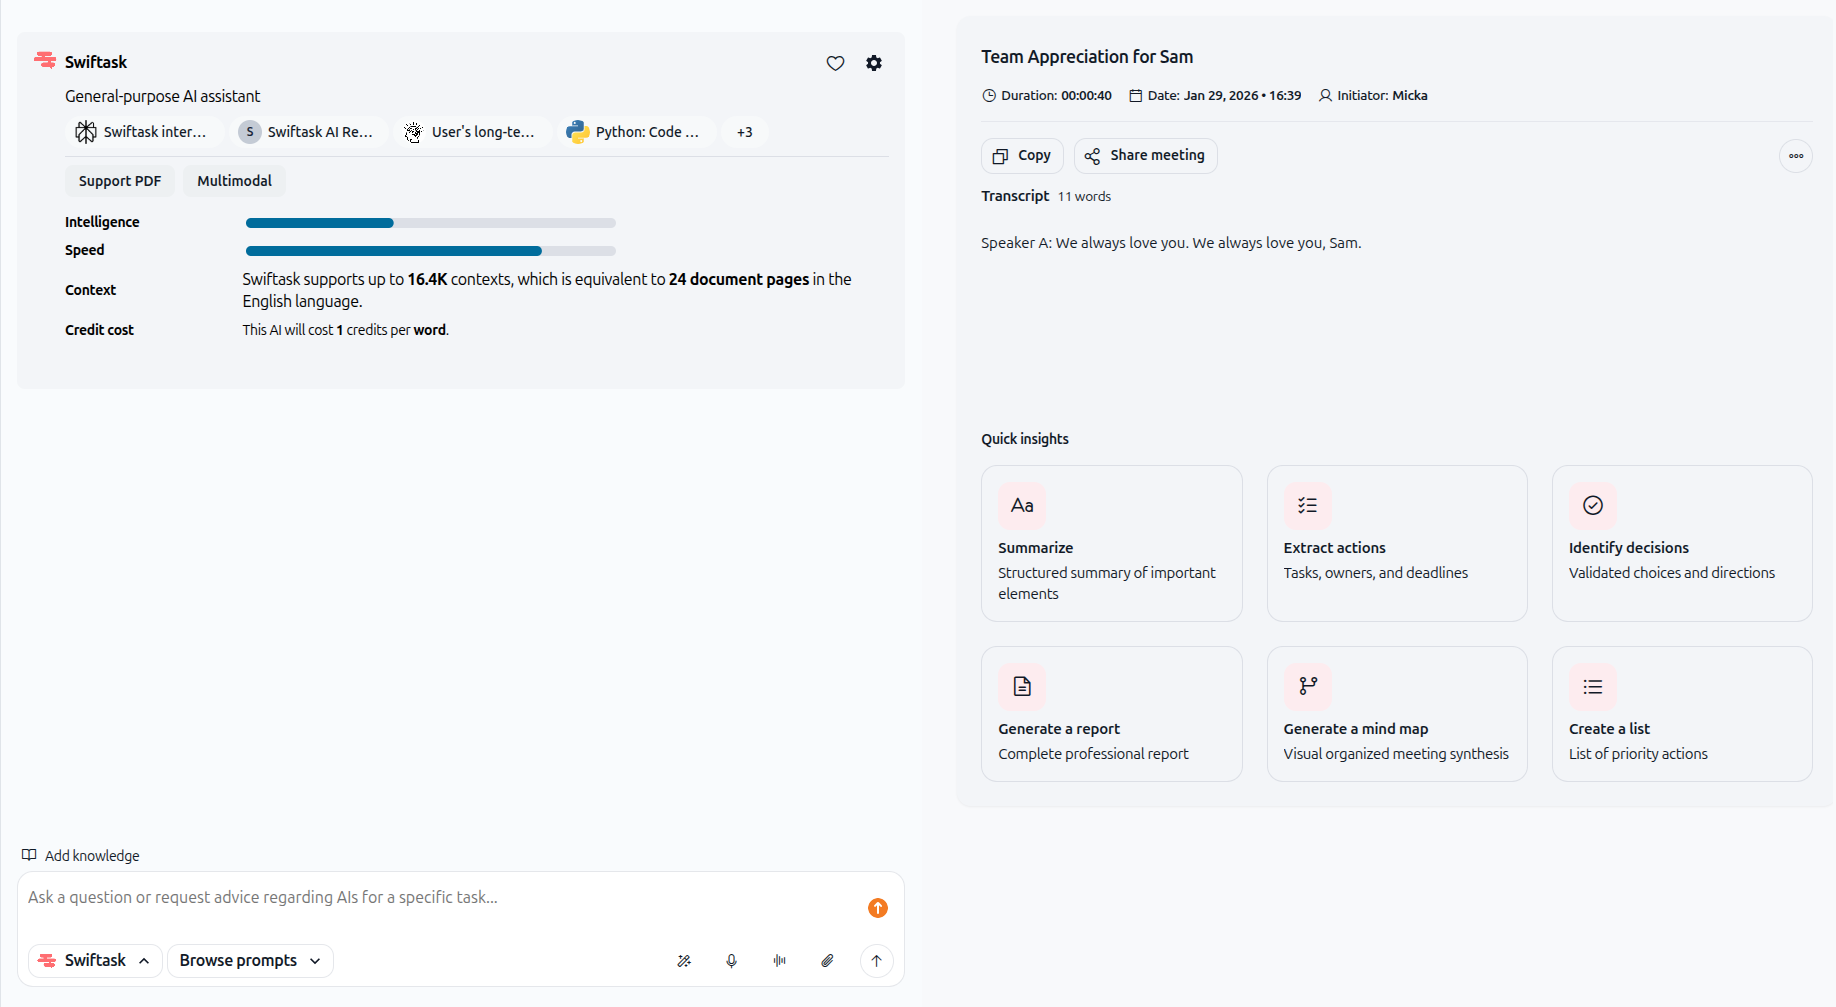
Swiftask transcribes your meeting automatically. Depending on the length of your recording, this usually takes a few moments.
Once complete, your meeting appears in the Meetings list with:
Meeting title (auto-generated or customizable)
Date and time
Duration (e.g., "00:17:00")
Transcript with full text of your meeting
Quick insights including summaries, action items, and key decisions
Practical use cases
Team standup meeting
Record your daily team standup. Swiftask transcribes who said what, captures decisions made, and highlights action items assigned to team members.
Client call
Record a client discussion to capture requirements, feedback, and next steps. Share the transcript with your team or client for reference.
One-on-one meeting
Record a performance review, feedback session, or career discussion. Get an instant transcript to refer back to later.
Project kickoff
Record the project kickoff meeting to document scope, goals, timeline, and responsibilities. Everyone on the team gets a clear record of what was discussed.
What happens next
After your meeting is recorded and transcribed, you can:
View the transcript – Read the full text of your meeting
Review quick insights – See automatically generated summaries, action items, and decisions
Share the meeting – Send the transcript to teammates or stakeholders
Organize in collections – Group meetings by project, client, or category for easy retrieval
Export or download – Save the transcript for your records
For more advanced features like editing transcripts, using recordings in Chat, or managing multiple meetings, see our detailed Meetings documentation.
Ready to record your first meeting? Open Swiftask, go to Meetings, and click "Record meeting" now.