Dashboard
Written By Stanislas
Last updated 16 days ago
Overview
The Workspace dashboard centralizes real-time analytics on your organization's AI operations. It provides clear visibility into credit consumption, active member engagement, and individual agent performance.
Use this dashboard to monitor monthly budget depletion, adjust seat capacity as your team scales, and evaluate which models or agents drive workspace activity.
Prerequisites
Before using the workspace dashboard, verify that you meet the following requirements:
An active Swiftask account with membership in a workspace.
Admin or Owner role to adjust seat capacity and purchase credits (standard members have read-only access filtered by their permissions).
Active usage data in your workspace to populate graphs and tables.
Step-by-step guide
1. Access the workspace dashboard
Open your workspace in Swiftask.
In the left navigation sidebar, click Workspace Information.
The Workspace dashboard page opens with your real-time analytics.
2. Track remaining credits and set analysis period
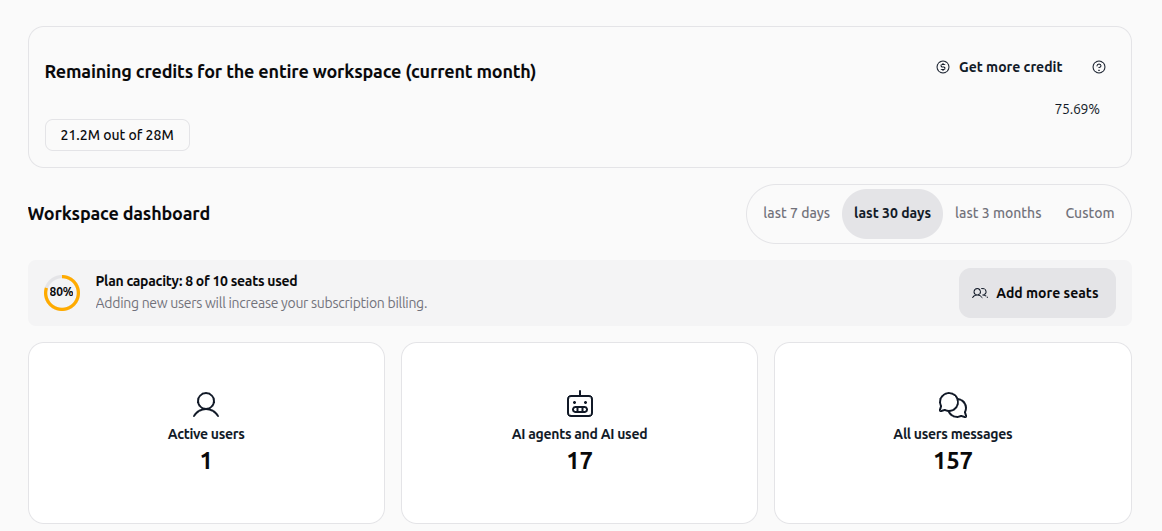
Check the Remaining credits for the entire workspace (current month) card at the top to view your available credit balance and usage percentage.
Click Get more credit if your workspace is running low on credits before the monthly reset.
In the Workspace dashboard header, select your desired timeframe:
last 7 days – For recent short-term activity.
last 30 days – For standard monthly oversight.
last 3 months – For quarterly trend review.
Custom – To pick specific start and end dates.
Review the three summary cards: Active users, AI agents and AI used, and All users messages.
3. Manage seat capacity
Only Admins and Owners can adjust seat capacity.
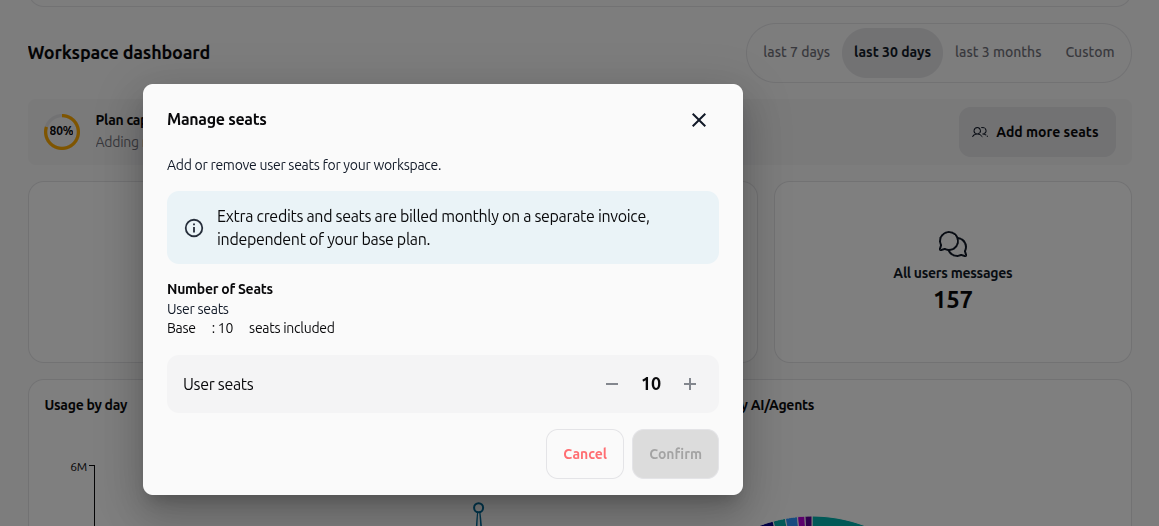
Locate the Plan capacity bar displaying your enrolled users versus total available seats.
Click Add more seats on the right side of the banner.
In the Manage seats modal, review your base included seats.
Use the + or – stepper to set the desired number of user seats.
Review the billing notice stating that extra seats are billed monthly on a separate invoice.
Click Confirm to apply the seat changes immediately, or click Cancel to discard.
4. Analyze daily trends and credit distribution
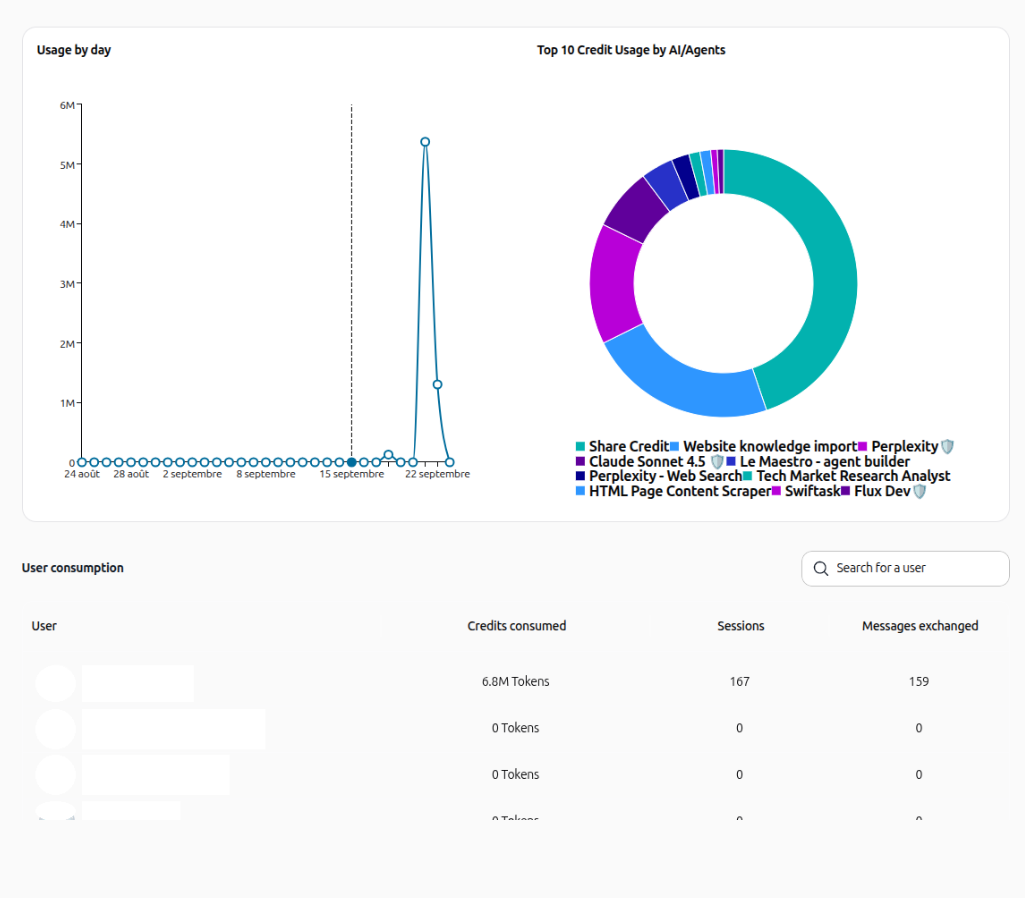
Review the Usage by day chart to detect consumption trends and activity peaks over your chosen timeframe.
Examine the Top 10 Credit Usage by AI/Agents donut chart to see how consumption splits across tools, integrations, and default models.
Scroll down to the User consumption table to monitor team activity:
Type a name or email in the Search for a user field to filter results.
Review each member's Credits consumed, Sessions, and Messages exchanged.
5. Inspect credit usage by LLM model
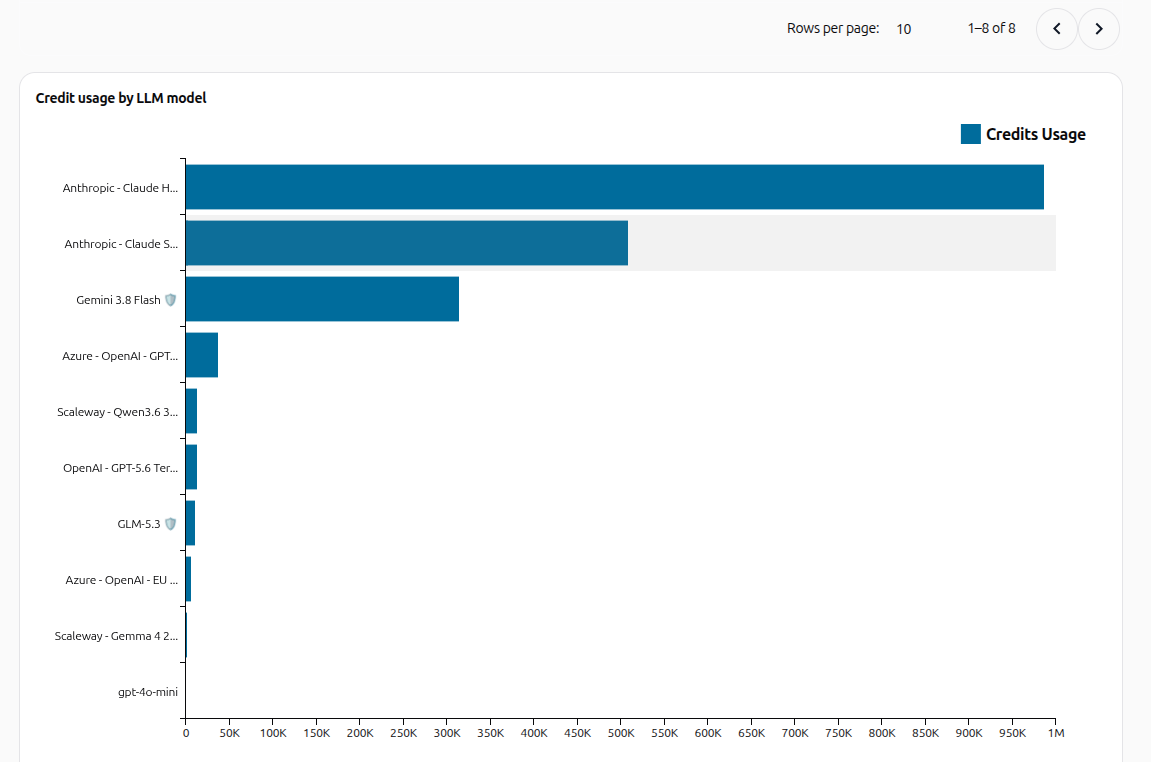
Scroll to the Credit usage by LLM model section.
View the horizontal bar chart showing consumption across foundational and hosted models (such as Anthropic Claude, Gemini, Azure OpenAI, Scaleway, or GLM).
Use the pagination controls at the top right to change Rows per page or navigate through model pages.
6. Review personalized agent analytics
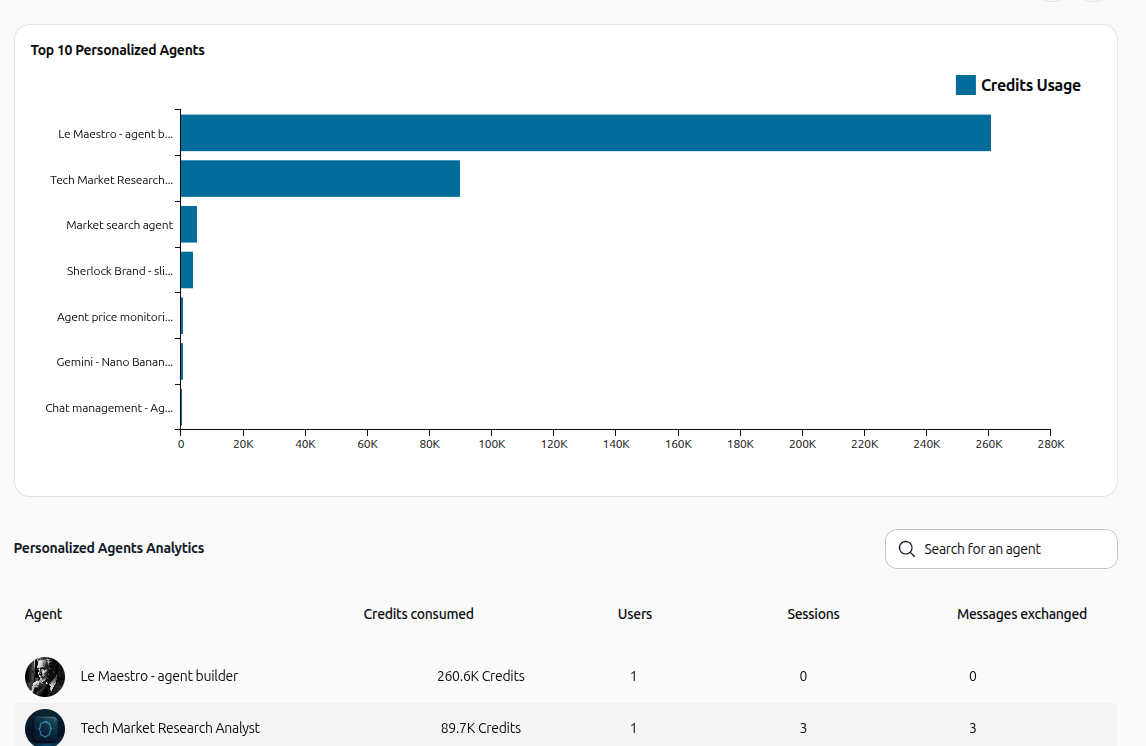
View the Top 10 Personalized Agents horizontal bar chart to identify your most credit-intensive custom agents.
In the Personalized Agents Analytics table below, enter an agent name in the Search for an agent input.
Check detailed metrics per agent:
Agent: Name and icon.
Credits consumed: Total credits billed to the agent.
Users: Number of distinct members interacting with the agent.
Sessions: Total execution sessions initiated.
Messages exchanged: Total interaction count.
Practical use cases
Monitor monthly credit burn rate
At the beginning of each week, check the remaining credits percentage and daily trend chart. If a spike occurs, identify the responsible agent or model to prevent unexpected budget depletion.
Scale user onboarding smoothly
When hiring new team members, check the Plan capacity widget. If capacity reaches 80% or more, click Add more seats to increase available slots before sending workspace invitations.
Identify cost-heavy models
Review the Credit usage by LLM model chart to see whether team members rely heavily on premium models for simple tasks. You can then encourage using faster, cost-efficient models where appropriate.
Audit custom agent adoption
Check the Personalized Agents Analytics table to see which custom agents deliver the highest value in terms of active users and message exchanges, and archive agents that show zero activity.
Tips & best practices
Switch time filters regularly: Compare 7-day and 30-day views to distinguish between temporary usage spikes and steady growth.
Adjust seat count proactively: Extra seats take effect immediately and are billed on a separate monthly invoice.
Search before sorting: Use the real-time search bars in both the user consumption and agent analytics tables to quickly isolate specific team members or agents.
Troubleshooting
Issue: "Add more seats" button is missing or disabled
Cause: You are logged in with a Member or Viewer role that does not have billing permissions.
Fix: Contact your workspace Owner or Administrator to perform seat upgrades or update your role.
Issue: Usage charts show flat lines or zero values
Cause: No AI interactions occurred during the selected date filter range.
Fix: Switch the timeframe filter to "last 30 days" or select a wider custom date range.
Issue: Newly added members do not appear in the consumption table
Cause: The table lists users who have initiated sessions or consumed credits within the selected period.
Fix: Verify that the member has logged in and sent messages, or expand your date filter range.
Was this helpful?
Still need help? Ask the team