July 15th, 2026
Hello,
We wanted to follow up with you regarding the recent incidents and slowdowns you may have experienced on the Swiftask platform.
What happened
After a thorough investigation by our technical teams, we identified that these incidents were caused by infrastructure issues triggered during peak load periods. These peaks are directly tied to the strong increase in platform adoption over the past few weeks, which put pressure on certain components of our architecture: application services, database, and computing resources.
What we've done
As soon as we detected these issues, our teams mobilized to diagnose the root cause and deploy fixes, which went into production last night. These improvements include:
Optimization of the agent engine deployment to prevent interruptions during execution
Increased database resources to better handle read/write load
Expanded server capacity across our infrastructure after coordinating with Scaleway to increase our quotas
What we're continuing to do
We're actively pursuing optimization efforts at multiple levels:
Application level: load management, processing optimization, and implementation of resilience mechanisms
LLM support optimization: improving resilience for Scaleway and other LLM providers
Infrastructure level: auto-scaling, enhanced monitoring, and resource management
Additionally, to ensure long-term platform reliability and performance, we've engaged an external infrastructure specialist to conduct a comprehensive audit of our systems and guide us through implementing improvements across the entire Swiftask platform.
We're committed to delivering a stable and high-performing service, and we'll keep you updated on our progress.
Thank you for your trust and patience.
Best regards,
The Swiftask team
July 7th, 2026
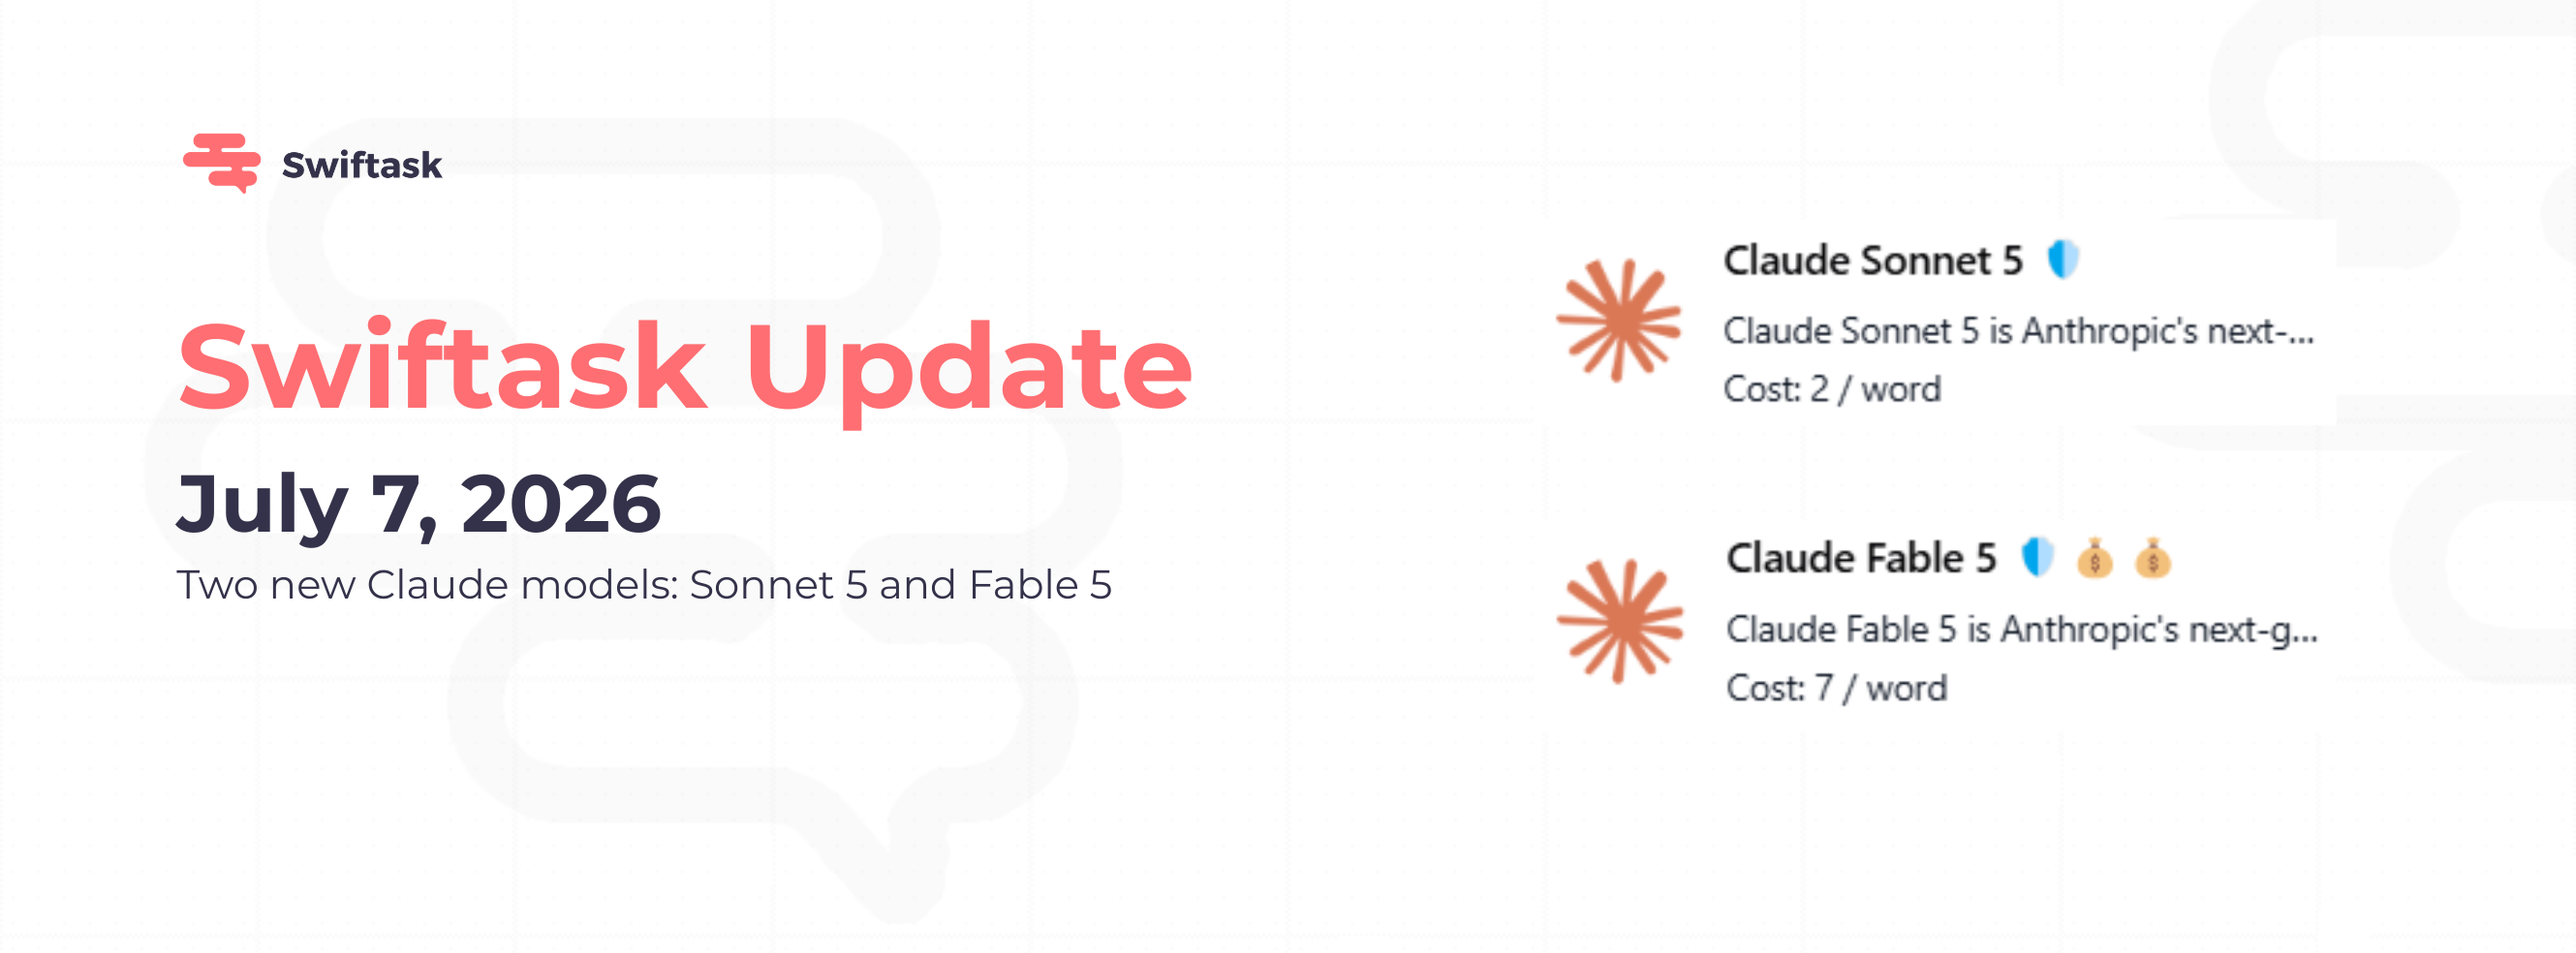
Anthropic just shipped two new Claude models. Both are live in Swiftask right now, on every plan, at no extra cost.
Which one to pick?
Both share the same specs:
992,000 token context window, analyze entire codebases or 500-page documents in one shot
120,000 token output limit, long-form outputs without truncation
Available on Pro, Team Starter, Team Growth, and Custom plans
Why upgrade from Sonnet 4.6 to Sonnet 5?
Sonnet 5 replaces Sonnet 4.6 as the recommended default for most tasks. Same price bracket, stronger reasoning, larger context (992K vs previous limits). If you're using Sonnet 4.6 today, you can freely switch to Sonnet 5 if you want it, that is a one-click win.
Sonnet 4.6 stays available: no forced migration, no breaking changes.

How to switch
In Chat:
Open Chat → click the model selector at the top of the input
Under "Anthropic - Claude", pick Sonnet 5 or Fable 5
Start typing
In Agents:
Open your agent → Agent Configuration → Model selection
Pick the new model → Save
As workspace default: Workspace administration → Settings → Advanced → Default Chat AI → select the model → Update.
How to test in 2 minutes
Sonnet 5: Drop a 50-page PDF and ask: "Extract the 10 most important insights with page references." Compare speed and accuracy vs. your current default.
Fable 5: Give it a complex reasoning task: "Analyze these three business scenarios and recommend the best one with tradeoffs." Compare output depth vs. Sonnet 5.

Our recommendation
Use Sonnet 5 for 80% of your workflows: chat, agents, automations. Reserve Fable 5 for tasks where output quality justifies the cost: legal analysis, strategic planning, technical audits.
Learn more about choosing the right model and credit consumption.
Open Chat now and try Sonnet 5 on your next task.
This thursday, join our webinar on building a fleet of cold-emailing agents to save time on your prospecting.
July 7th, 2026
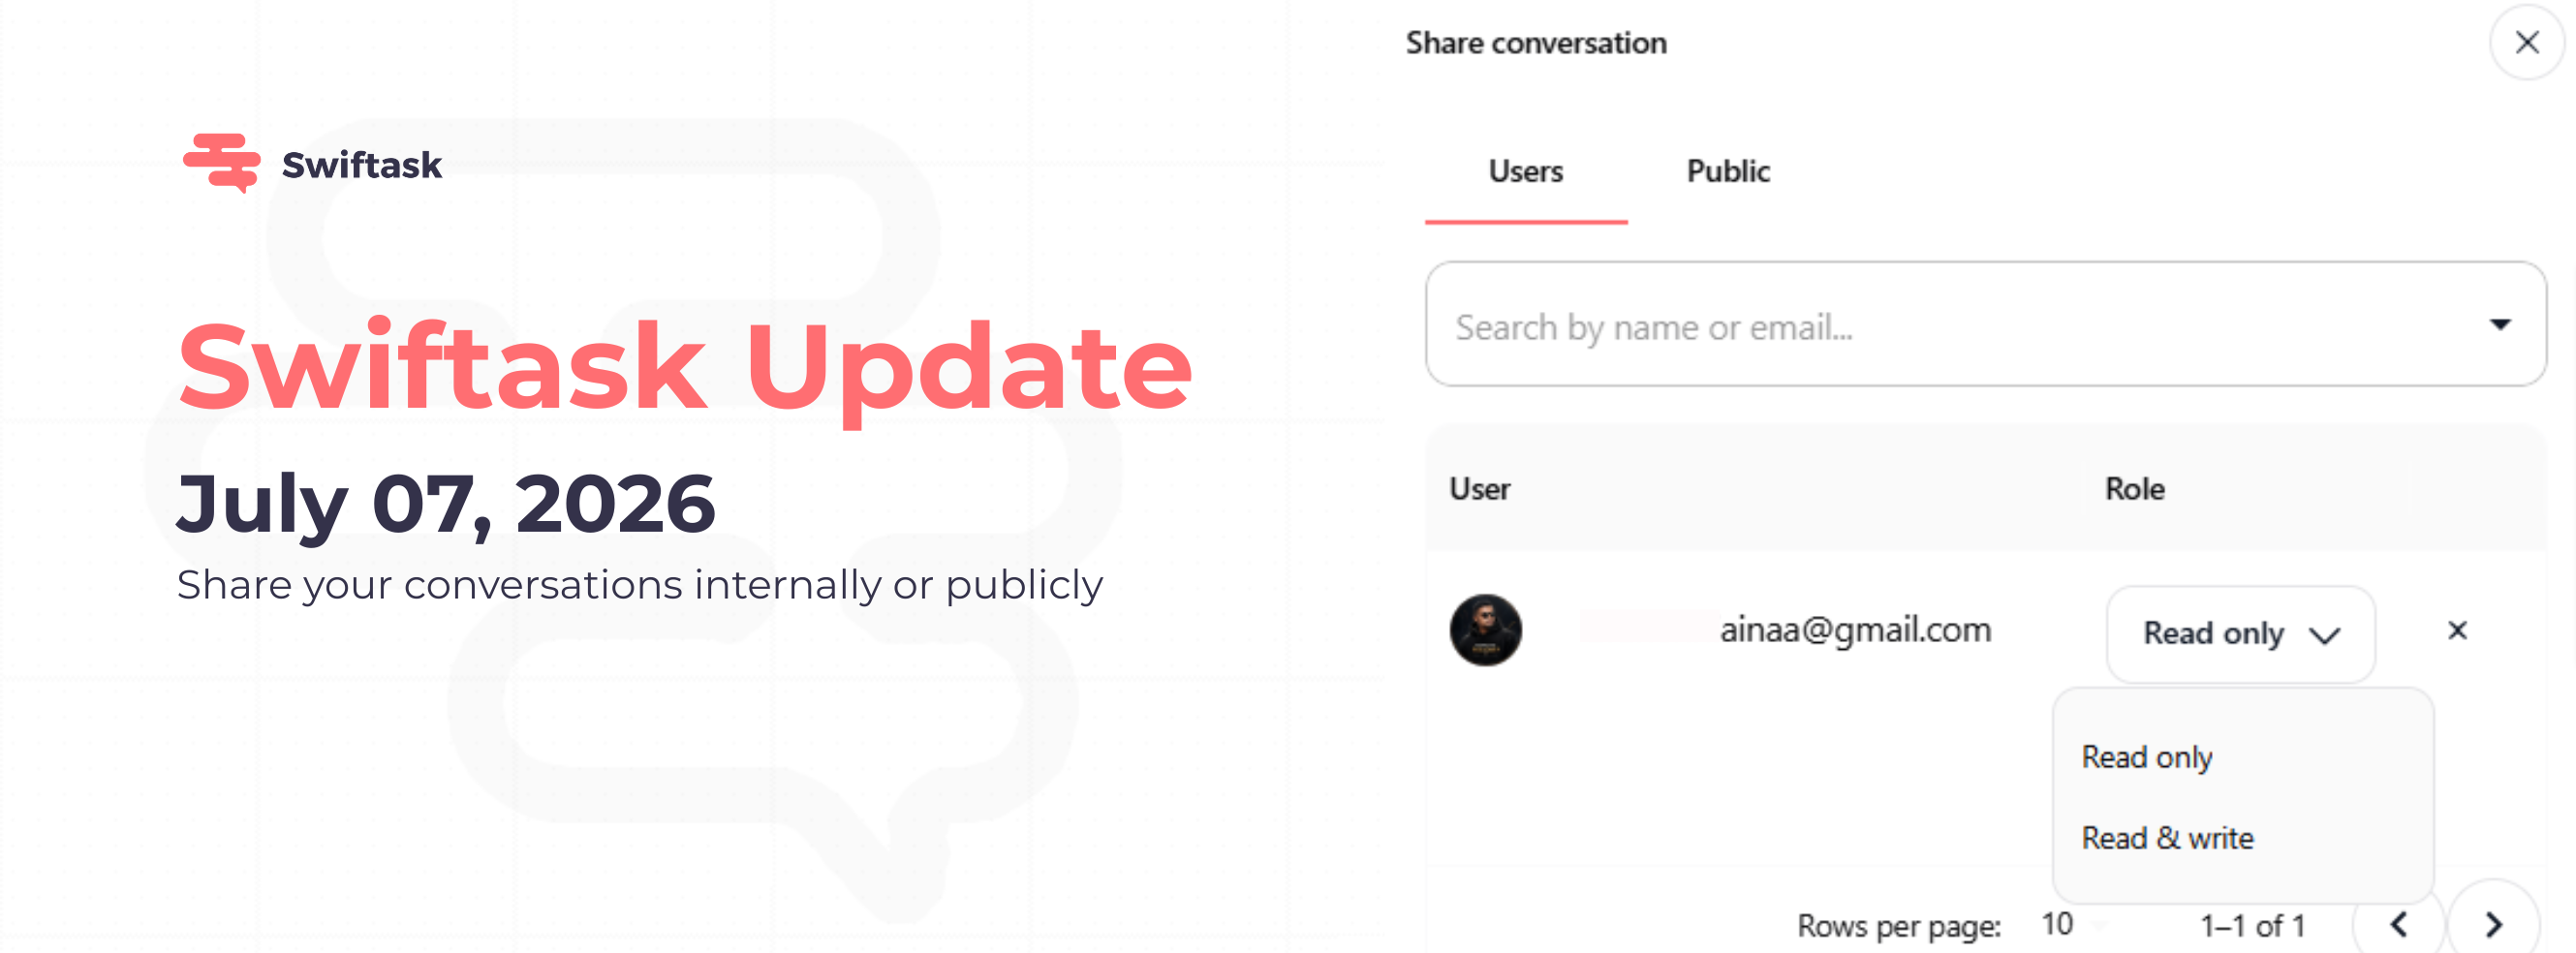
We've made it easier to work together. You can now share any chat session with teammates or with anyone outside your workspace. Whether you need feedback from a colleague or want to show a completed analysis to a client, sharing is one click away.
Share conversations with teammates
Invite colleagues to view or edit any chat session. Each person gets the access they need: view-only to review your work, or read and write to jump in and add their own messages. Find it by clicking the Share button at the top of any conversation.
Two permission levels: "Read only" (view only) or "Read & write" (view, reply, and edit own messages)
Search teammates by name or email
Manage access anytime by reopening the share dialog

Share conversations publicly via link
Need to share a chat with someone outside your workspace? Generate a unique public link anyone can open without logging in. Perfect for sharing analysis results with clients, getting external feedback, or archiving conversations for reference.
Anyone with the link can view the conversation in read-only mode
Public link format:
https://www.app.swiftask.ai/public/chat/[slug]Revoke access anytime by disabling the public link
Recipients see only the conversation thread — no sidebar, no other chats

Find shared conversations easily
A new "Shared chats" collection is now available in your chat session list, located at the bottom of your collections. It groups every conversation shared with you or accessible via public links. No more hunting through your chat history.

How to test it
Open any conversation and click the Share button (top right of the chat header)

In the "Users" tab: search for a colleague and assign "Read only" or "Read & write"
In the "Public" tab: toggle "Anyone with the link" to generate a shareable URL, then copy it
Send the public link to someone outside your workspace, they can open it immediately without signing up
Check your chat session list and go to the "Shared chat" collection at the bottom to see all your shared conversations.
Available on all Swiftask plans. Open any conversation and hit Share to try it.
Tomorrow, join our webinar on building a fleet of cold-emailing agents to save time on your prospecting.
July 1st, 2026
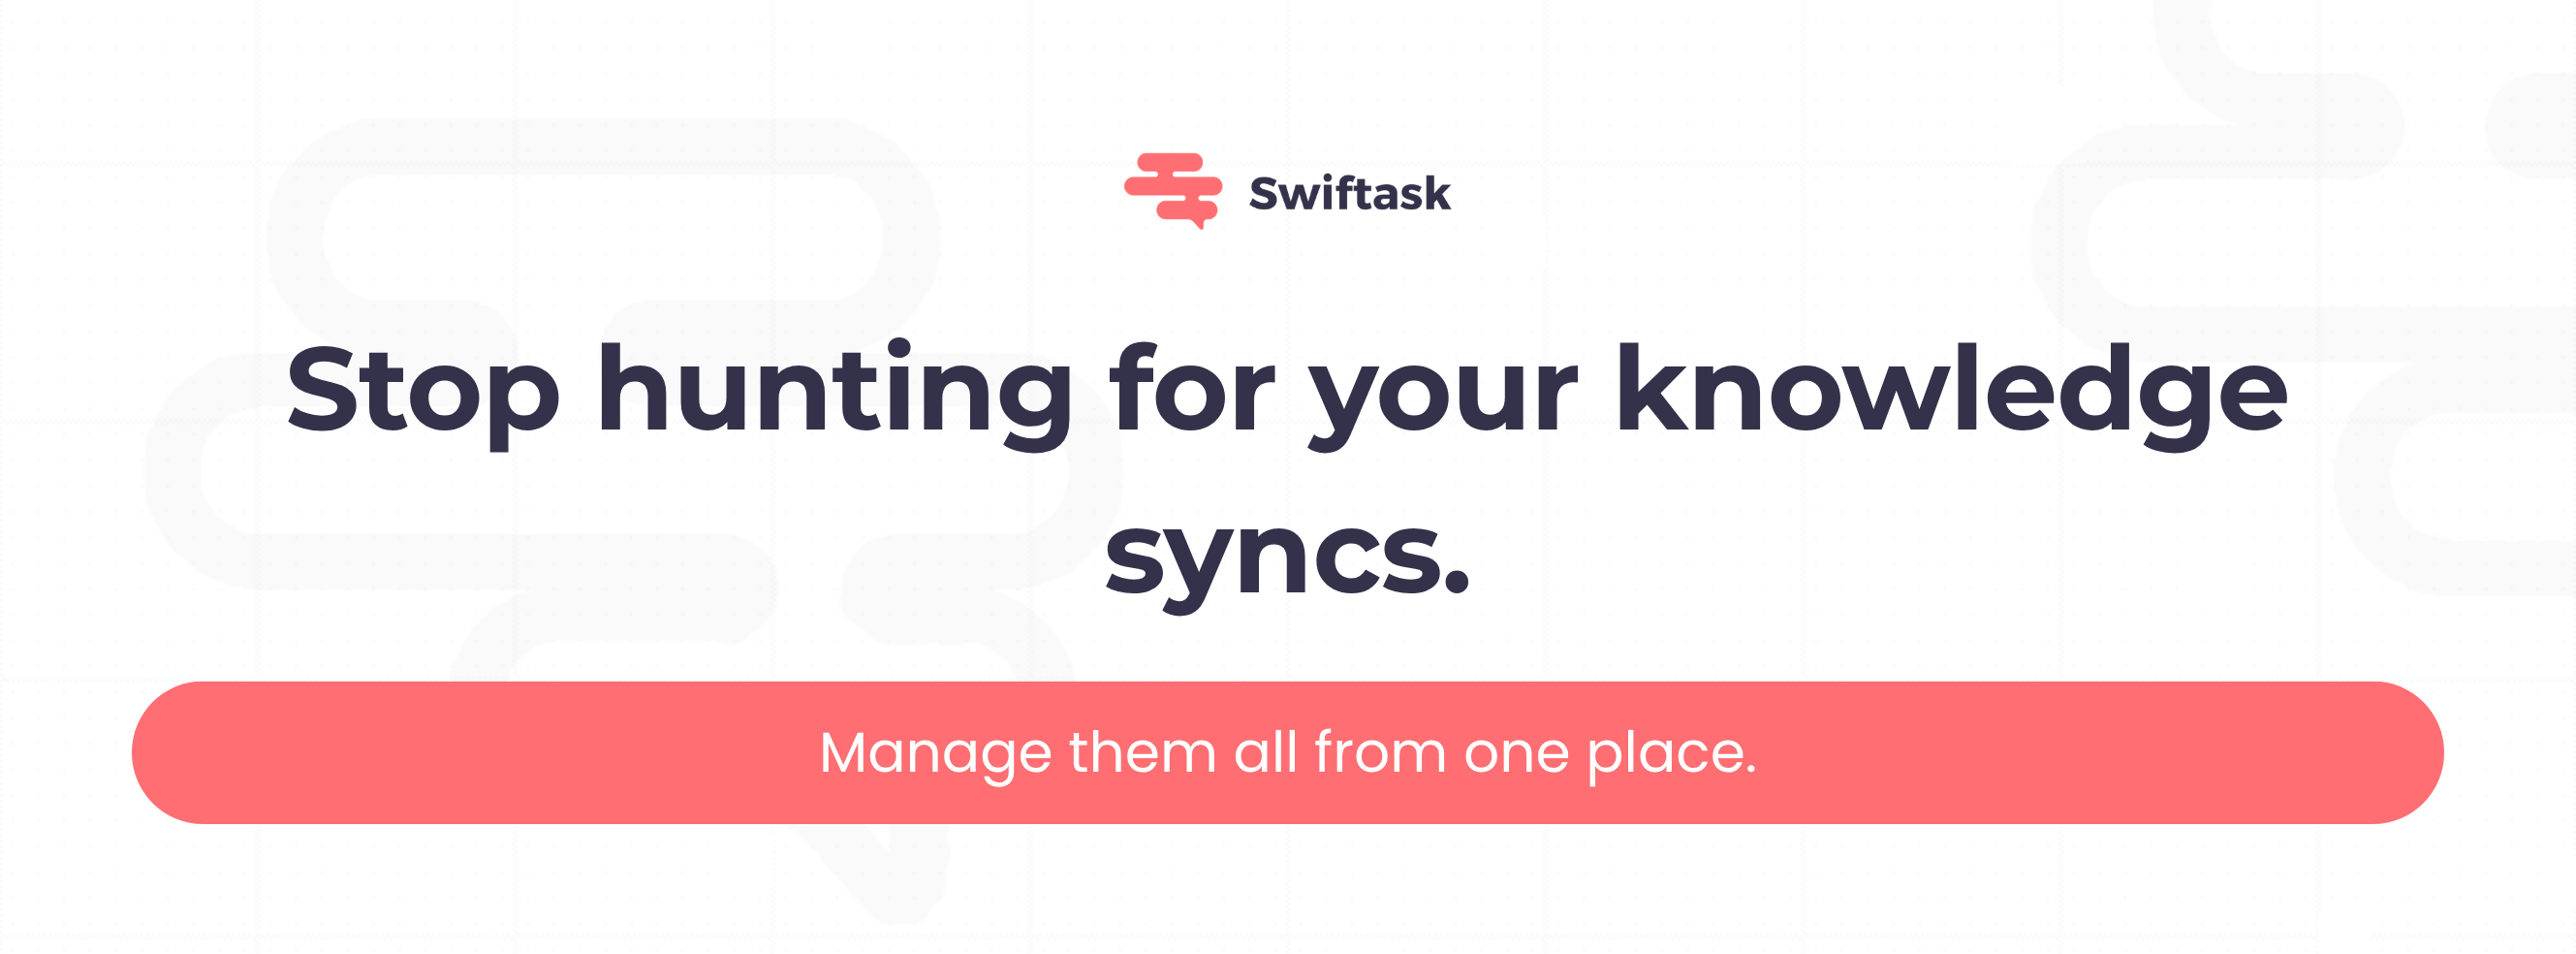
Until now, tracking your automatic knowledge syncs meant opening each source one by one. No overview. No central control. No easy way to know when your next sync would run.
Today, we're fixing that.
✨ New: Knowledge auto sync menu
A dedicated dashboard to view, monitor, and control every automatic sync across your knowledge sources, in one click.
Find it in Knowledge → Auto sync (left sidebar).
What you get:
Full overview of every active sync: source, category, schedule, next run, and status
Real-time status indicators: instantly see what's ACTIVE or PAUSED
One-click actions: pause, resume, or delete any sync without leaving the dashboard
Immediate propagation: changes on your synced sources reflect in your agents right away
Flexible schedules: hourly, daily, weekly, monthly, with custom intervals
Supported sources: Google Drive, SharePoint, Dropbox, websites, and document files
Available on all plans: Pro, Team Starter, Team Growth, and Custom

💡 Why it matters
Your agents are only as good as the knowledge they have access to. When your docs, drives, and pricing pages update, your agents need to know instantly.
The Auto sync menu gives you the control layer that was missing: less time babysitting syncs, more time letting your AI work on fresh data.
🧪 Try it now
Open Knowledge in the left sidebar
Click Auto sync
Review your active syncs and their next scheduled runs
Pause, resume, or delete any sync in one click
One dashboard. Every sync. Full control.
Join our webinar on building a fleet of cold-emailing agents to save time on your prospecting.
July 1st, 2026
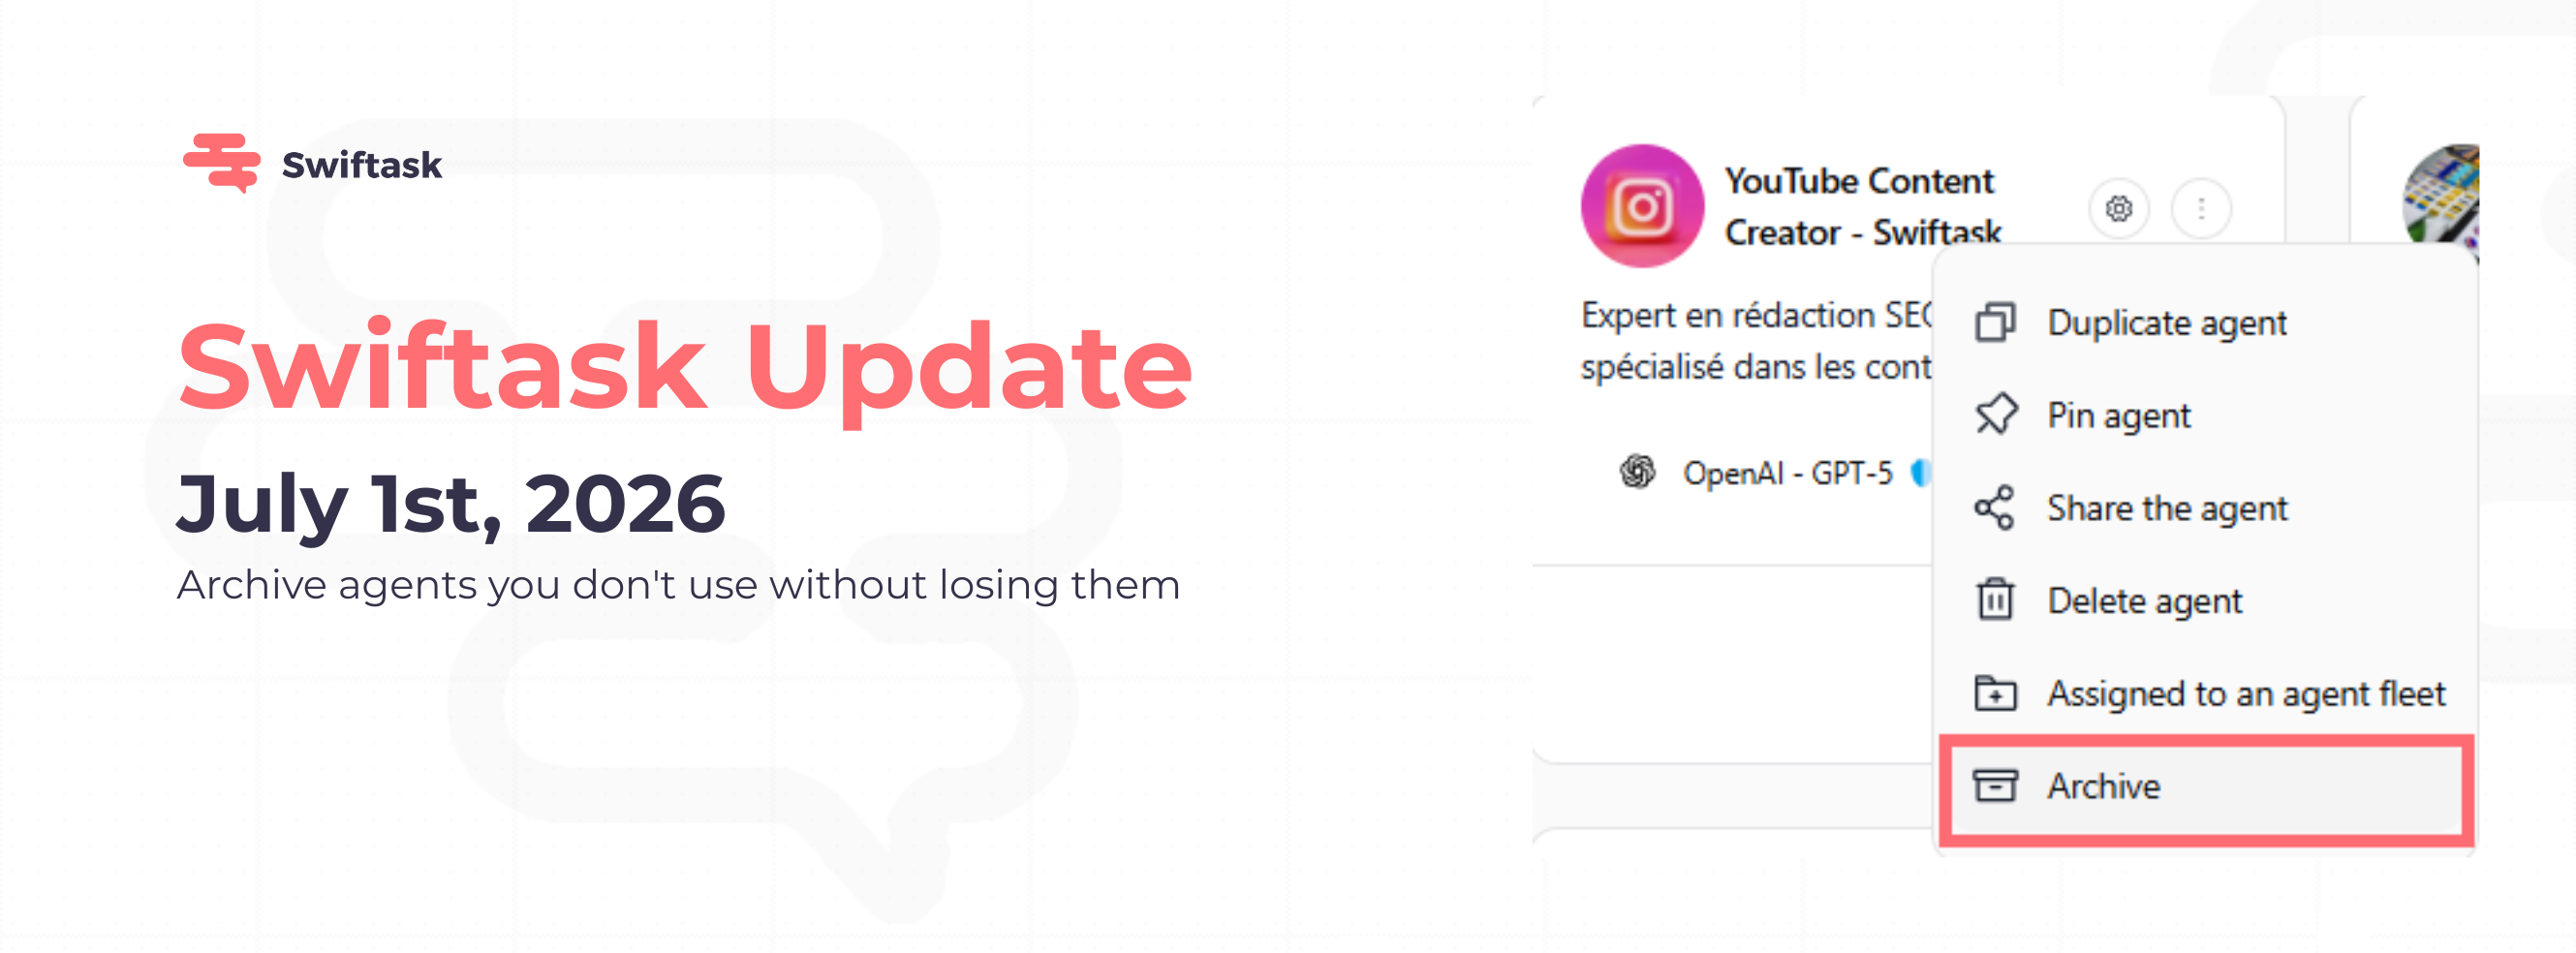
Your agent fleet is growing. Some agents run every day, others only once a quarter, and some you no longer use at all. You can now archive inactive agents to keep your workspace clean, and restore them in one click whenever you need them back.
Archive and restore in seconds
Archive any agent from the three-dot menu (⋮) on the agent card

Access all archived agents in the new "Archived" tab in the Agents sidebar
Restore an archived agent with one click; all its skills, knowledge sources, and settings come back untouched
Delete permanently from the archived view when you're sure you don't need it anymore
Find it: Agents → [Agent card] → ⋮ → Archive Restore it: Agents → Archived tab → ⋮ → Restore

What happens when you archive an agent
The agent disappears from all agent lists and search results, and moves to the Archived tab
Existing conversations remain fully accessible in your chat history, nothing is lost
Automation triggers stop running (scheduled tasks, email triggers, etc.) until the agent is restored
Shared access is paused: users you shared the agent with can no longer access it
When you restore the agent, sharing is automatically re-enabled for all previous users, no need to re-share manually
How to test it
Open Agents in the sidebar
Pick any agent you own
Click the three-dot menu (⋮) → Archive
Confirm the agent is gone from your main agent list
Scroll to the new Archived tab at the bottom of the sidebar
Click ⋮ on the archived agent → Restore
The agent is back in your main list, fully usable, with all sharing restored
Available on: All plans (Pro, Team Starter, Team Growth, Custom)
📖 Learn more about managing agents →
Join our webinar on building a fleet of cold-emailing agents to save time on your prospecting.
July 1st, 2026
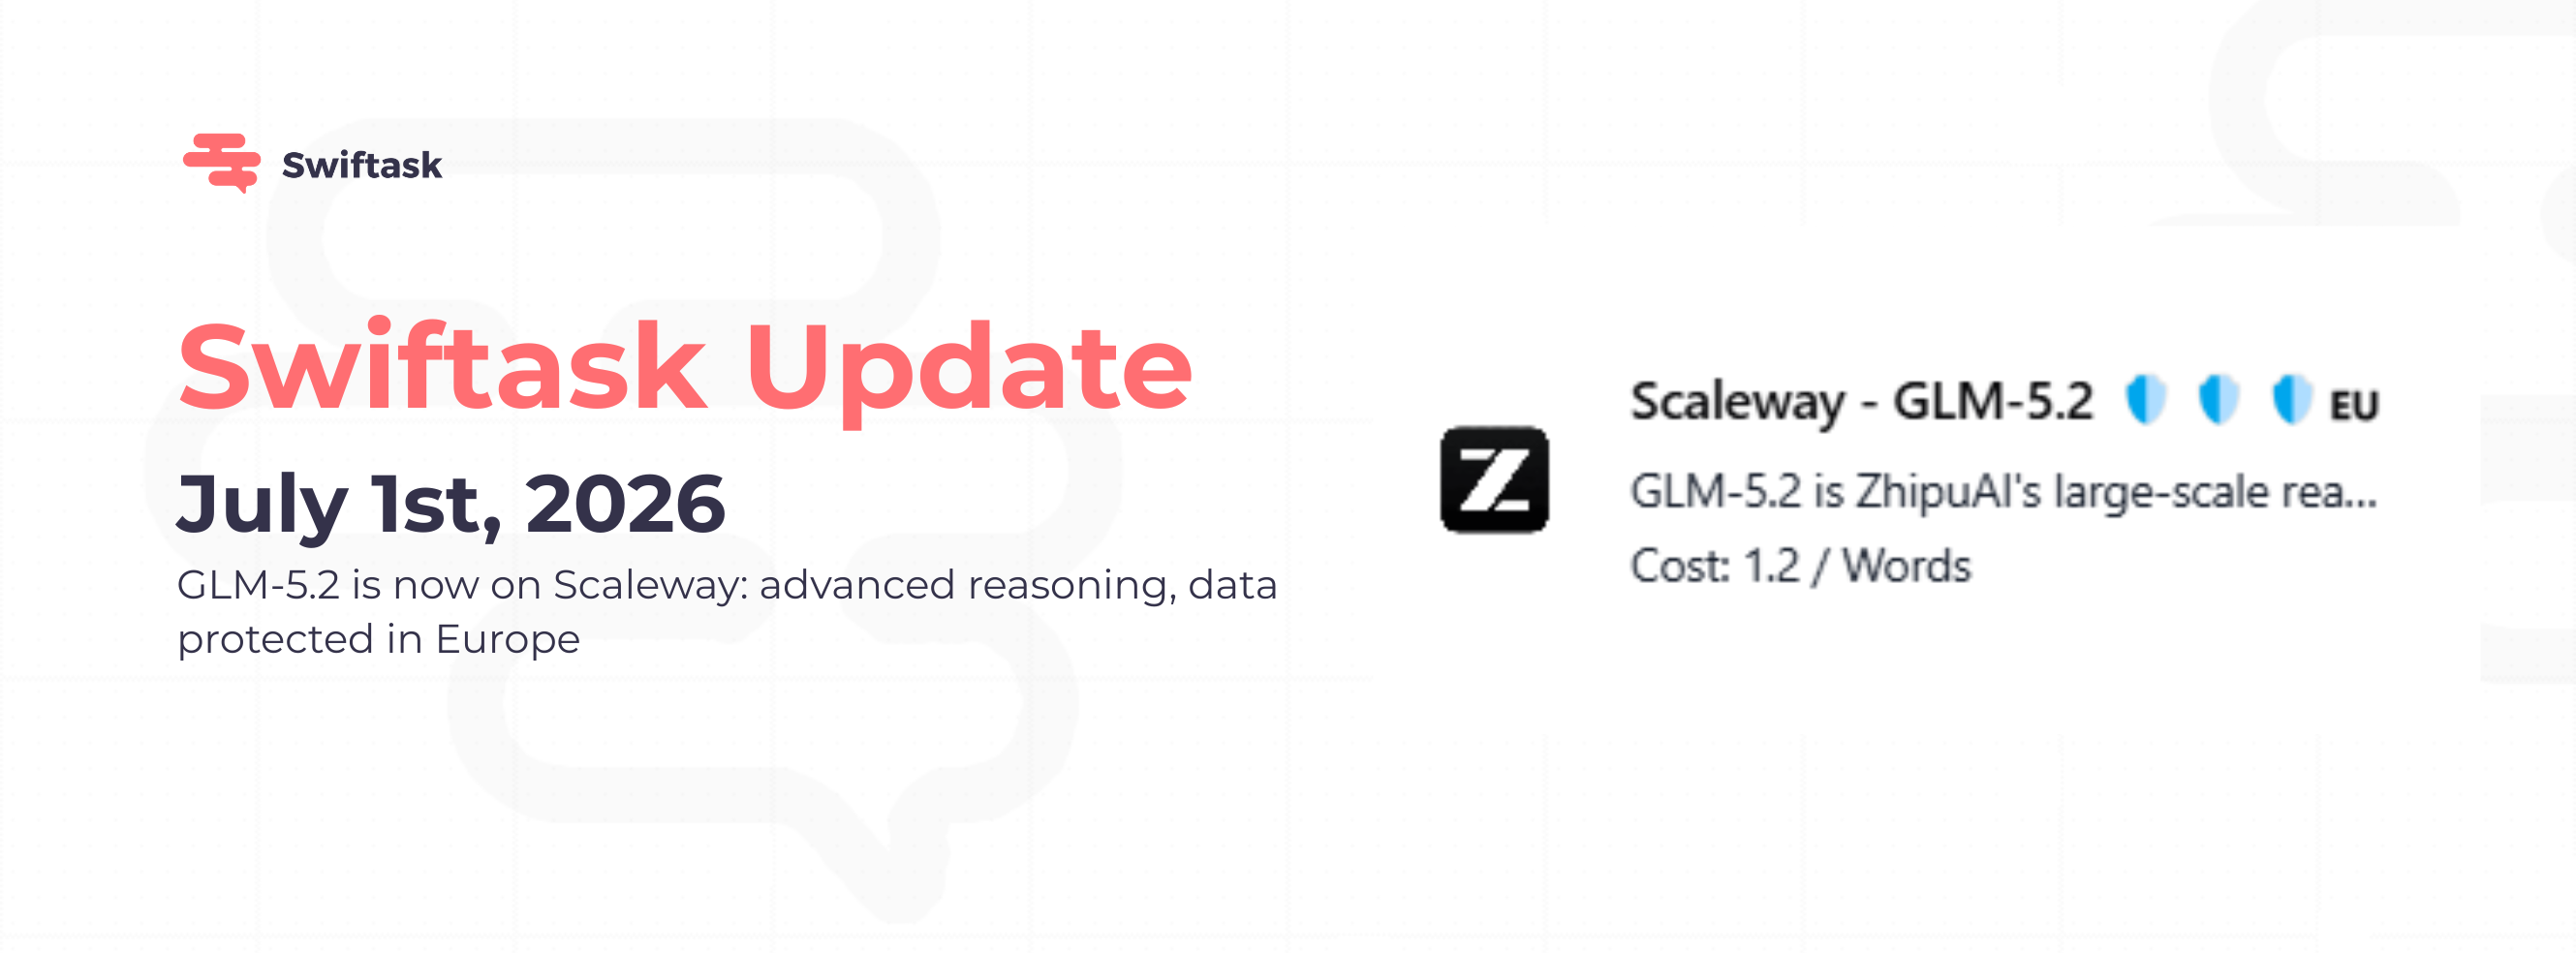
GLM-5.2 was already available on Swiftask. We've now added a second version hosted on Scaleway, so you can use the same reasoning power with your data kept in Europe.
Same model, sovereign hosting
You now have two ways to use GLM-5.2 in Swiftask:
GLM-5.2 (original)
Scaleway - GLM-5.2 (new, hosted in Europe with Shield 3 protection)
Same capabilities, same reasoning quality. The difference is where your data is processed.
Cost: 1.2 per word
Hosting: Scaleway, in Europe
Data protection: Shield 3, your data stays in Europe and is never used to train the model
Availability: All plans, no extra cost
Access: Already visible in the model selector, no configuration needed
When to use the Scaleway version
Pick Scaleway - GLM-5.2 when:
You handle sensitive or regulated data (finance, healthcare, public sector)
You need European data residency for compliance (GDPR, SecNumCloud)
You want to keep your data flow within EU infrastructure
For everything else, the original GLM-5.2 works just as well.
How to use it
In Chat:
Open Chat
Click the model selector at the top left
Choose Scaleway - GLM-5.2
In Agents: Go to Agents → Configuration → Model Selection and assign Scaleway - GLM-5.2 to your agent.

Open Chat, pick Scaleway - GLM-5.2, put it to work on your longest, most complex task, and keep your data in Europe.
Join our webinar on building a fleet of cold-emailing agents to save time on your prospecting.
July 1st, 2026
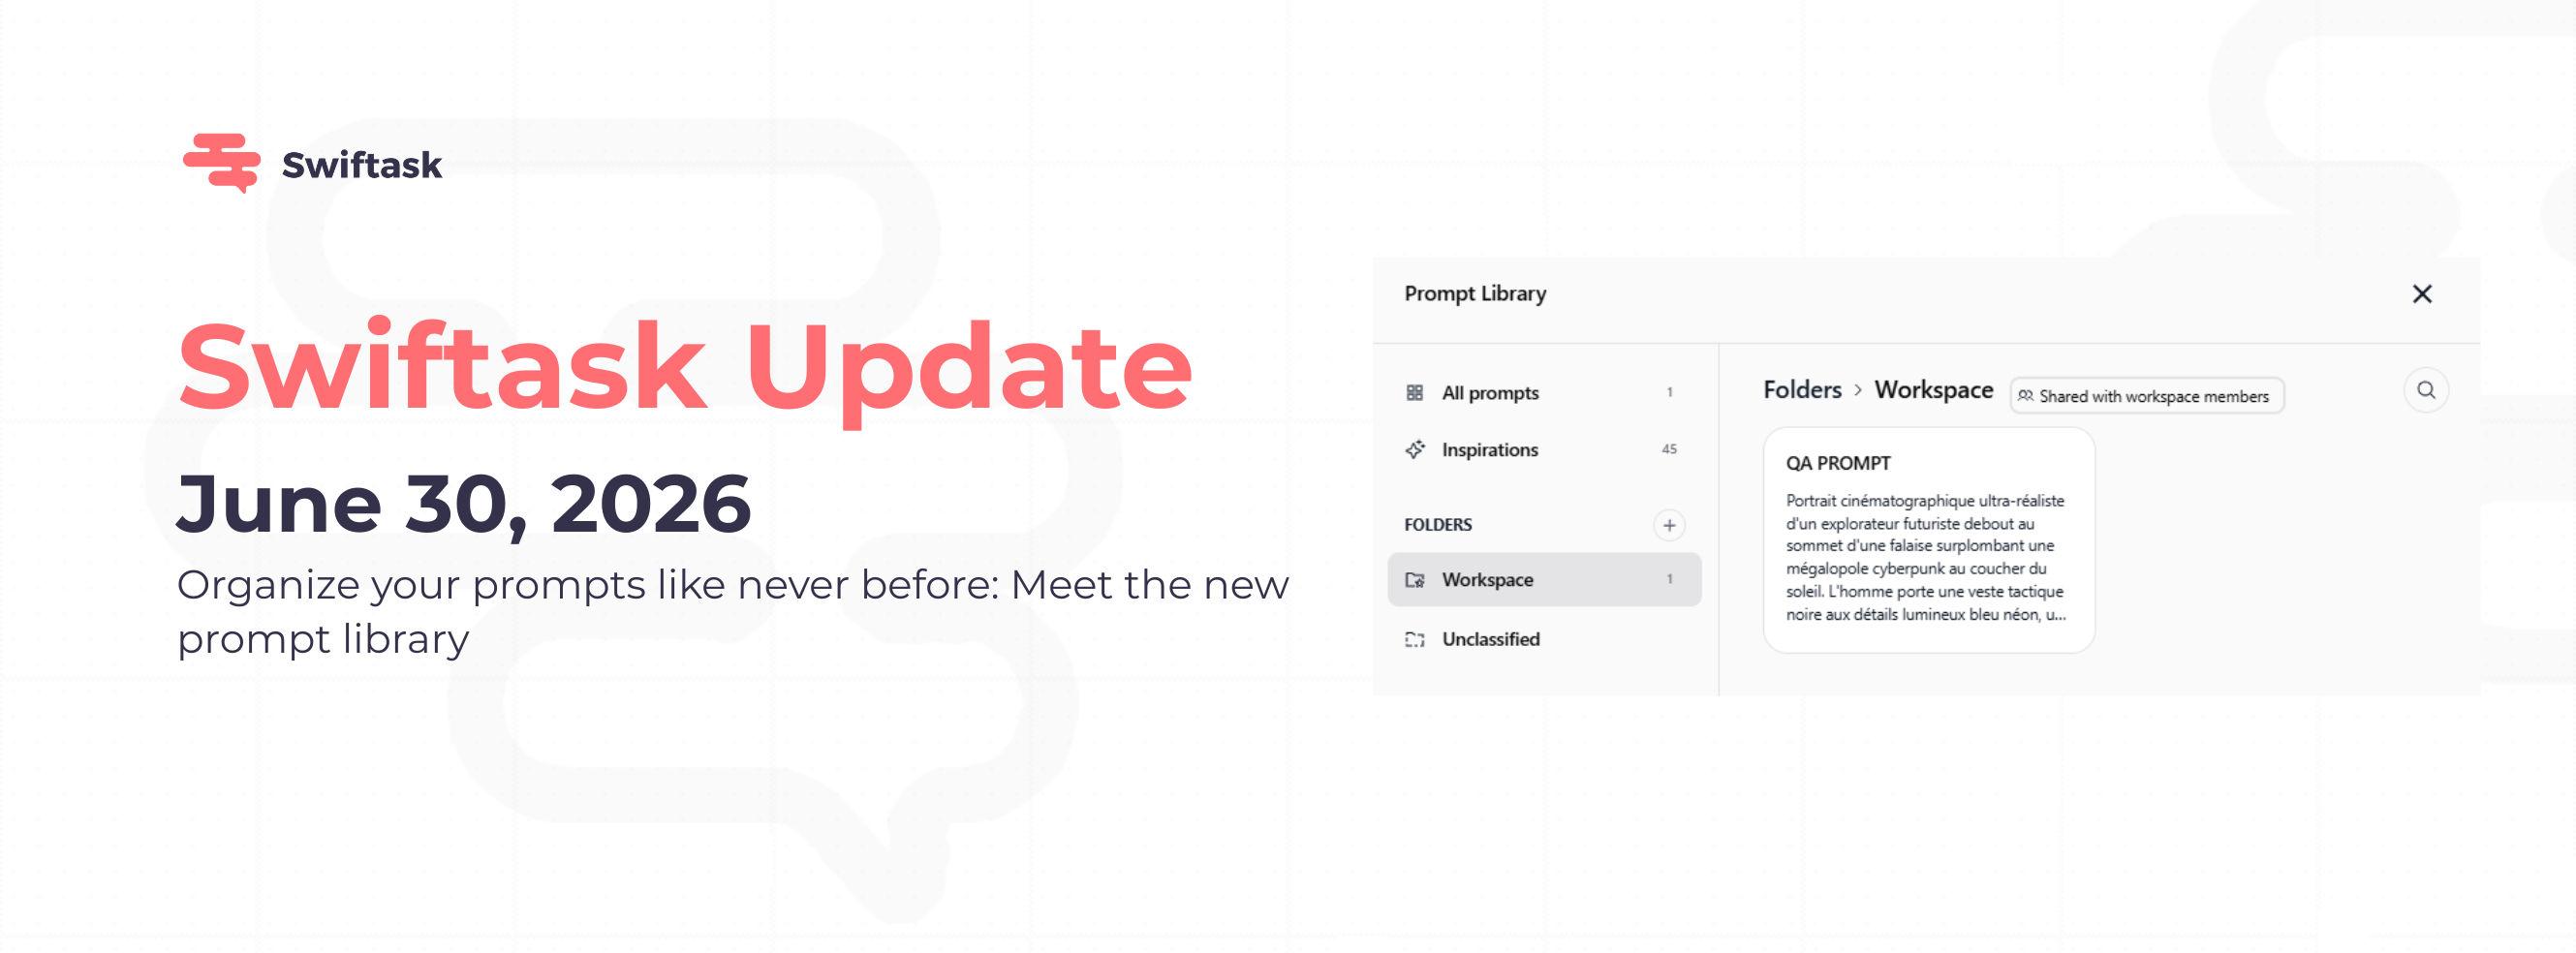
You asked for a better way to manage prompts. It's here. Organize prompts in folders, share them with your team, and insert them into Chat in one click, no more scrolling through a flat list.

Why this matters
Less time searching. Less time copying. Less friction for teams that use prompts every day.
Prompts scattered in a long list slow you down. Sharing them one by one is painful. And copy-pasting into Chat is a waste of clicks. The new Prompt Library fixes all three.
Folders that work like Notion or Google Drive
Group prompts by team, project, or use case. Folders keep your library clean and make prompts easy to find.
Create, rename, and delete folders directly from the library
Move prompts between folders in one action
Workspace folder, shared across your team by default
Inspirations folder, read-only prompts curated by Swiftask
Unclassified section catches prompts not yet sorted

Folder-level sharing with role-based access
Share an entire folder in one action instead of managing prompts one by one. Add users or groups, assign a role, and you're done.
User can use prompts in the folder
Admin can manage prompts and members
Owner: full control, including deletion
Share with individuals or groups; flexible for any team structure

One click to use a prompt in Chat
Click a prompt, hit Use Prompt, and it lands in your Chat input, ready to send. For prompts with dynamic values (#placeholders), fill the fields first, then insert.
No more copy-paste. No more context switching.
UI and performance improvements
Cleaner sidebar with folder badges showing prompt counts
Breadcrumb navigation to always know where you are
Faster search across all your prompts
Smoother folder navigation, even with large libraries
Availability
Available now on all Swiftask plans: Pro, Team Starter, Team Growth, and Custom.
Try it now: open Chat, click Browse prompts, and start organizing.
June 30th, 2026
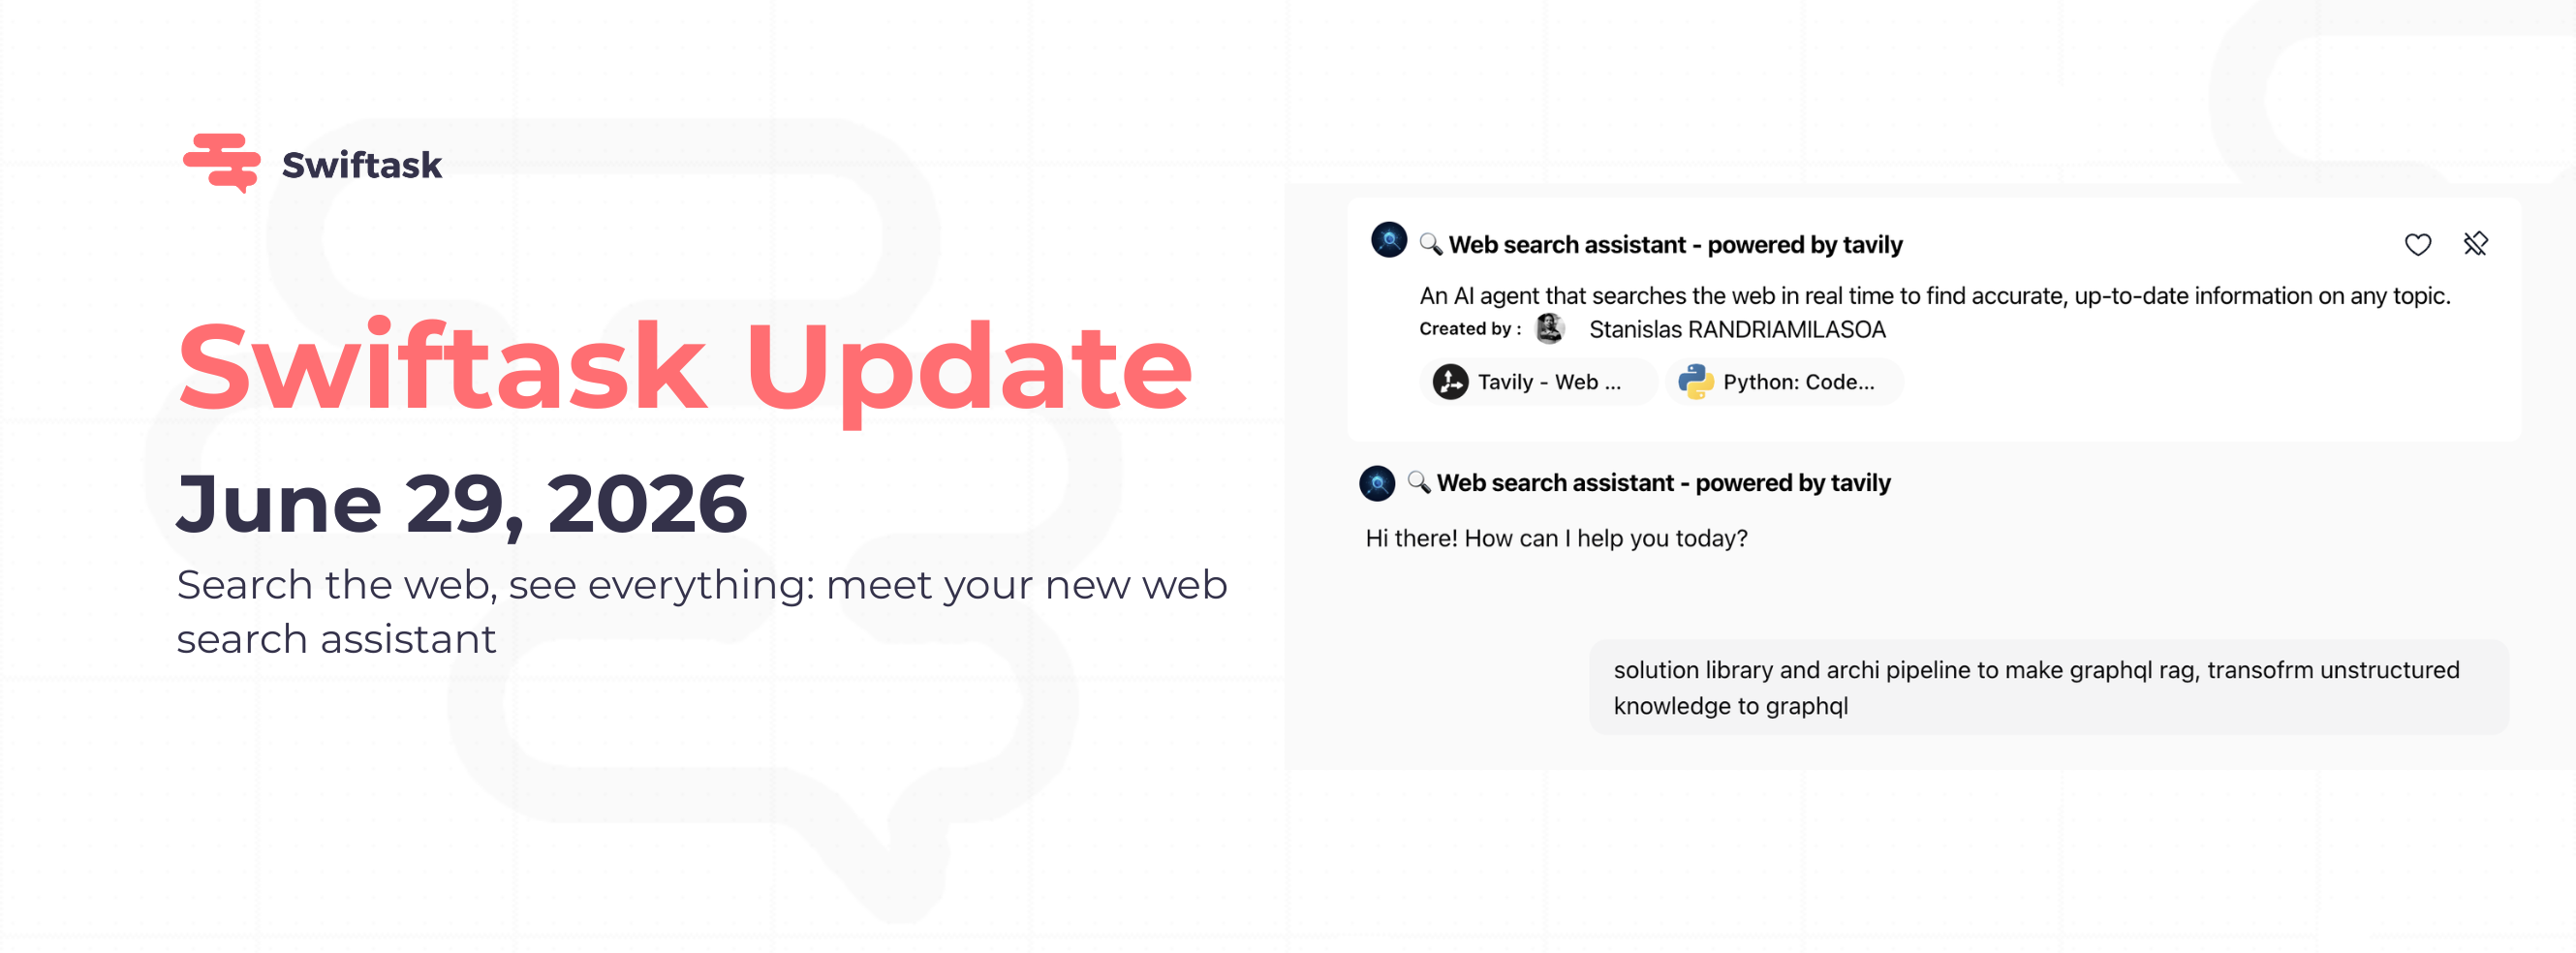
We've added a new search agent that finds information on the web and brings back pictures, links, and clear answers. No more flipping between Swiftask and Google.
Your new web search buddy
Meet your web search assistant. Ask it anything you'd normally Google : "What's the latest news about X?" or "Show me competitor prices" , and it comes back with images, sources you can click on, and summaries that actually make sense.
- Searches the web and shows you images
- Gives you clickable links to where it found things

- Includes snippets so you see the context
- Works right in Chat with your other agents
- Available for everyone, no extra setup needed
How to use it:
1. Open Chat
2. Click on the agent selector at the bottom left
3. Pick "Web Search Assistant"
4. Ask your question
5. Get back results with pictures and sources
Try it out:
Ask something like: "What are people saying about [topic]?" or "Find me info about [company]" and you'll see results with images and clickable sources.

It's that simple. Better research, no tab switching. 🔍
Join our webinar on building a fleet of cold-emailing agents to save time on your prospecting.
June 25th, 2026
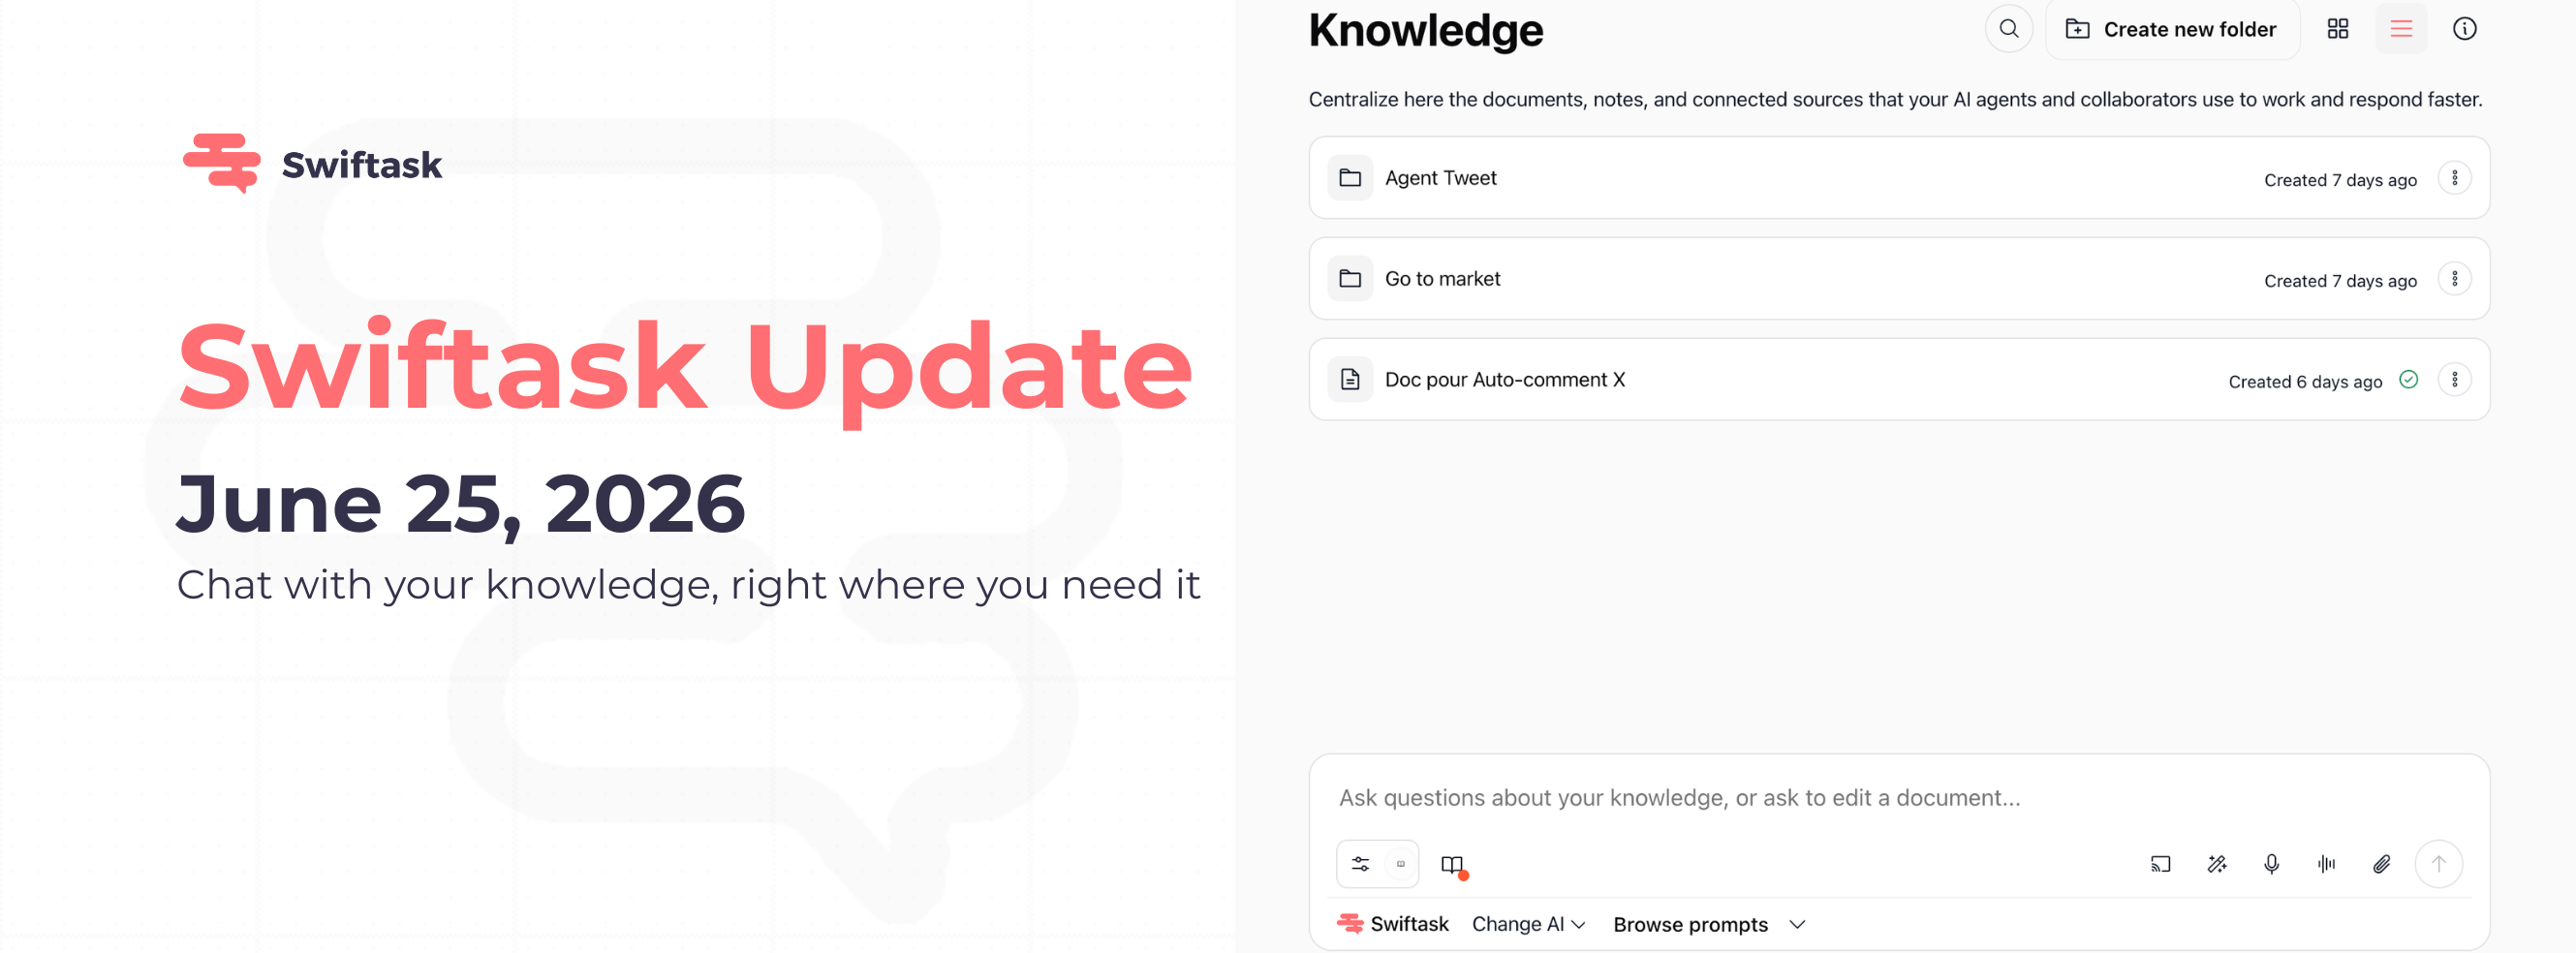
We're excited to introduce Chat directly in your Knowledge base. No more switching between screens, no more context loss. Ask questions about your documents, request edits, and work with AI all in one place.
Chat in Knowledge: Ask and edit your documents instantly
You can now chat with AI directly within your Knowledge interface. Whether you're exploring documents or building your knowledge base, the chat input is always visible at the bottom of the screen, ready for your questions and requests.
Ask questions about any document in your Knowledge base
Request edits or modifications to your documents
Select specific documents to focus your questions
Switch between AI models with the "Change AI" dropdown
Works seamlessly across all your documents without limitations
Available on all plans: Pro, Team Starter, Team Growth, and Custom
How to test it: Open Knowledge → Select or browse your documents → Use the chat input field at the bottom ("Ask questions about your knowledge, or ask to edit a document...") → Type your question or edit request → Choose your preferred AI Agent from the "Change AI" dropdown → Press Enter to get instant responses about your documents.
Where to find it: Knowledge → Bottom of the interface (always visible when viewing documents)
That's it! Your team can now work with documents and AI in one unified space, eliminating the friction of switching between Knowledge and Chat.
June 24th, 2026
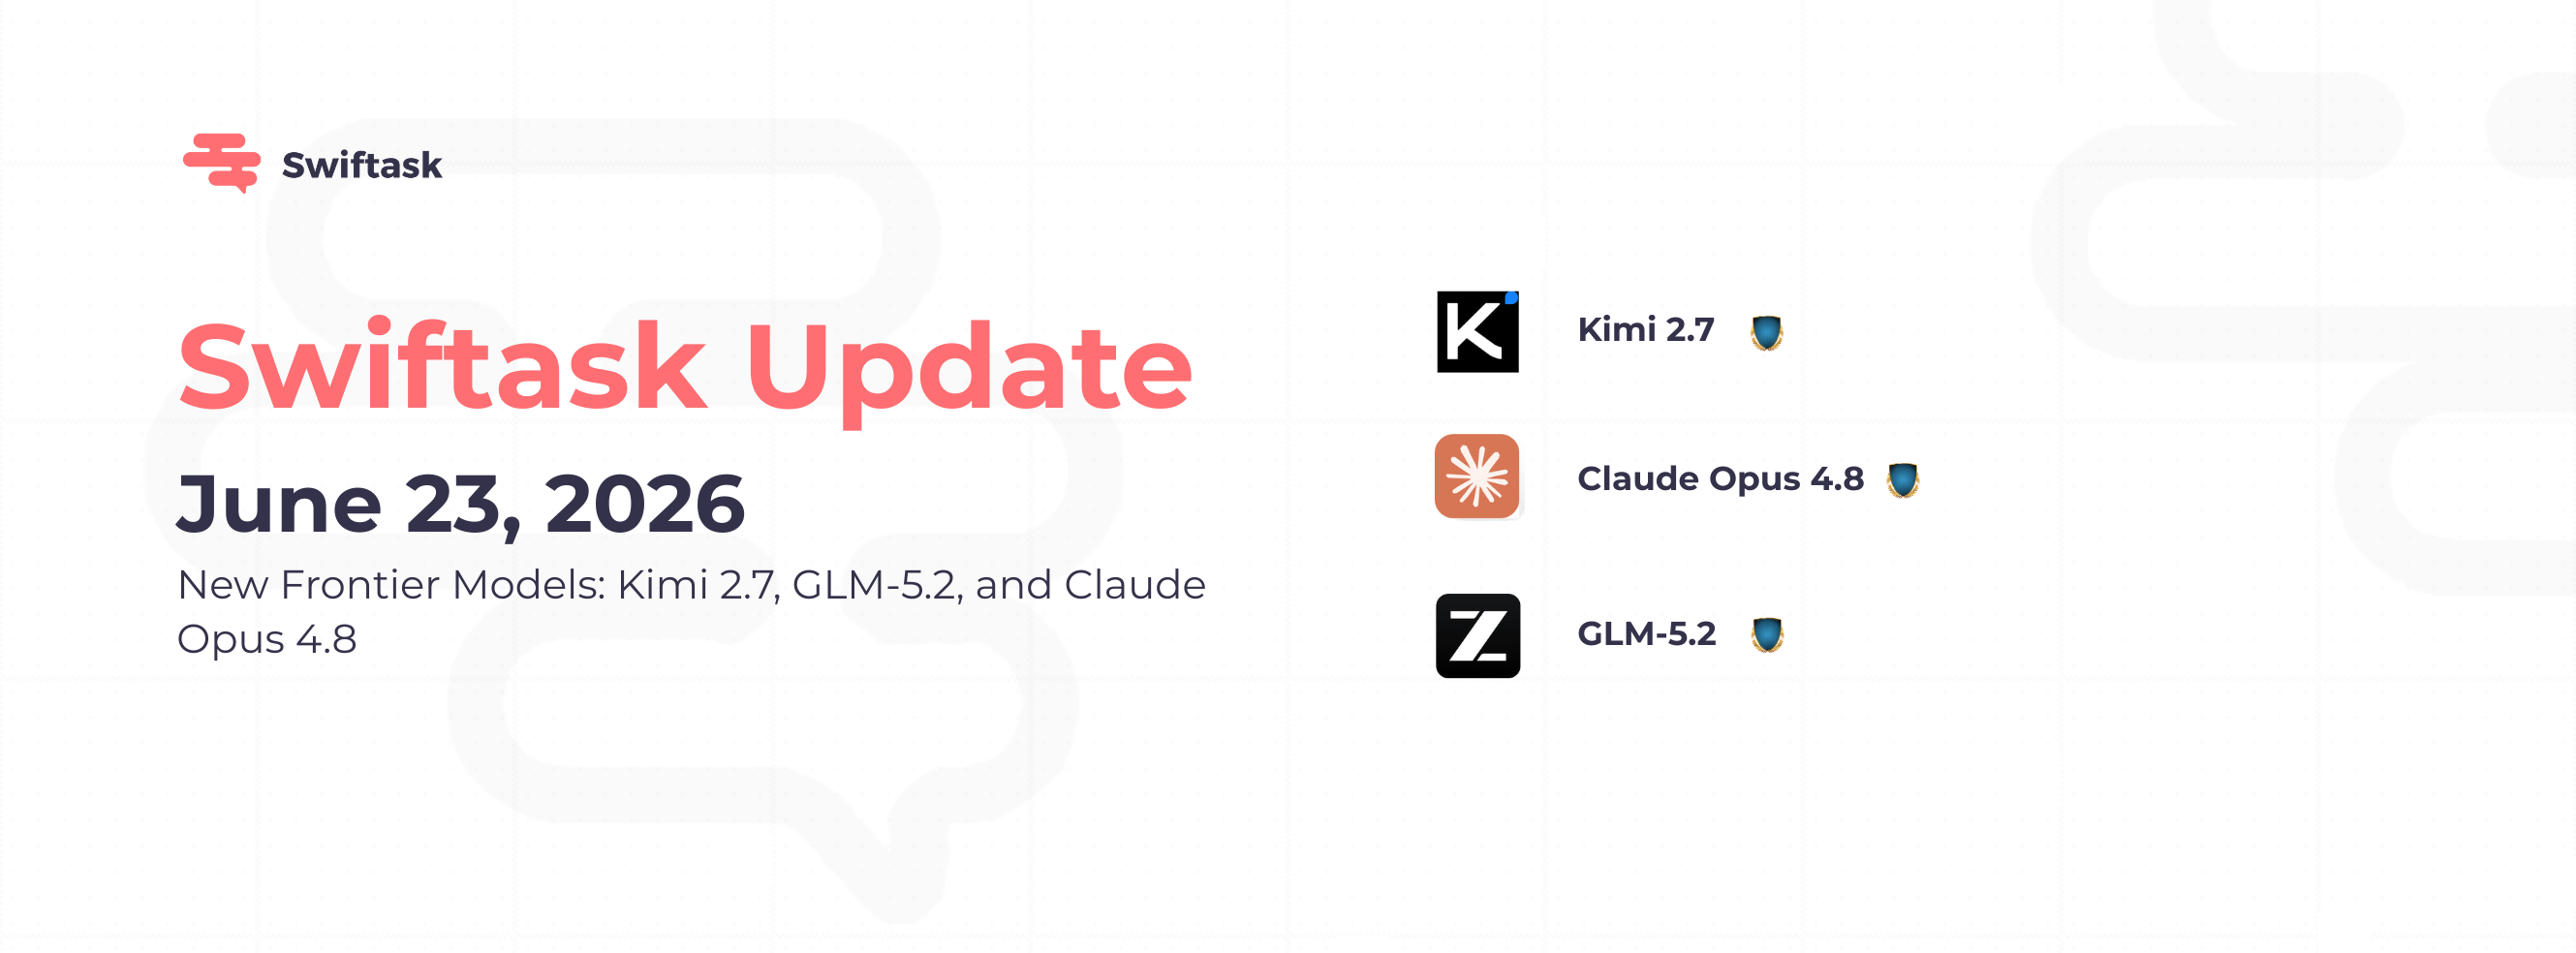
You can now choose between three frontier models based on your specific needs and budget. All models are available immediately via the Chat Model Selector and Agent Configuration, across all plans.
Kimi 2.7 Code (Moonshot AI)
High performance, controlled budget.
Moonshot has created a model that delivers exceptional results while using 30% less computing power than its predecessor. Perfect for teams deploying high volumes of agents and workflows.
0.6 credit/word: the most economical choice in this selection
Excellent performance for complex tasks and multi-step workflows
Ideal for teams looking to scale AI agents while keeping costs low
GLM-5.2 (Z.ai)
Deep understanding, massive context, fair pricing.
Z.ai has built a model capable of reading entire projects in one go. It is ideal if you need to analyze long documents, massive codebases, or coordinate complex, multi-step workflows.
0.9 credit/word: the sweet spot between cost and capacity
Capable of absorbing the equivalent of a small library in a single request
Great for long-document analysis and long-running autonomous workflows
Claude Opus 4.8 (Anthropic)
Premium reliability for critical tasks.
Anthropic has delivered its most reliable model yet for high-stakes decision-making. It is 4x better at detecting its own errors than the previous generation and "thinks" before acting on complex problems.
3.48 credits/word: our premium model
Recommended for enterprise workflows where precision is non-negotiable
Ideal for tasks requiring deep reasoning, high accuracy, and professional-grade reliability
How to choose?
High-volume tasks on a budget? Start with Kimi 2.7 Code to optimize costs.
Complex projects or massive documents? Go with GLM-5.2 for its massive context capacity.
Critical enterprise decisions? Invest in Claude Opus 4.8 for maximum reliability.
You can use all three simultaneously in your workspace, simply pick the best model for each specific agent.
Improvements
Real-time model switching: Update your models in Agent Configuration instantly without needing to refresh the page.
Enhanced model cards: The Chat Model Selector now displays costs and key capabilities at a glance, making it easier to choose the right tool for the job.
Get started now: Open your Chat Model Selector or create a new agent to test your first frontier model.