Odoo connector
Written By Stanislas
Last updated 2 days ago
Overview
The Odoo connector integrates your Odoo ERP and CRM environment directly into Swiftask agents. It allows agents to interact with your business data while respecting your instance's access boundaries.
Use this connector when you want your agents to look up contacts, monitor sales pipelines, inspect inventory levels, or automate tasks across your Odoo operations without manual data export.
Prerequisites
Before configuring the connector, ensure you have:
A Swiftask workspace account with permission to edit agents.
An active Odoo instance (cloud-hosted or on-premise) reachable over the network.
The name of your target Odoo database.
An Odoo user account with appropriate access rights to the modules you plan to connect.
Your Odoo login password
Step-by-step guide
1. Open agent skills
Open your agent configuration in Swiftask.
Select Skills under the Agent Instruction menu in the left sidebar.
Click + Browse all skills.
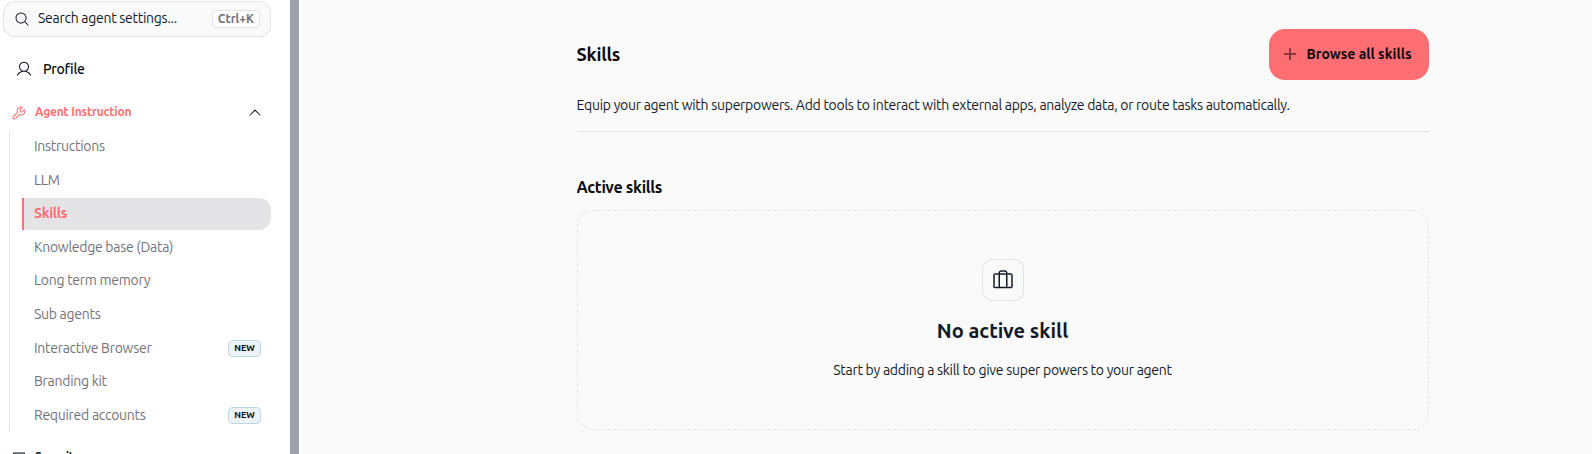
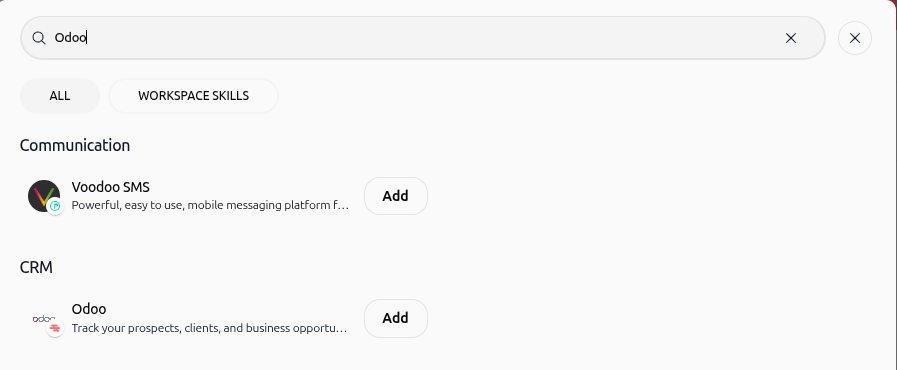
2. Locate and add the Odoo connector
Enter "Odoo" in the search bar or scroll down to the CRM category.
Click Add on the Odoo card to open the configuration panel.
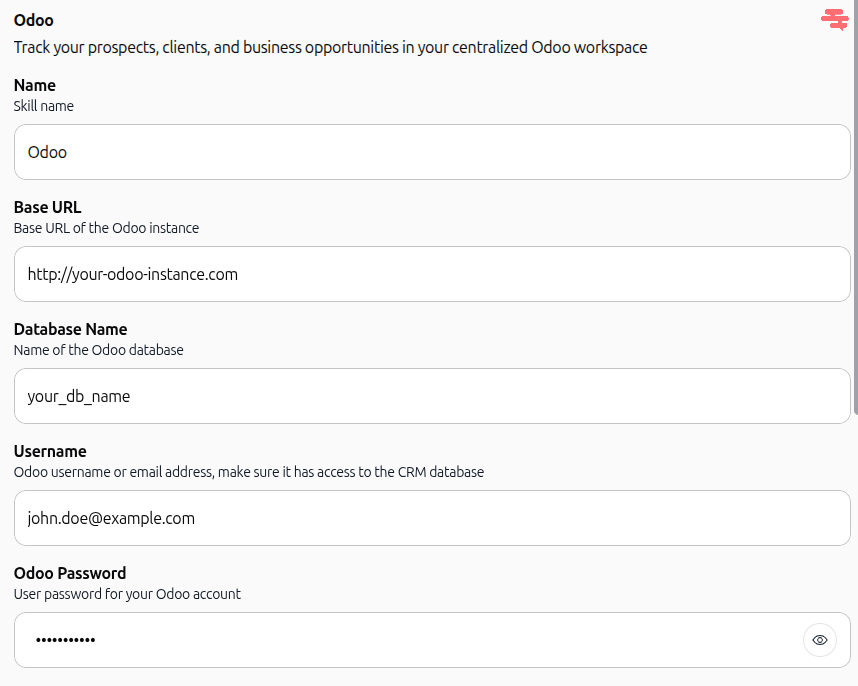
3. Enter your connection credentials
Fill in the required fields:
Name: Enter a custom display name for the skill (for example, "Odoo").
Base URL: Enter the full URL of your Odoo instance (e.g.,
https://your-odoo-instance.com).Database Name: Enter the exact name of your Odoo database.
Username: Enter the Odoo login username or email address.
Odoo Password: Enter the user password or API key for this account.
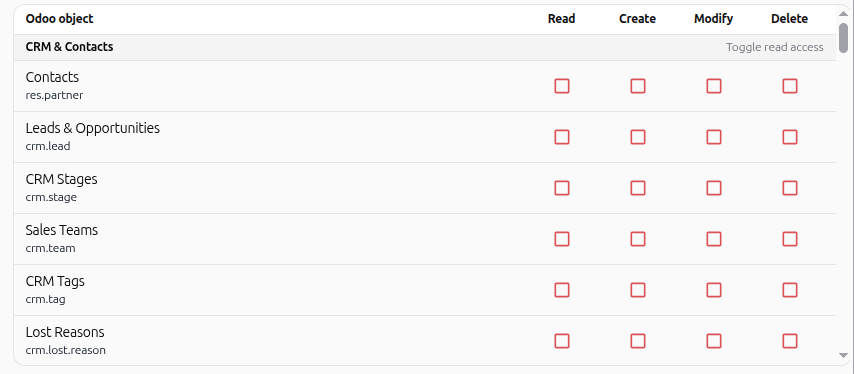
4. Select access scopes and permissions
Choose which Odoo objects your agent can access and specify the permitted operations:
Read-only mode (recommended): Enable this toggle to restrict the agent to read operations only, preventing any record creation, updates, or deletions.
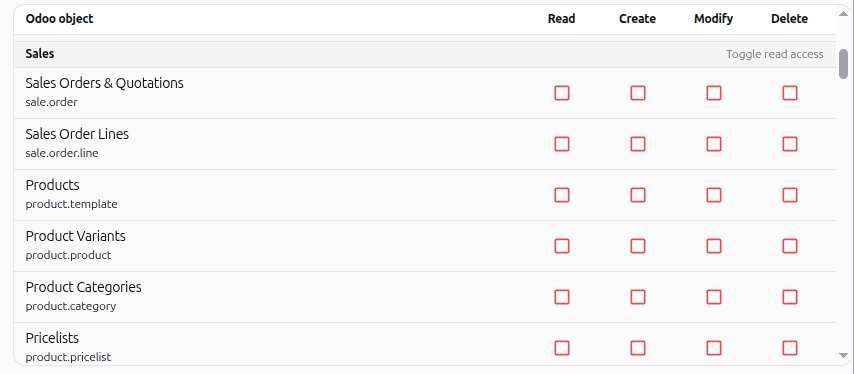
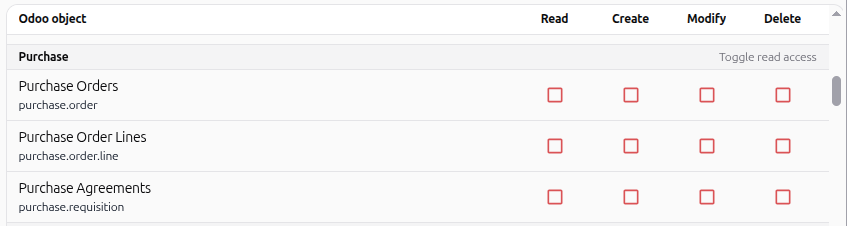
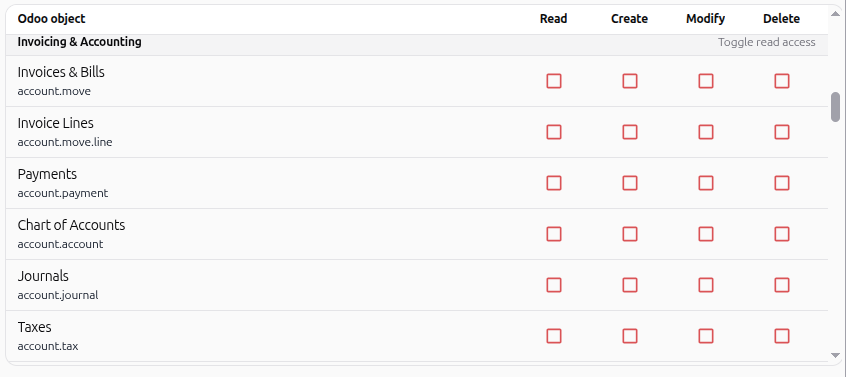
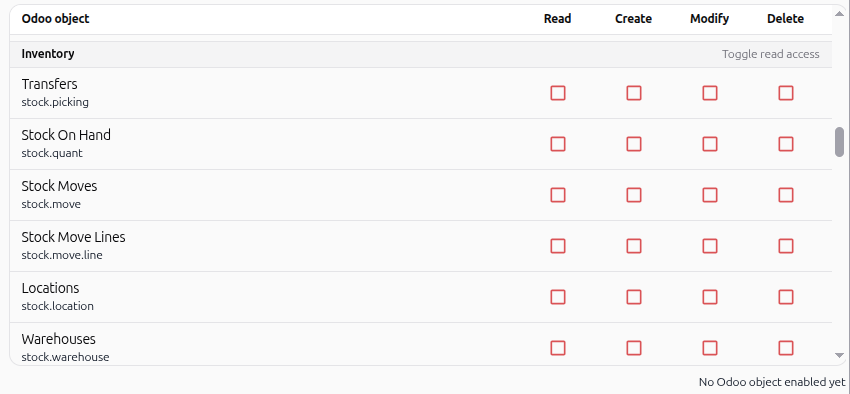
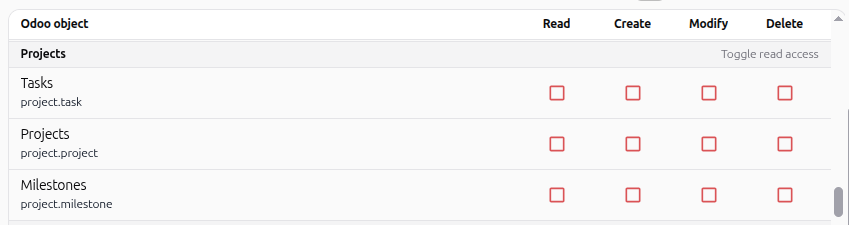
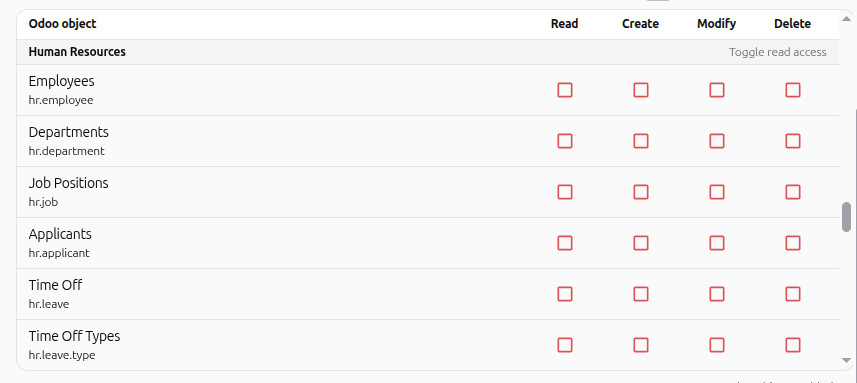
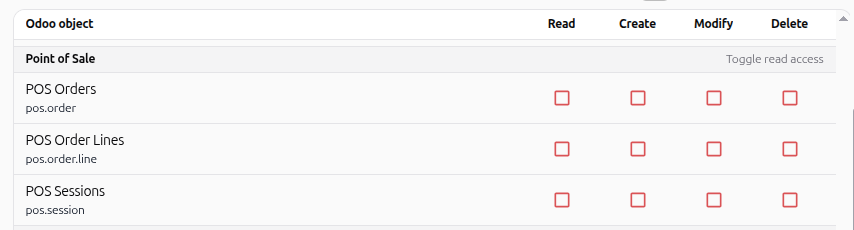
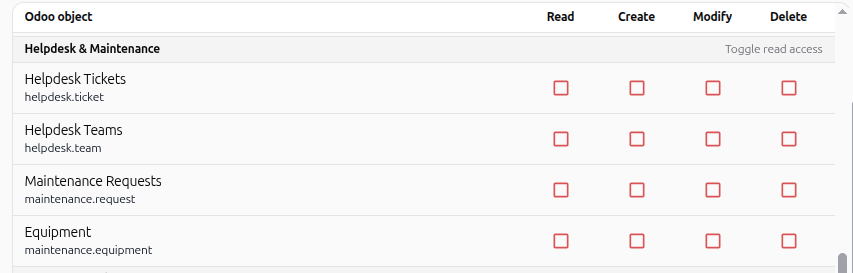
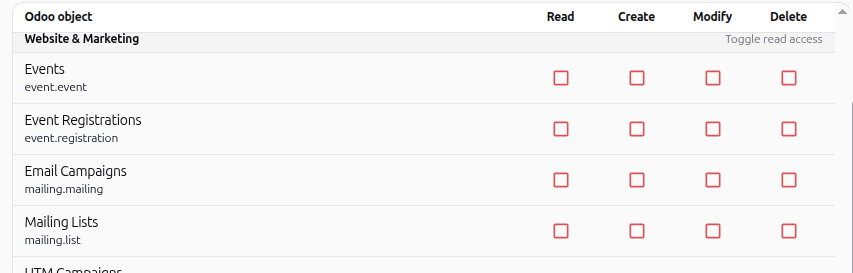
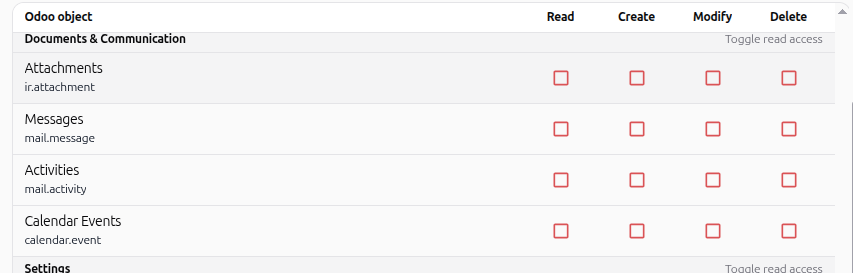
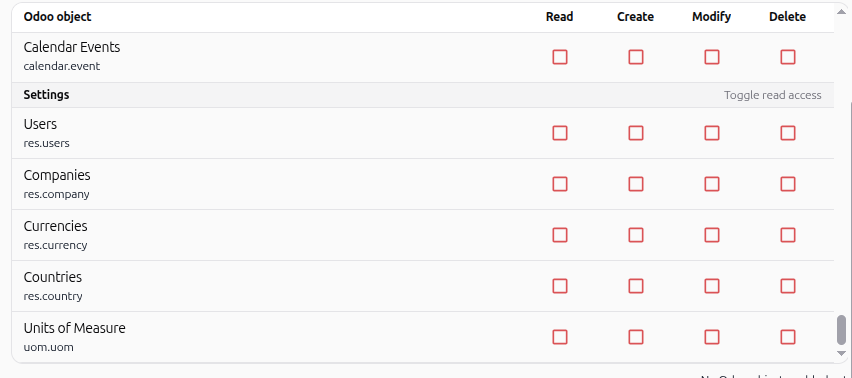
Granular permissions: Use the permission grid to assign Read, Create, Modify, or Delete permissions per module.
Select only the modules installed on your Odoo instance across the 13 available scopes:
CRM & Contacts
Sales
Purchase
Invoicing & Accounting
Inventory
Manufacturing
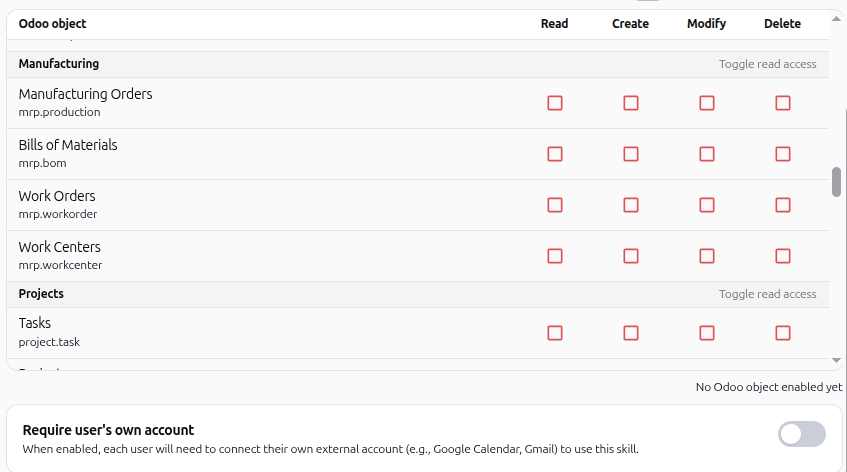
Projects
Human Resources
Point of Sale
Helpdesk & Maintenance
Website & Marketing
Documents & Communication
Settings
5. Configure account connection mode (optional)
By default, the connection is shared across all workspace members using the agent.
Toggle Require user's own account if you want each teammate to authenticate with their personal Odoo credentials before running the skill.

6. Test and save the skill
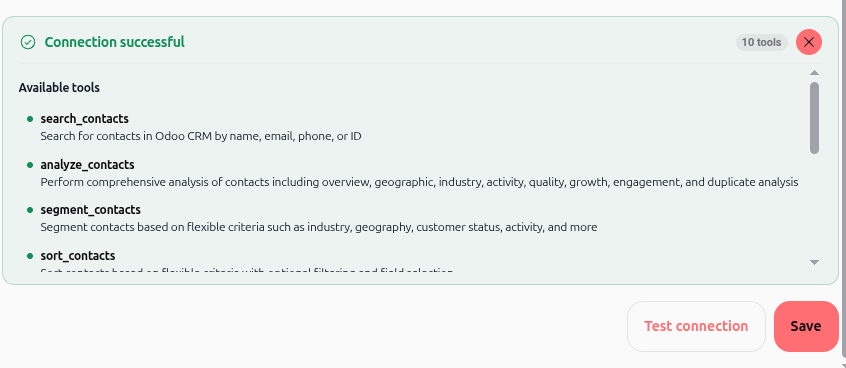
Click Test connection at the bottom of the form.
Check the green Connection successful notification and review the detected tool actions.
Click Save to attach the connector to your agent.
7. Test the connection in Chat
Navigate to Chat in the left sidebar and select your agent.
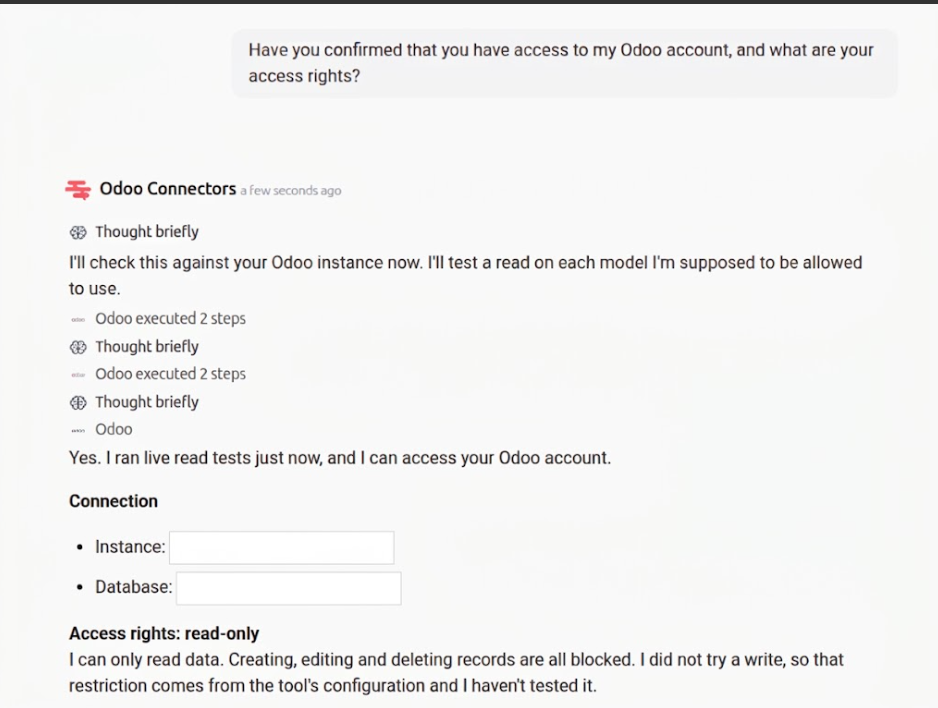
Ask the agent to verify its connection and access rights (for example: "Have you confirmed that you have access to my Odoo account, and what are your access rights?").
The agent runs live checks against your Odoo instance and confirms the connection status, database, and configured access mode.
Practical use cases
Automated prospect and contact lookup
A sales agent queries Odoo CRM to check contact records, review interaction history, and qualify leads during customer conversations.
Real-time inventory and product verification
An operational assistant inspects current stock levels and warehouse locations directly from Odoo Inventory before confirming customer requests.
Project task status tracking
A project management agent checks active tasks and milestones in Odoo Projects to report progress during internal team standups.
Tips & best practices
Enforce read-only access initially: Keep read-only mode active during agent testing to avoid unintentional modifications to live business records.
Enable only installed modules: Selecting objects from modules not present on your Odoo instance causes connection tests to fail.
Use dedicated service credentials: Create a dedicated Odoo user with scoped role permissions for the Swiftask integration rather than using personal administrative accounts.
Troubleshooting
Authentication or login failed
Cause: The Base URL, database name, username, or password was entered incorrectly.
Fix: Verify your database name from the Odoo database selector, confirm your instance URL format, and re-enter your credentials.
Server not responding or timeout
Cause: The Odoo instance is unreachable, blocked by firewall settings, or experiencing downtime.
Fix: Confirm the Odoo server is running and accessible externally via HTTPS without network restrictions.
Additional resources
Attach a skill from configuration – Learn how to attach tools and integrations to your agent.
Test skill connection – Test connectivity and view available tools before deploying.
Shared connection: one account for the whole workspace – Configure a single third-party account for team-wide use.
Required own connection: personal connection – Require each user to authenticate with their personal credentials.
Share and manage skills – Manage permissions and reuse configured skills across agents.
Was this helpful?
Still need help? Ask the team