Creating diagrams
Written By Stanislas
Last updated 16 days ago
Overview
Diagrams in Artifacts allow you to design, edit, and visualize workflows, system architectures, and process flows on an interactive Excalidraw canvas. Swiftask generates structured visual boards with custom-styled shapes, labeled connectors, and bidirectional feedback loops.
Whether you need to map complex orchestration, document software architecture, or draft decision trees, diagrams give you complete control. You can edit nodes in real time, collaborate with team members via role-based access, track sharing history, toggle light and dark themes, and publish public preview links.
Prerequisites
Before creating diagrams, ensure you have:
An active Swiftask account.
Access to a workspace.
The Artifacts feature enabled (available on all workspace plans).
Step-by-step guide
1. Open the Artifacts section
Click Artifacts in the left navigation sidebar.
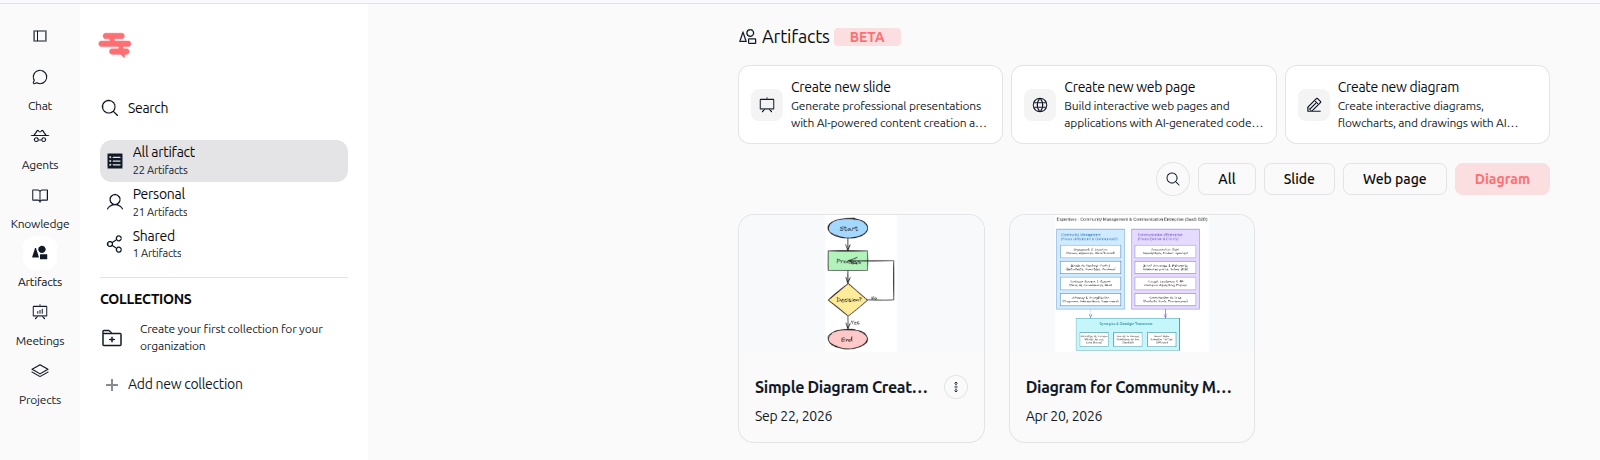
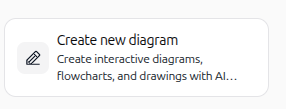
2. Click Create new diagram
Click the Create new diagram button in the Artifacts header.
3. Configure your diagram prompt
In the diagram creation modal:
Select your AI agent (or workspace default diagram agent).
Specify the diagram structure (e.g., flowchart, decision trees, sequential pipelines, and feedback loops).
(Optional) Select Set as default to preserve this agent for upcoming diagrams.
Click Create artifact.
(Note: You can also generate diagrams directly in any conversation by asking an agent with the
Artifact - diagram generatorskill).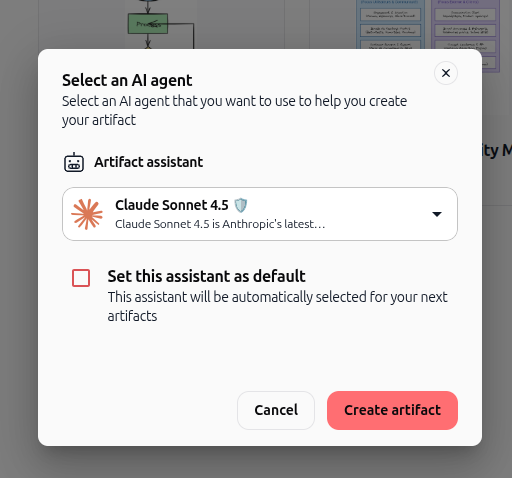
4. View and navigate your diagram
The AI renders your diagram in an interactive workspace with dedicated view controls:
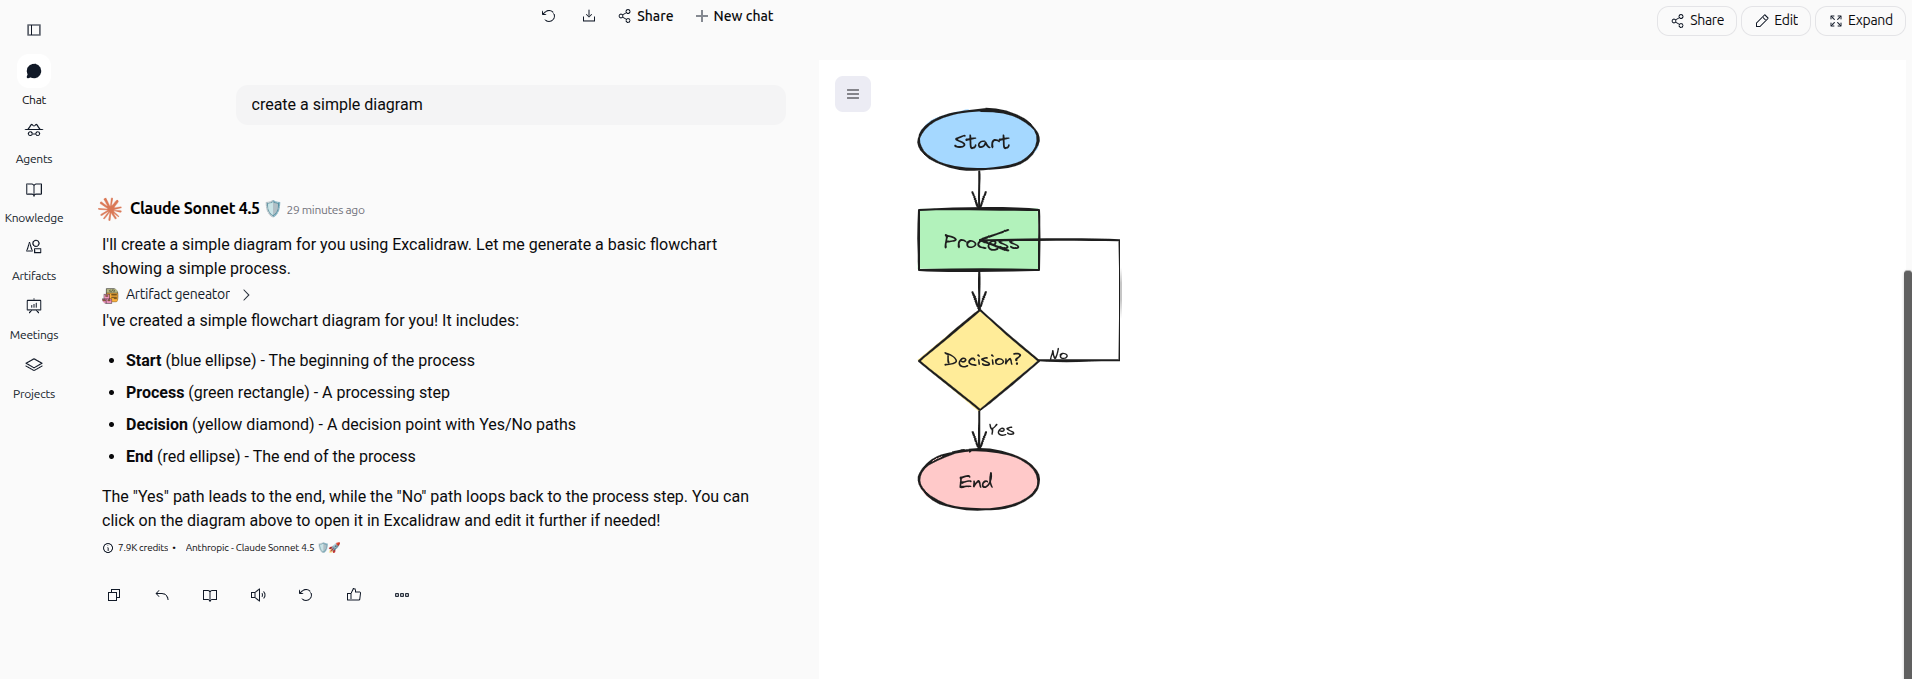
Top toolbar actions: Access Share to manage collaboration permissions, Edit to enter manual modification mode, and Collapse to minimize surrounding panels for an expanded canvas view.
Canvas navigation controls (bottom-left): Use the zoom controls (−, zoom percentage, +) to adjust the view scale, and use Undo (↶) and Redo (↷) to reverse or reapply actions.
Help shortcut (bottom-right): Click the question mark button (?) to open keyboard shortcuts at any time.
5. Enter edit mode and customize shapes
Click the Edit button in the top toolbar to enter in-place editing mode:
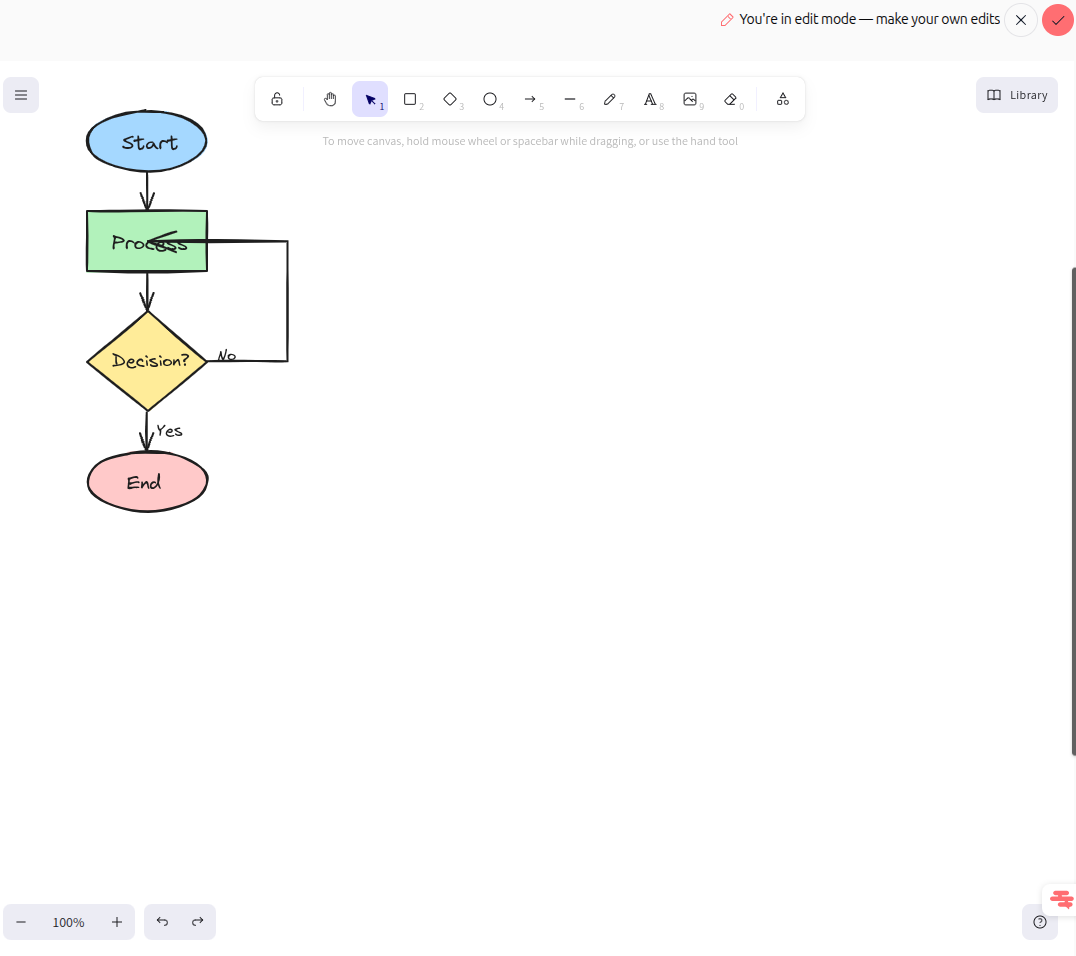
In edit mode, a notification confirms "You're in edit mode — make your own edits" with a red checkmark button (✓) to save modifications and a cancel icon (✕) to exit. The top Excalidraw toolbar provides access to all creation tools:
Lock tool: Keep the active drawing tool selected for multiple placements.
Hand tool & Selection: Pan across the board (or hold
Space + drag) and select elements (Vor1).Geometric shapes: Add Rectangles (
Ror2), Diamonds (Dor3), and Ellipses (Oor4).Connectors: Draw directional Arrows (
Aor5) and straight Lines (Lor6) that snap to shape boundaries.Freehand & annotations: Sketch using the Draw pencil (
Por7) and insert Text blocks (Tor8).Media & layout: Insert images (
9), erase elements with the Eraser (Eor0), create Frames (F), and browse the pre-built shape Library.
6. Access canvas menu, export, and theme settings
Click the hamburger menu button (☰) in the top-left corner of the canvas to access global options:
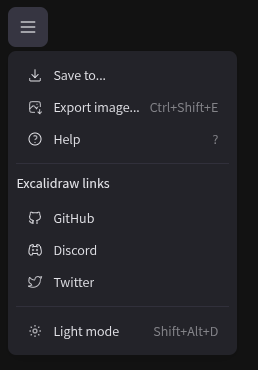
Save to...: Save your diagram file locally or backup your layout.
Export image... (Ctrl+Shift+E): Export your full canvas or selection as high-resolution PNG or vector SVG files.
Light mode / Dark mode (Shift+Alt+D): Switch between high-contrast dark canvas and clean light presentation themes.
Excalidraw community links: Access official GitHub, Discord, and Twitter resources.
7. Master keyboard shortcuts and editor controls
Press ? or select Help from the hamburger menu to view all productivity shortcuts:
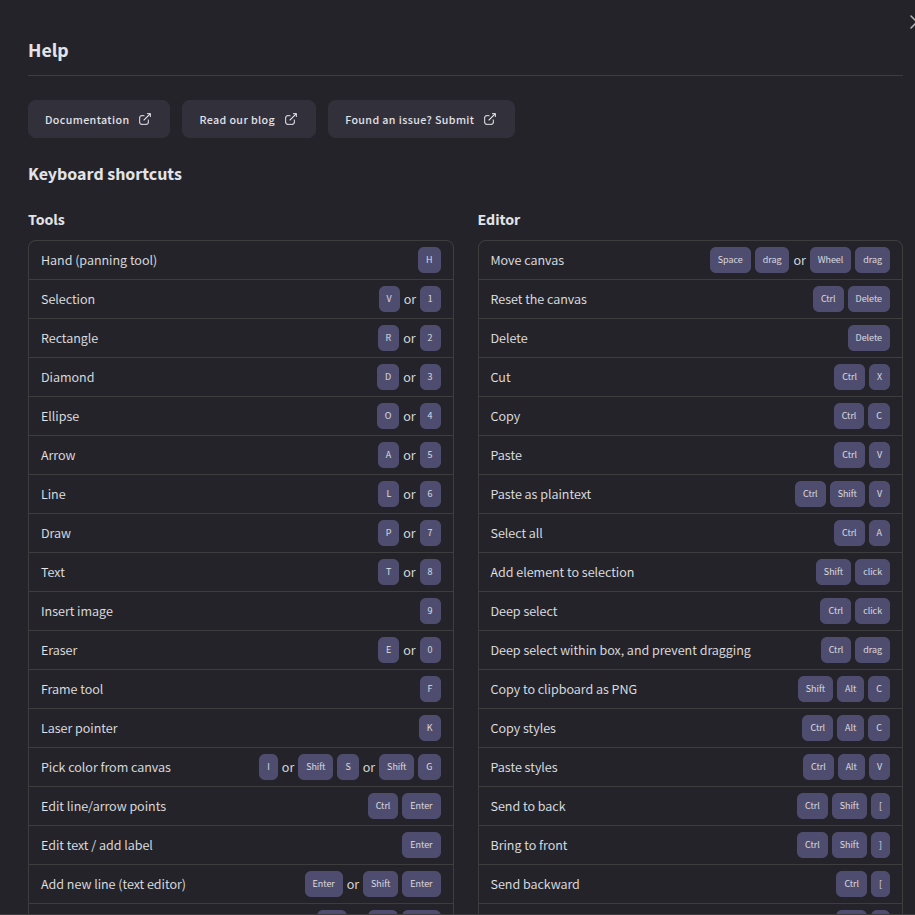
Quick style copying: Copy element styling with
Ctrl+Alt+Cand paste withCtrl+Alt+V.Clipboard export: Instantly copy the canvas as PNG to clipboard using
Shift+Alt+C.Layering: Bring elements to front with
Ctrl+Shift+]and send to back withCtrl+Shift+[.Color picker: Pick any color from the canvas using
IorShift+S.
8. Share resources and manage collaboration
Click the Share button in the top toolbar to open the resource sharing modal:
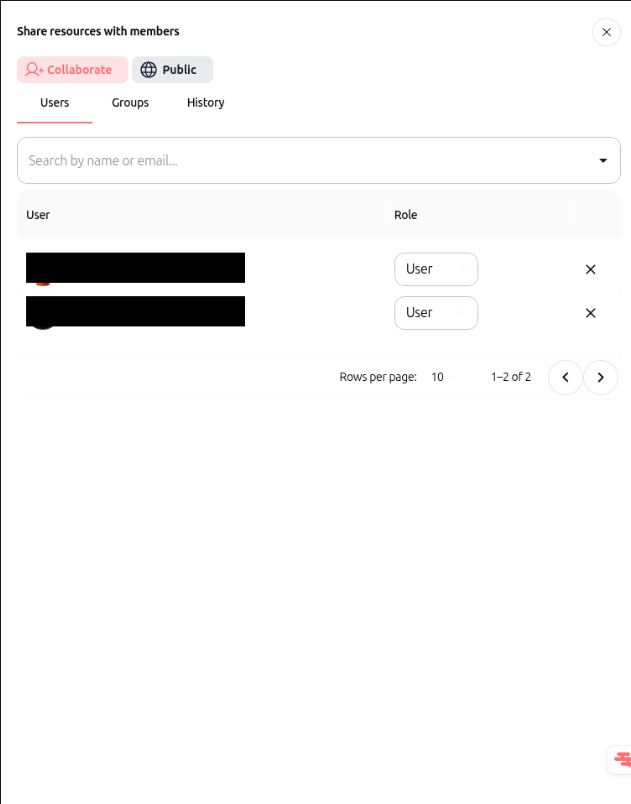
The sharing modal offers two access modes and three collaborative tabs:
Collaborate mode: Share the diagram internally with workspace colleagues.
Users tab: Search workspace members by name or email. Assign granular roles (User for viewing, Admin for editing and managing, or Owner for full administrative rights), or click ✕ to revoke access.
Groups tab: Grant instant access to entire functional departments or user groups in a single click.
History tab: Review the complete audit trail of access modifications, showing which users or groups were added, updated, or removed over time.
Public mode: Generate a public sharing link to allow external clients or partners to view the diagram without requiring a Swiftask account.
9. Organize diagrams from the library card menu
From your Artifacts library, click the three dots icon (⋮) on any diagram card to access the management context menu:
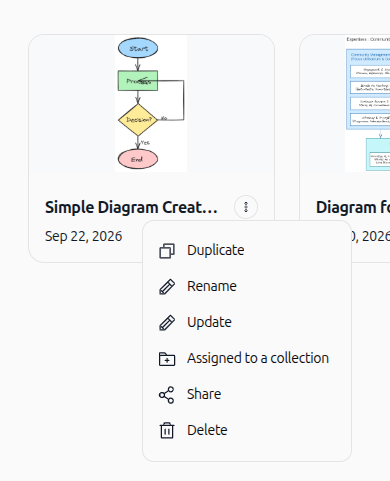
Duplicate: Create an immediate clone of your diagram to test alternate layouts or preserve baseline versions.
Rename: Change the title of your diagram artifact for clear indexing and workspace traceability.
Edit artifact: Re-open the canvas in edit mode or return to the AI chat to request prompt-based updates.
Assigned to a collection: Organize the diagram inside project, department, or client collections.
Share: Open the collaboration window to manage member permissions and public links.
Delete: Permanently remove the diagram artifact from your workspace. (Note: This action cannot be undone).
Practical use cases
Workflow process mapping: Illustrate operational pipelines, customer onboarding paths, and decision trees with conditional logic.
Engineering system architecture: Document cloud infrastructure, microservices, databases, and API integrations with color-coded nodes.
Team collaboration and reviews: Share diagrams with specific teams or groups, collect feedback, and share public visual links during client presentations.
Tips & best practices
Use
Shift+Alt+Cto copy your diagram directly as a PNG to your clipboard for rapid pasting into Slack or docs.Check the History tab in the Share modal to keep a clear audit log of who has access to sensitive diagrams.
Use the Duplicate feature before executing major structural revisions so you always retain a working backup.
Hold
Spacewhile dragging to effortlessly pan across large boards without accidental node displacements.
Troubleshooting
Connector arrows not snapping: Move the arrow endpoint over the shape border until the attachment point lights up, or press
Ctrl+Enterto modify line vertices.Changes not saving in edit mode: Ensure you click the red checkmark button (✓) in the top-right corner to save and apply all canvas edits.
Member cannot view shared diagram: Verify that the user or their group has been assigned at least the User role under the Users or Groups tab in the Share modal.
Additional resources
Was this helpful?
Still need help? Ask the team