Microsoft 365 connector
Written By Stanislas
Last updated 1 day ago
Overview
The Microsoft 365 connector links your Swiftask AI agent directly to your Microsoft 365 environment through Microsoft Graph. It allows your agent to perform authenticated actions across your Microsoft services, including reading and sending emails, scheduling calendar events, managing contacts and tasks, and accessing OneDrive and SharePoint files.
Connecting Microsoft 365 equips your agents with real-time access to your day-to-day productivity tools. This eliminates manual context switching and enables automated task handling directly inside your chat workflows.
Prerequisites
Before setting up the Microsoft 365 connector, ensure you have:
An active Swiftask account with permissions to edit agents.
A valid Microsoft 365 account (personal, business, or enterprise).
Your Microsoft login credentials ready for OAuth verification.
Step-by-step guide
1. Open agent skills
Navigate to Agents from the left sidebar and select the agent you want to configure.
In the left navigation panel, click Skills under Agent Instruction.
Click the + Browse all skills button.

2. Locate and add Microsoft 365
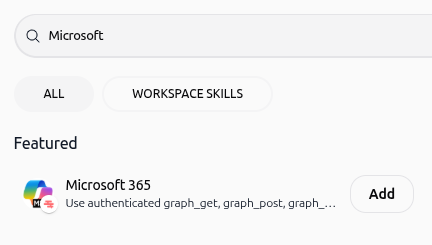
In the skills modal, type Microsoft in the search bar.
Locate the Microsoft 365 skill card under the search results.
Click Add.
3. Configure the skill details
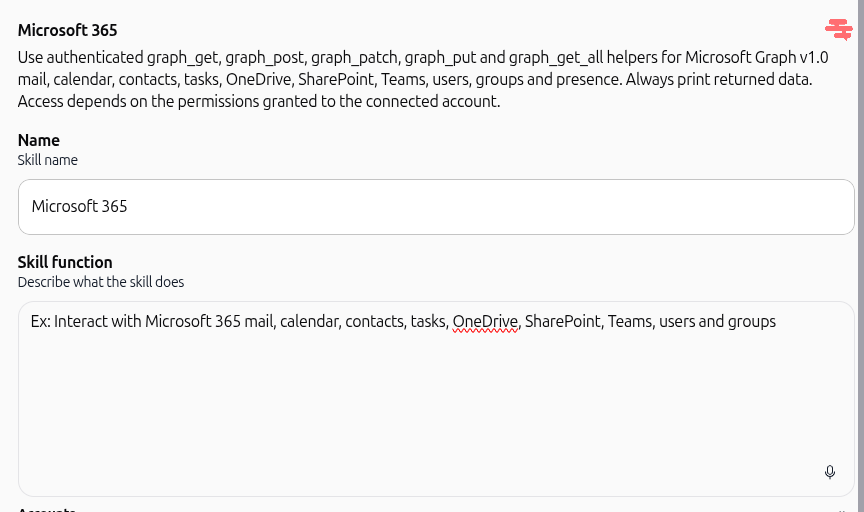
In the Name field, keep the default name
Microsoft 365or enter a custom identifier.In the Skill function field, describe what tasks the agent should perform using this integration (for example, Interact with Microsoft 365 mail, calendar, contacts, tasks, OneDrive, SharePoint, Teams, users and groups).
4. Connect your Microsoft account
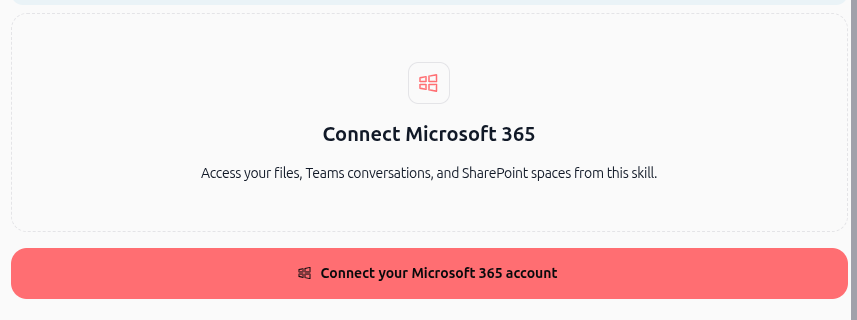
Scroll to the Accounts section within the configuration modal.
Click Connect your Microsoft 365 account.
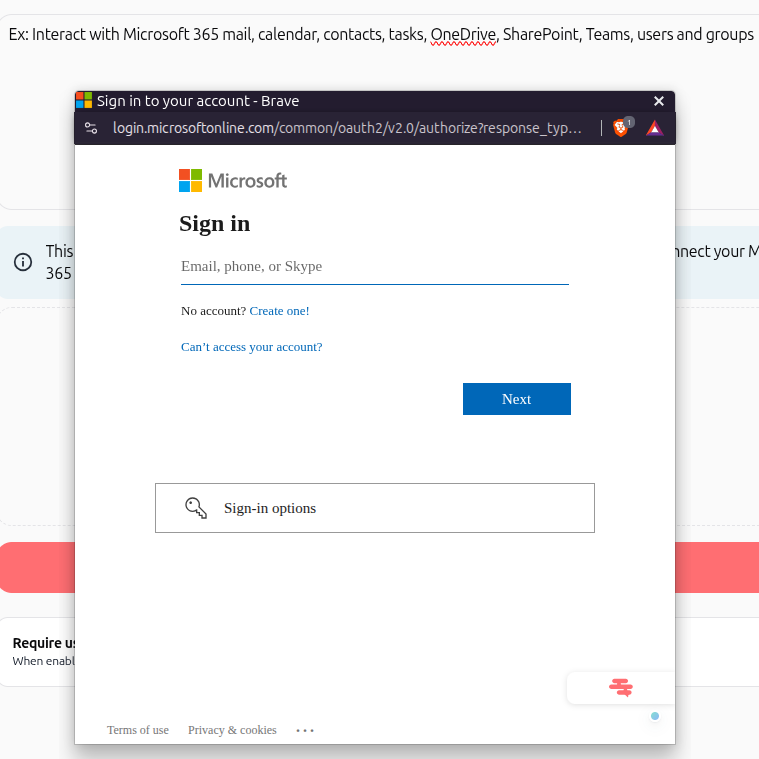
A Microsoft OAuth window opens. Enter your Microsoft 365 email address and password, then authorize the connection.
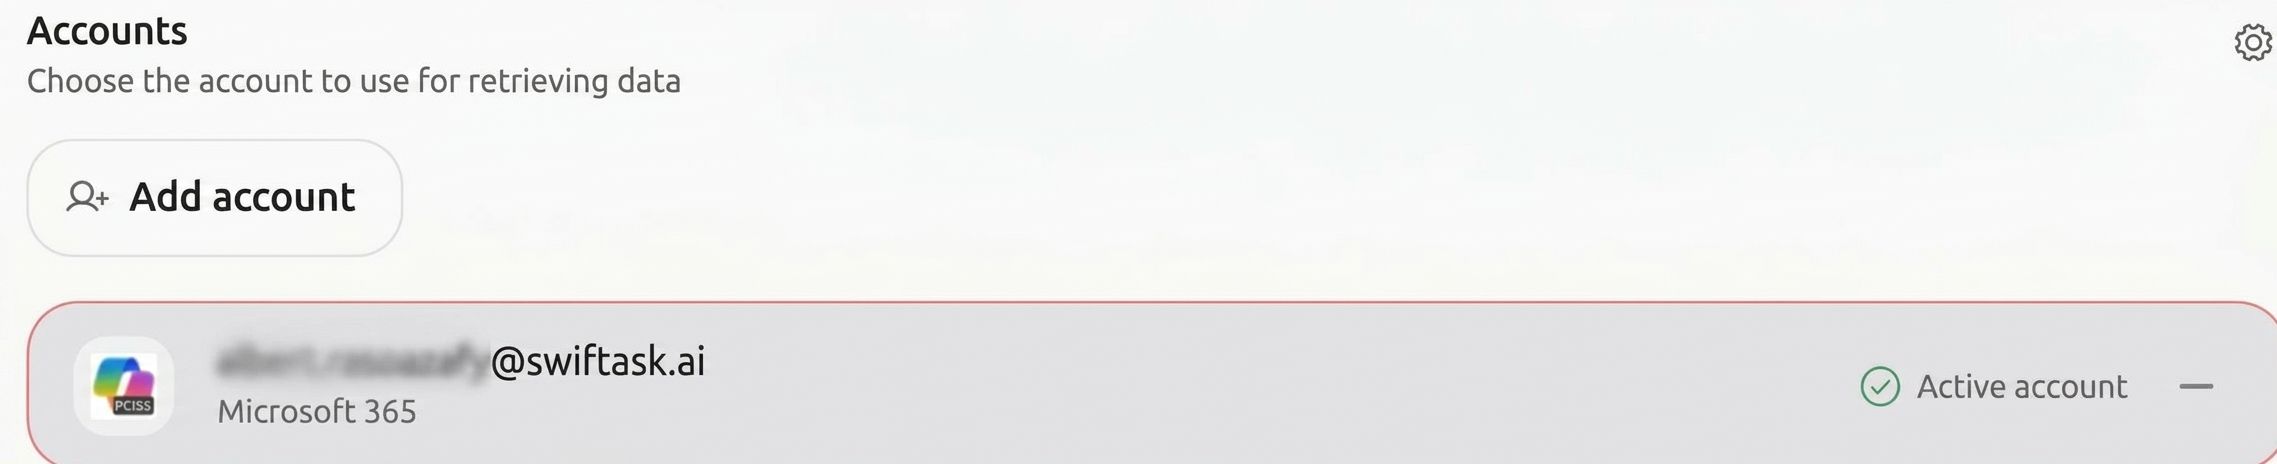
Once authenticated, your account appears in the Accounts list with an Active account status.
5. Adjust account mode and save
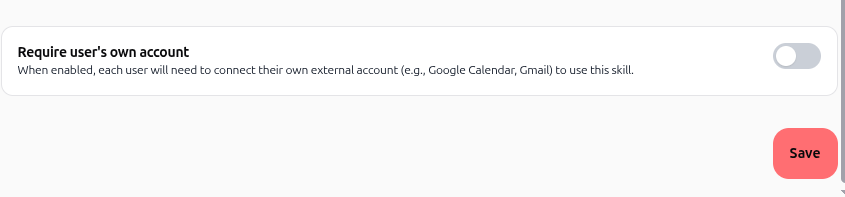
If you want other workspace members to connect their own credentials rather than sharing yours, turn on the Require user's own account toggle. Keep it disabled to share this account across the workspace.
Click Save in the bottom-right corner of the modal.
Verify that Microsoft 365 appears under Active skills in your agent settings.
6. Test the connection in chat
Open a conversation with your agent in Chat.
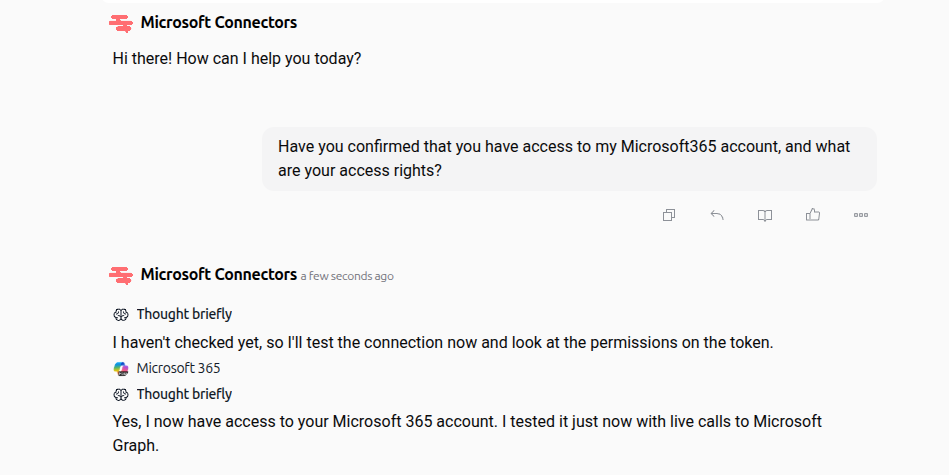
Send a message to confirm the integration (for example: "Have you confirmed that you have access to my Microsoft 365 account, and what are your access rights?").
The agent calls Microsoft Graph live and confirms whether access is active.
Practical use cases
Calendar management: Ask your agent to review your schedule for conflicts and propose or book new meeting slots.
Inbox monitoring and drafting: Have your agent scan recent emails, summarize critical threads, and prepare draft replies.
File lookup: Search and retrieve relevant documents stored across your OneDrive or SharePoint spaces directly within chat.
Task organization: Create, view, and update your personal Microsoft To Do tasks from chat instructions.
Tips & best practices
Define clear skill functions: Provide specific instructions in the Skill function field so the agent knows precisely when to query Microsoft Graph.
Manage multiple accounts: Use the + Add account button if you need to switch between different profiles or test distinct account permissions.
Choose the appropriate connection mode: Use the default shared connection for centralized team assistants, and enable Require user's own account if the agent handles private mailboxes or personal OneDrive folders.
Troubleshooting
Connection failed during OAuth login
Cause: Popup blockers prevented the Microsoft login window from completing authentication, or session tokens expired.
Fix: Allow popups for Swiftask in your browser settings and click Connect your Microsoft 365 account again.
Agent cannot access specific Microsoft resources
Cause: Your connected Microsoft account lacks administrative permissions or license access for the requested service (e.g., SharePoint or Teams).
Fix: Verify your account privileges in your Microsoft 365 admin center or reconnect with an account that has appropriate administrative access.
Additional resources
Was this helpful?
Still need help? Ask the team