Required own connection: personal connection
Written By Stanislas
Last updated 16 days ago
Overview
Required own connection is an authentication mode for external agent skills. When enabled, each user interacting with a shared agent must authenticate with their own credentials rather than using the account of the agent owner.
This mode prevents credential sharing and ensures that sensitive data, such as emails, calendars, and cloud files, stays strictly isolated to the user executing the action. Actions taken by the agent are traceable to the specific individual in audit logs.
When to use personal connection vs. shared connection
Prerequisites
Before setting up a personal connection skill, make sure you have:
A Swiftask workspace account with permissions to create or edit agents (Owner, Admin, or agent creator).
An external account for the service you want to attach (e.g., a Google account for Gmail).
For teammates using the shared agent: access to the shared agent and their own account credentials for the required service.
Step-by-step guide
1. Select the external skill in agent settings
Navigate to Agents in the left sidebar and select your agent.
Click the edit icon (pen icon) to open the agent configuration.
Select Skills from the left panel.
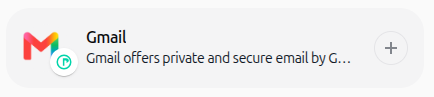
Locate the external skill you want to add (e.g., Gmail powered by Pipedream) and click the + button.
2. Enable personal connection mode
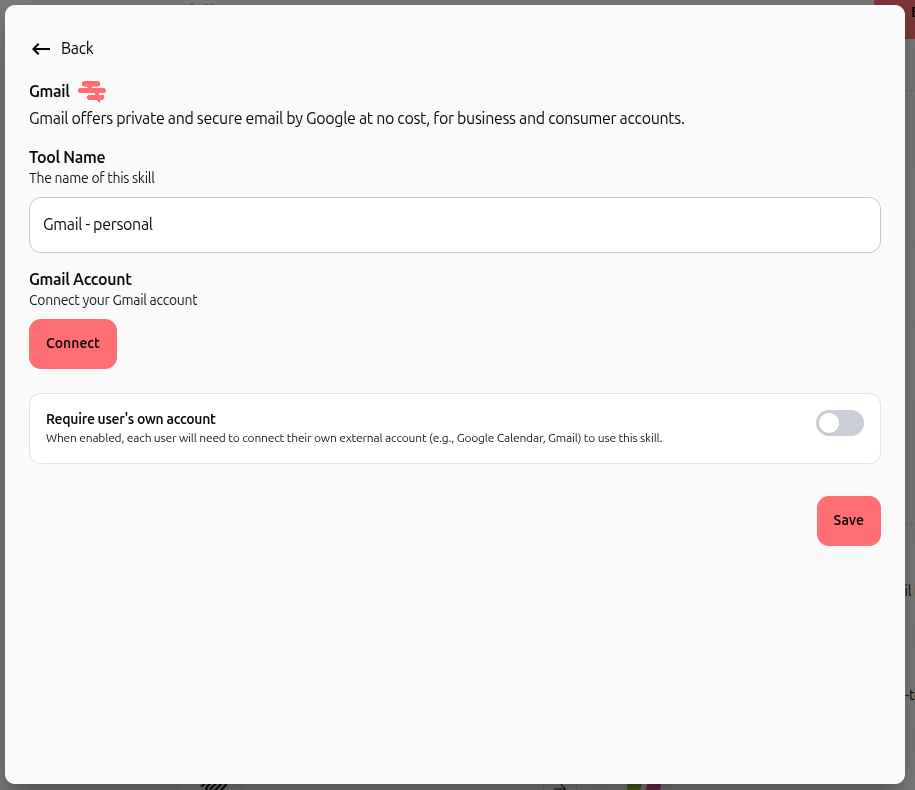
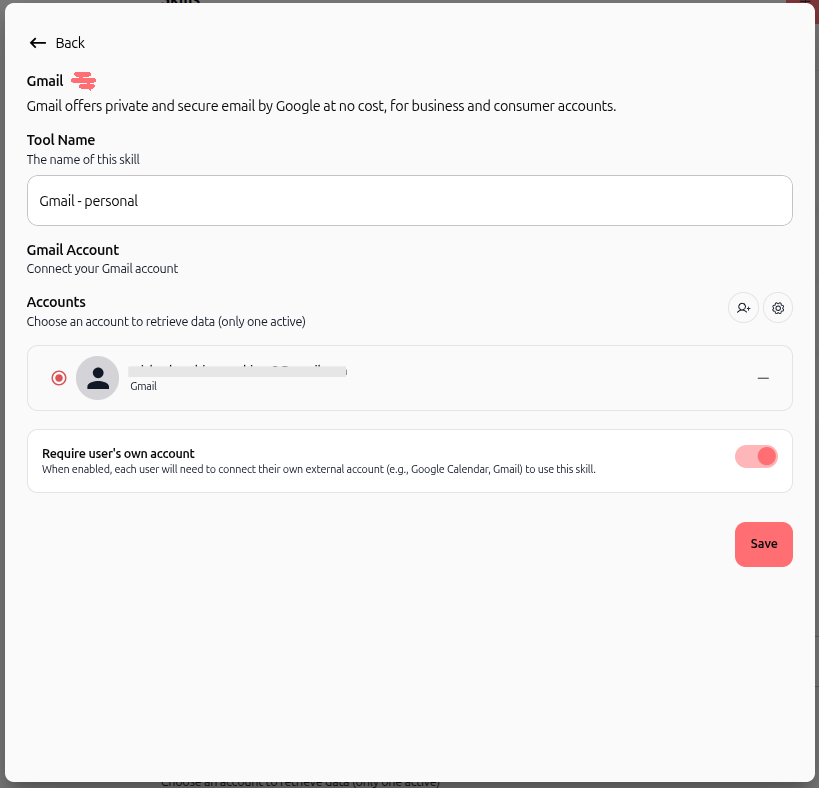
Enter a name in the Tool Name field (for example,
Gmail - personal).Click the Connect button under the service account section.
Turn on the Require user's own account toggle at the bottom of the dialog.
3. Authenticate with Pipedream Connect
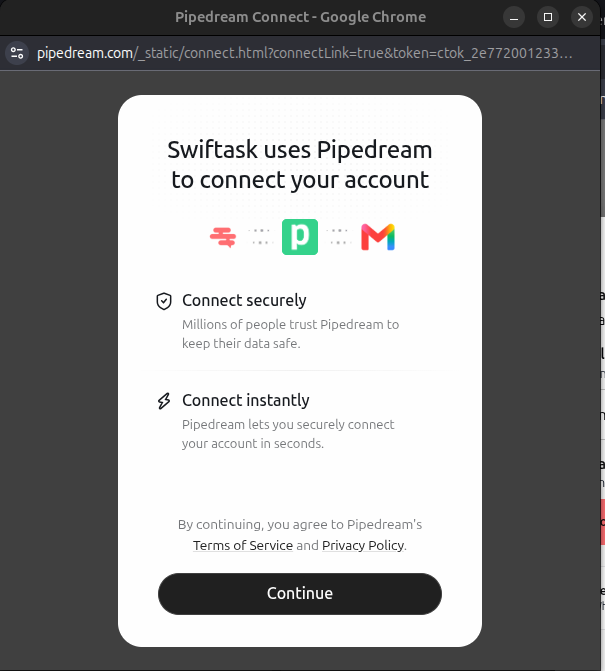
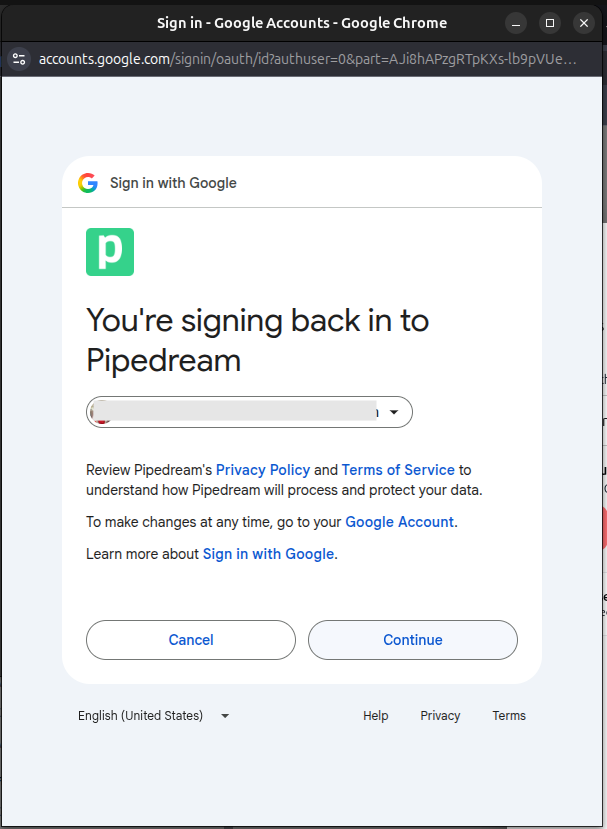
In the Pipedream Connect modal, click Continue.
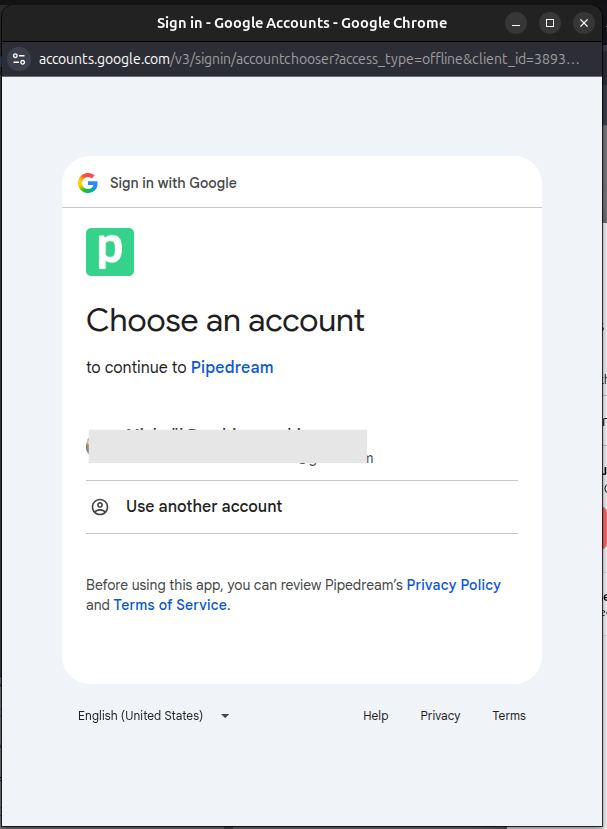
Select your Google account from the account chooser dialog.
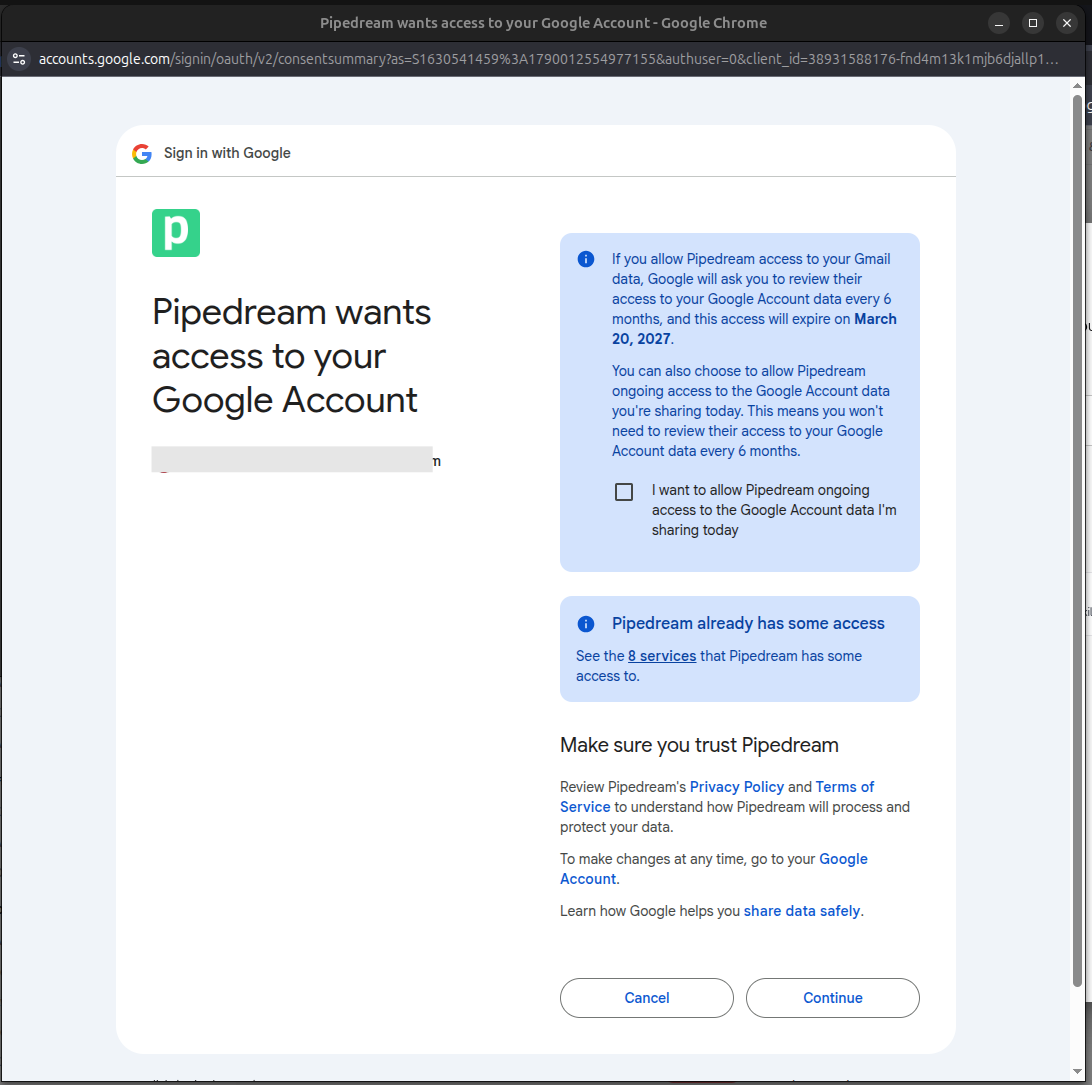
Review the sign-in confirmation screen and click Continue.
Check the box "I want to allow Pipedream ongoing access to the Google Account data I'm sharing today" and click Continue.
4. Verify account attachment and save the tool
Once redirected back to Swiftask, confirm your connected email address appears selected under the Accounts section, and verify that the Require user's own account toggle is turned on (active).
If needed, click the Add another account icon to link an additional account:
Click the Go to App Connections gear icon to view or manage your connected external services:
Click Save to complete the initial setup and attach the tool to your agent.
5. View tool details and test connectivity
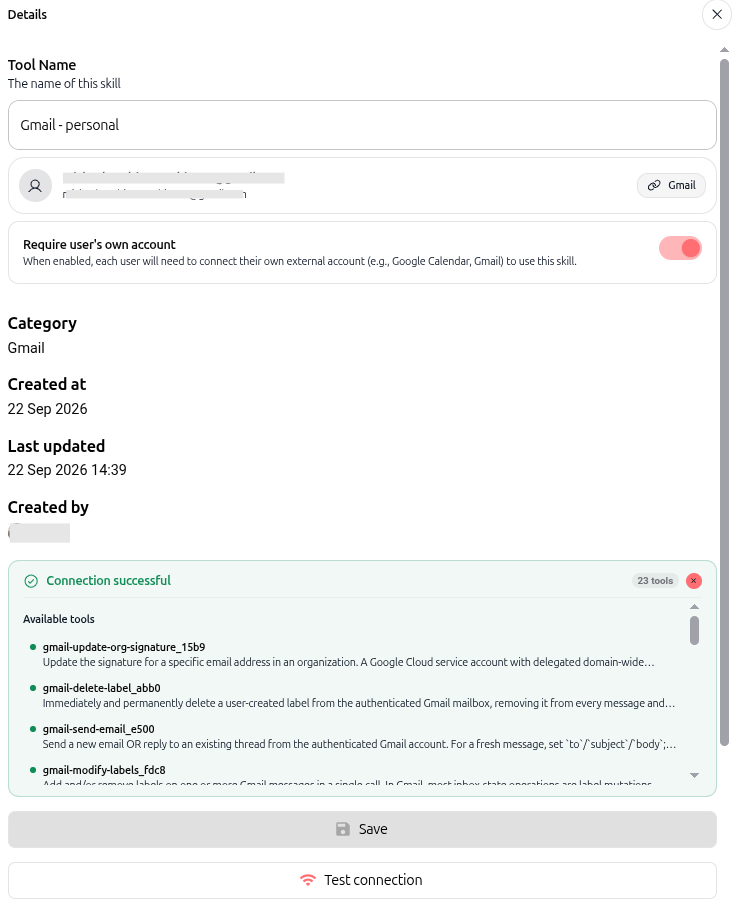
Once the tool has been created and attached to your agent, you can inspect its details and test connectivity:
In the agent's Skills list, click the eye icon on the attached tool to open its Details panel.
Scroll to the bottom of the details panel and click Test connection.
Confirm the green Connection successful status badge displays along with the count and list of available tools (e.g., 23 tools for Gmail).
Click Save to confirm.
6. End-user configuration on shared agents
When an agent owner shares an agent configured with personal connection mode, teammates experience an individual onboarding step:
The recipient opens the shared agent in Chat.
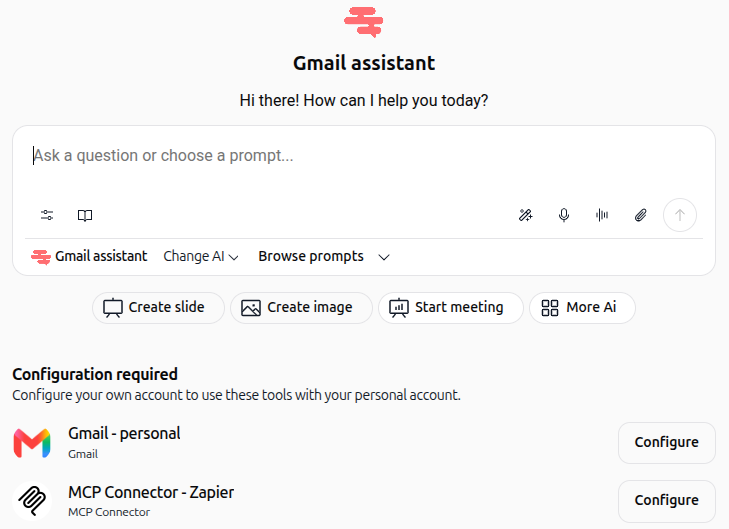
A Configuration required banner appears below the prompt input with the message: "Configure your own account to use these tools with your personal account."
The user clicks Configure next to each required skill (e.g.,
Gmail - personal,MCP Connector - Zapier).
The user completes OAuth authentication with their personal credentials.
Once configured, the banner disappears, and the agent becomes active for that user.
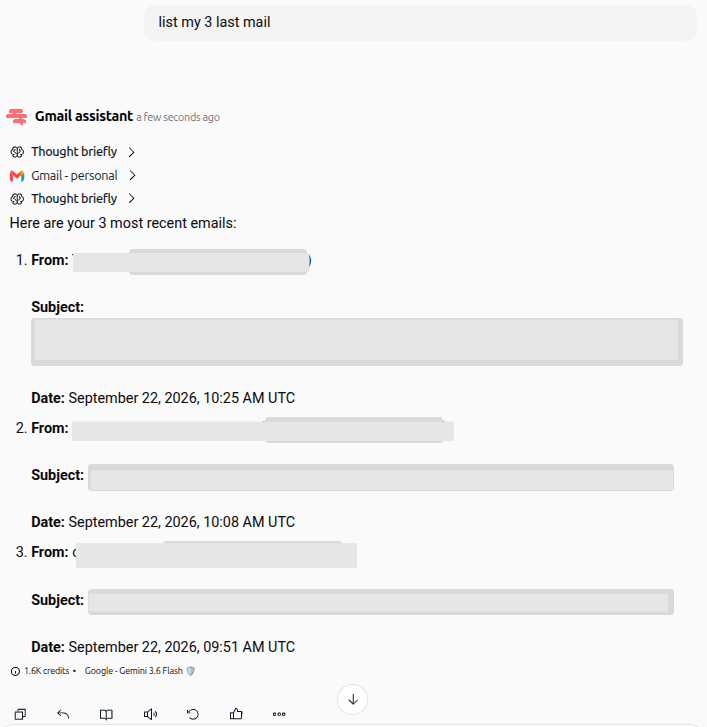
7. Verify isolated agent execution
To confirm that user data remains strictly isolated:
Agent owner query: When the owner asks the agent to list recent emails, the agent returns emails from the owner's mailbox.
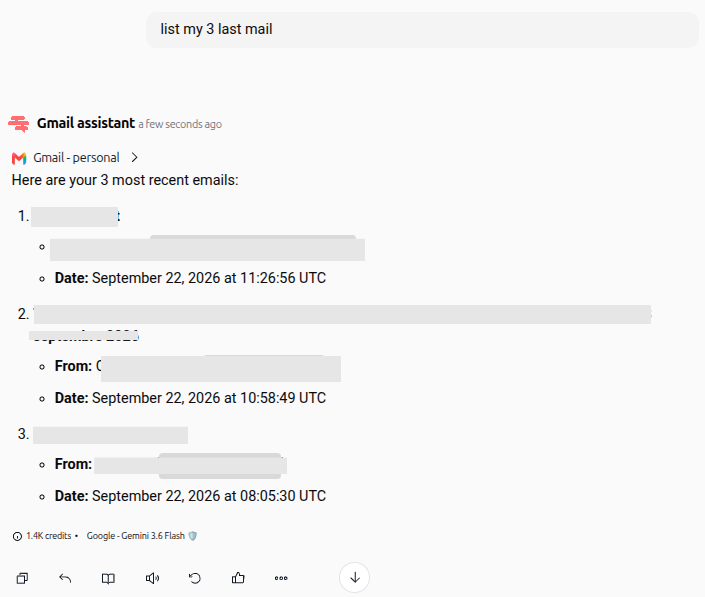
Teammate query: When the shared user asks the same question, the agent returns emails only from the teammate's mailbox.
8. Manage connected external accounts
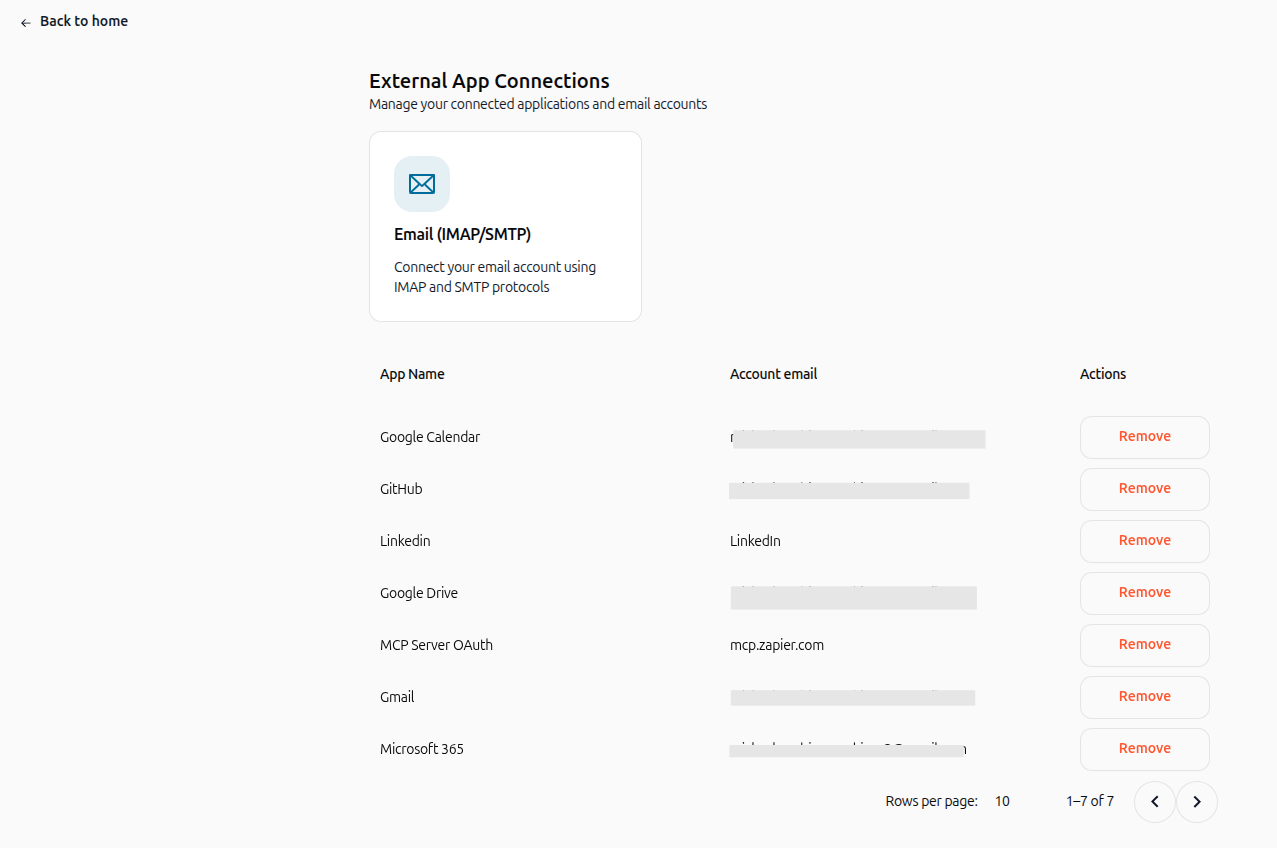
Users can view, manage, or remove their connected external accounts at any time.
The External App Connections page can be accessed by clicking the gear icon during skill configuration, or through the navigation menu:
Click the Settings icon (gear) in the bottom-left corner of the main navigation panel.
Select Account Settings.
Under the Preferences & Tools section, click App Connections (or manage email protocols via connect SMTP/IMAP).
View the list of active services under External App Connections (including MCP Server OAuth, Gmail, GitHub, and Microsoft 365).
Click Remove next to any connection to revoke credentials.
Practical use cases
Recruiting team sending candidate emails
An HR manager builds an agent to draft and dispatch interview invitations. With personal connection mode enabled, emails are dispatched directly from each coordinator's individual Gmail account, allowing candidates to reply directly to their specific recruiter.
Consultants managing client schedules
A team of consultants shares a scheduling agent connected to Google Calendar. Each consultant connects their own calendar so meeting requests and availability checks accurately reflect individual schedules without mixing client bookings.
Sales representatives reading incoming leads
A sales director deploys a lead-triage agent. Each sales rep uses the agent to summarize incoming prospect emails from their personal inbox, keeping prospect discussions confidential between account owners.
Tips & best practices
Inspect tool details to verify connectivity: Click the eye icon on any attached skill in the agent settings to access the "Test connection" button and verify tool permissions.
Inform recipients in advance: When sharing an agent, notify teammates that they will see a one-time "Configuration required" banner in chat.
Revoke credentials when offboarding: Teammates can remove their external connections anytime from External App Connections without modifying the agent configuration.
Troubleshooting
"Configuration required" banner does not disappear
Cause: The user clicked "Configure" but did not complete the authentication process or grant all required permissions.
Fix: Click Configure again, finish the OAuth steps in Pipedream Connect, ensure all consent checkboxes are marked, and click Save.
Skill works for the agent owner but fails for shared users
Cause: The shared user has not connected their own external account, or their external account has restricted permissions.
Fix: Have the user verify their connection status under the agent chat banner or reconnect the app in External App Connections.
Unable to find the "Require user's own account" toggle
Cause: The selected skill is an internal tool (e.g., document retrieval, code runner) rather than an external integration service.
Fix: The toggle is only available for third-party connector skills (Gmail, Google Drive, Outlook, Slack, Calendar, etc.).
Additional resources
Skills / AI tools – Learn how to browse and attach capabilities to your agents.
Swiftask Help Center – Explore guides and best practices for configuring agents and workspace settings.
Was this helpful?
Still need help? Ask the team