Embedding & widget (Chat bubble)
Written By Stanislas
Last updated 16 days ago
Overview
The chat bubble feature transforms your Swiftask agent into an embeddable website widget. Visitors can open a floating launcher in the corner of your page to start a conversation without a Swiftask account.
Use it for automated support, lead qualification, and visitor assistance. You can customize its appearance, advanced behavior, billing account, and credit alerts.
Prerequisites
Before you start, you need:
An active Swiftask account with permission to edit agents.
A configured agent with instructions and any required knowledge or skills.
Access to your website source code or CMS to add JavaScript.
Step-by-step guide
1. Open the chat bubble settings
Go to Agents in the left sidebar and select the agent you want to embed. Click the pen icon on the agent card.
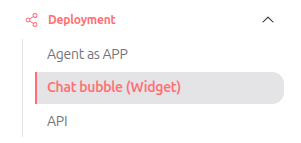
Under Deployment, click Chat bubble (Widget).
2. Unlock public mode
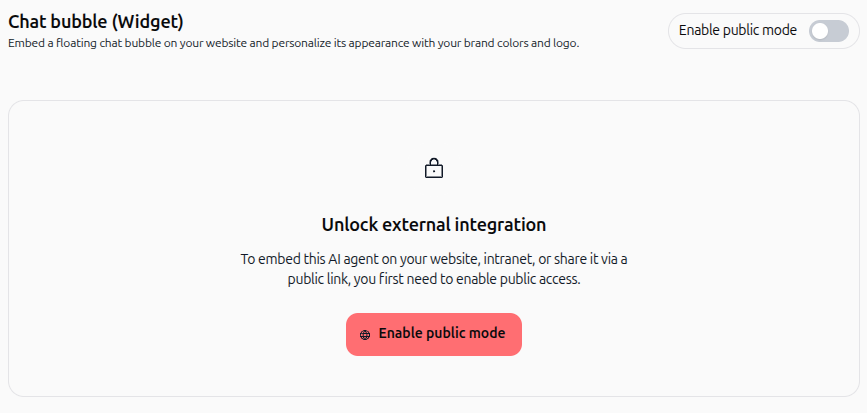
External integration is locked by default. Click Enable public mode in the center card or turn on the switch in the top-right corner.
The Integration, Appearance, Cost Control, and Credit monitoring tabs become available.
3. Copy the JavaScript integration script
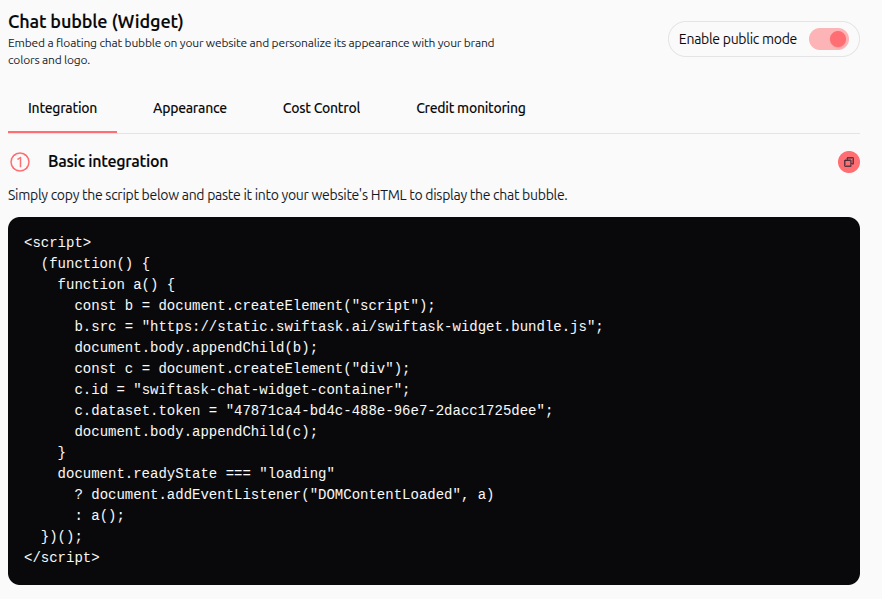
Open the Integration tab. In Basic integration, click the copy icon on the script card.
Paste the copied JavaScript directly before the closing </body> tag in your website's HTML.
4. Customize the appearance
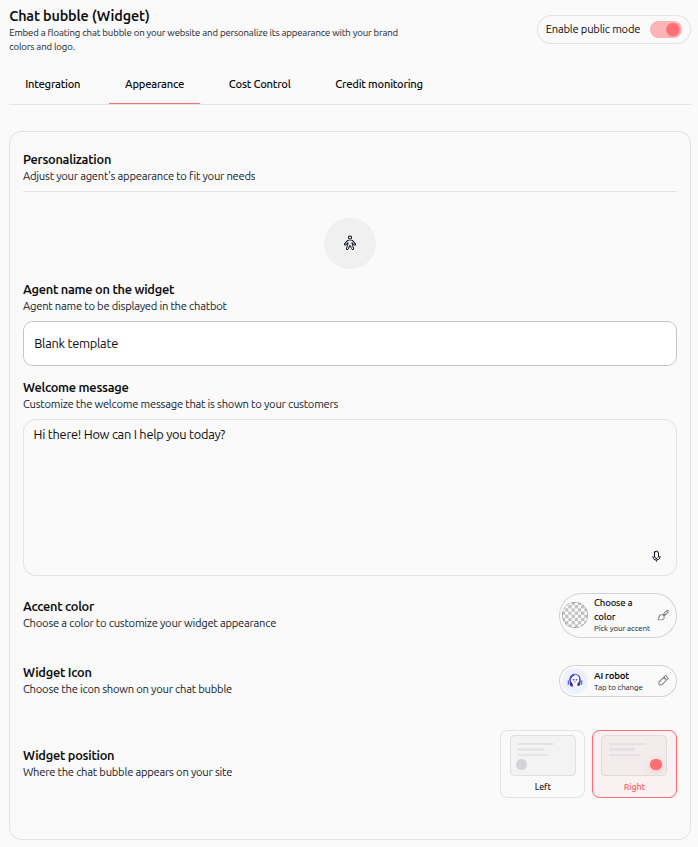
Open Appearance and configure:
Agent name on the widget: Name shown in the chat header.
Welcome message: Greeting shown when visitors open the widget.
Accent color: Preset or custom color for the widget.
Widget Icon: Avatar shown on the chat bubble.
Widget position: Left or Right corner of the page.
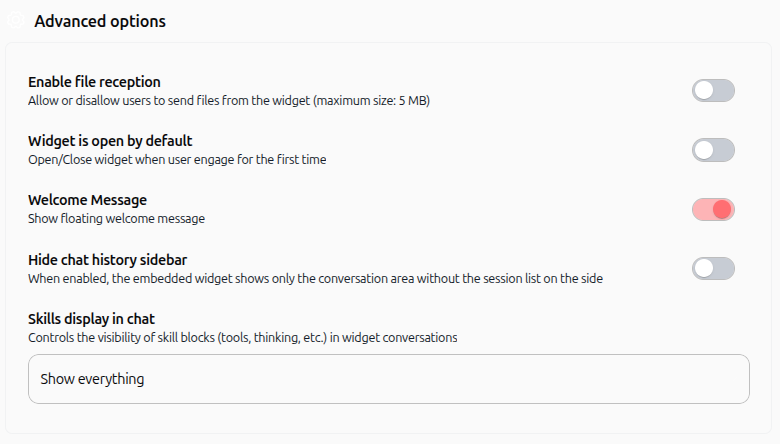
5. Configure advanced options
In Appearance, open Advanced options:
Enable file reception allows visitors to send files up to 5 MB.
Widget is open by default opens the chat automatically when the page loads.
Welcome Message shows a floating welcome bubble beside the launcher.
Hide chat history sidebar shows only the conversation area.
Skills display in chat controls the visibility of skill blocks, tools, and thinking details.
6. Configure cost control
Open Cost Control to configure ownership and billing:
Current owner is responsible for the agent. Transfer ownership when someone leaves the company.
Credit consumption identifies the account charged for external widget usage.
Charges follow this order: designated credit consumer, agent creator, delegated owner, then workspace owner. If a user is inactive, charges fall back to the next eligible member.

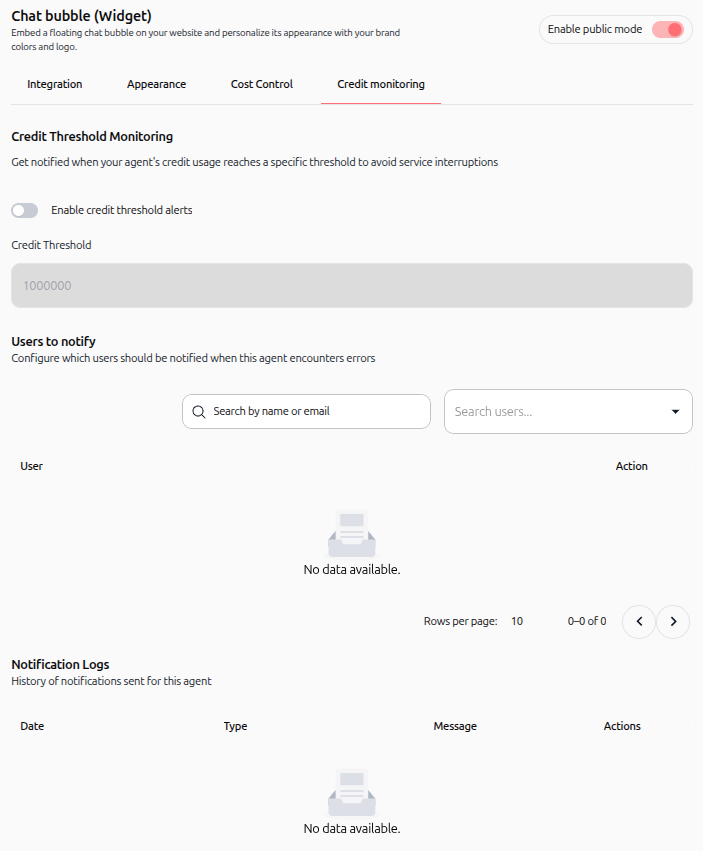
7. Configure credit threshold monitoring
Open Credit monitoring:
Turn on Enable credit threshold alerts.
Enter a Credit Threshold, such as
1000000.Select Users to notify.
Review Notification Logs for sent alerts.
Practical use cases
Customer support: Answer product and FAQ questions directly on your support site.
Lead qualification: Welcome visitors, answer pre-sales questions, and collect contact details.
Internal assistance: Help employees find policies and procedures on an intranet.
Tips & best practices
Write a clear, action-oriented welcome message.
Set credit alerts early enough to allow corrective action.
Hide the chat history sidebar and limit skill visibility when a simpler public interface is preferable.
Use a dedicated credit account to separate external widget costs from internal usage.
Troubleshooting
Widget does not appear: Confirm public mode is enabled and the
<script>is immediately before</body>.File uploads fail: Enable Enable file reception and check the 5 MB limit.
Usage stops: Check the assigned credit account, its membership status, and available credits.
Additional resources
Agent as app – Deploy an agent as a standalone web application.
Create AI Agent step by step – Configure agent instructions, knowledge, and skills.
Workspace administration – Manage workspace members, roles, and credits.
Was this helpful?
Still need help? Ask the team