AI reply
Written By Stanislas
Last updated 16 days ago
Overview
The AI reply feature in the Swiftask Chrome extension integrates intelligent text generation directly into your browser's input fields. It detects the surrounding context of discussions, comments, and message threads to produce relevant and coherent responses without leaving your active tab.
Instead of switching back and forth between Swiftask and your external applications, you can trigger AI writing directly inside platforms like Gmail, LinkedIn messages, Facebook comments, and other web forms with a single click.
Prerequisites
Before using the AI reply feature, make sure you have:
Google Chrome installed on your device.
The Swiftask Chrome extension installed and pinned to your browser toolbar.
An active Swiftask account signed in through the extension.
Access to any Swiftask plan (Free, Pro, Team Starter, Team Growth, or Custom).
Step-by-step guide
1. Locate the AI action button in any web field
Navigate to any supported platform or web page containing a message, thread, or comment section. Swiftask automatically embeds a dedicated button next to the standard input toolbar:
In email clients like Gmail, click the AI Write button located in the compose toolbar.
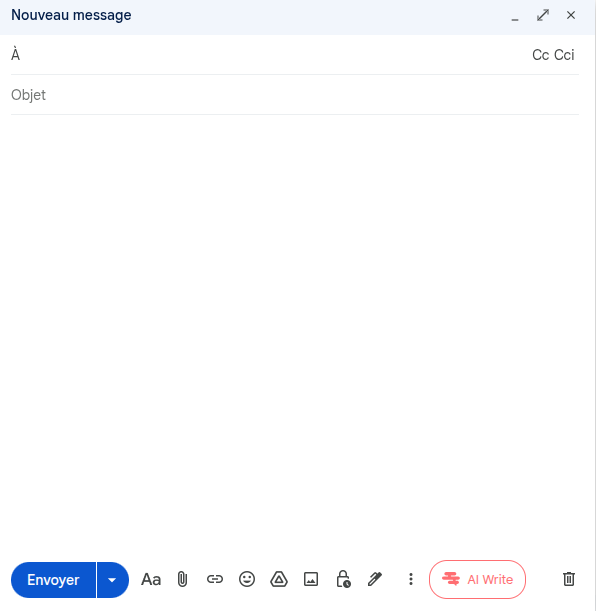
In social feeds like Facebook, click the AI reply button underneath the comment box.

In messaging interfaces like LinkedIn, click the AI reply button in the chat action bar.
2. Enter your response instructions
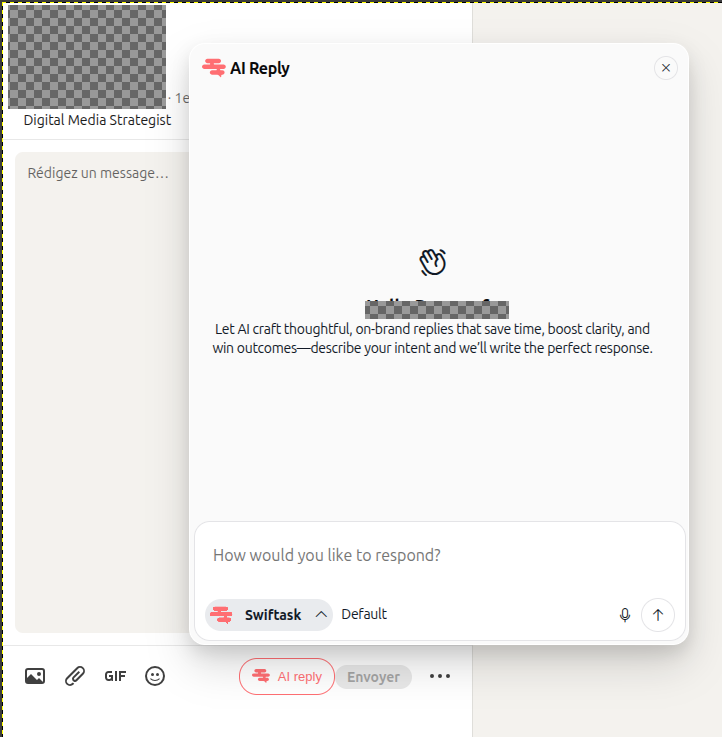
Clicking AI reply or AI Write opens a floating assistant window:
Review the context automatically captured from the thread or discussion.
In the How would you like to respond? input field, type brief instructions describing the intent, tone, or key points of your message.
Optionally, click the microphone icon to dictate your instructions using voice input.
Select your preferred AI model or custom agent from the bottom dropdown selector.
Click the send icon (upward arrow) to generate the response.
3. Review and insert the generated text
Once the AI generates your response, you can inspect it before adding it to your draft:
Read the generated response in the assistant preview card.
If you want to refine the response, type additional prompts into the input box below.
Click the copy icon to copy the text to your clipboard, or click Insert → to automatically inject the message into your text field.
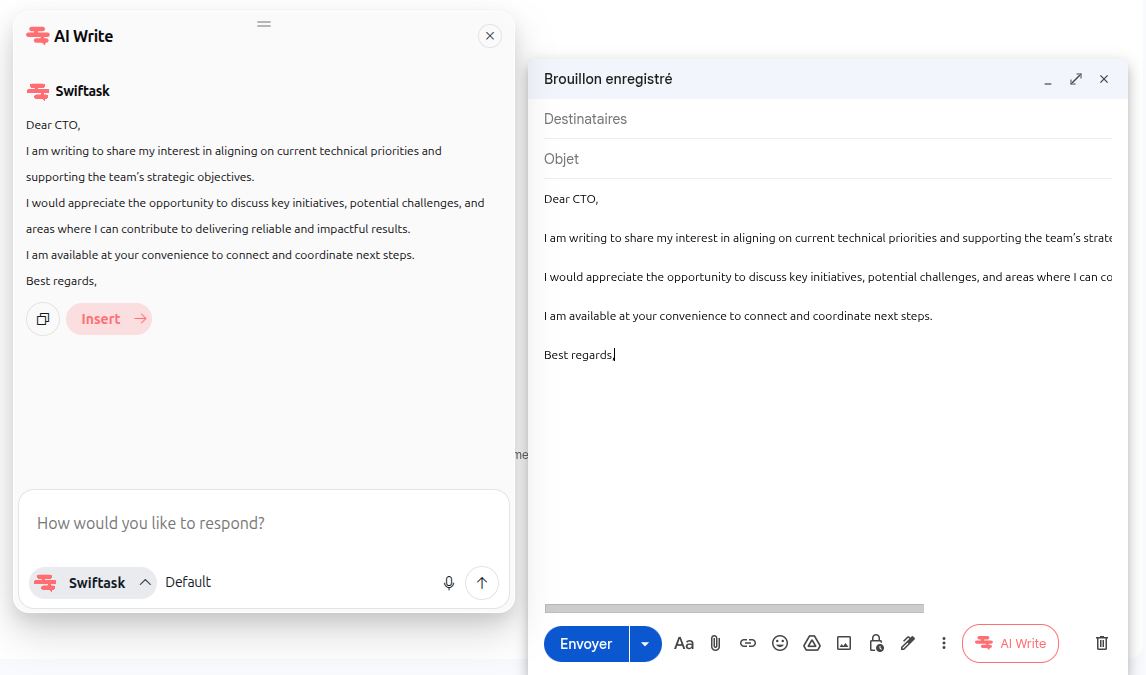
Make any final manual edits directly in the message field and send your message.
Practical use cases
Replying to social media comments: Quickly draft polite, engaging answers to questions or feedback on Facebook or LinkedIn posts while maintaining a consistent tone.
Handling professional inquiries: Draft polished responses to inbound LinkedIn direct messages and connection requests based on the conversation history.
Composing emails: Turn quick notes into fully structured business emails or follow-ups in Gmail without opening a separate tab.
Customer support replies: Provide accurate answers to repetitive inquiries across web help desks, discussion boards, and community forums.
Tips & best practices
Provide specific intent: Adding guidance such as "Decline politely and propose next Tuesday at 2 PM" gives the AI exact details to include in the reply.
Switch models for specialized tasks: Use the model dropdown in the assistant window to switch to a higher-reasoning model or a specialized agent for technical replies.
Review before inserting: Use the Insert → button for instant placement, but take a moment to adjust personalized details before sending.
Troubleshooting
The AI reply button does not appear:
Cause: The webpage loaded before the extension initialized, or the extension lacks site permissions.
Fix: Refresh the page (
Ctrl + RorCmd + R), verify that the extension is pinned and enabled inchrome://extensions, and confirm you are signed in.Generated text is not inserting:
Cause: The active web editor lost focus or uses a custom non-standard rich text framework.
Fix: Click inside the destination input field once, or click the copy icon in the AI window and paste manually with
Ctrl + VorCmd + V.Extension asks to log in:
Cause: Your Swiftask session has expired.
Fix: Click the Swiftask extension icon in your browser toolbar, sign in with your credentials, and return to your webpage.
Additional resources
Was this helpful?
Still need help? Ask the team