Basic features
Written By Stanislas
Last updated 16 days ago
Basic features are the everyday actions available directly inside a Chat conversation: enhancing your question with AI, dictating via voice recording, attaching files, managing AI responses, mentioning a bot, and saving useful answers to your Knowledge base.
These small actions save time on every message you send and make it easy to reuse, refine, or share what the AI produces.
Overview
Every message you send or receive in Chat comes with a set of quick actions. Before you send a message, you can check which agent answers, enhance your prompt, record your voice for instant transcription, or attach files. Once the AI responds, a toolbar under the message lets you copy, reply, save, regenerate, or delete it.
These features are available in every conversation, with any AI model or agent, and require no extra setup.
Prerequisites
To use Chat's basic features, you need:
A Swiftask account (sign up at swiftask.ai)
Access to Chat
A working microphone and browser microphone permission (for voice recording)
All features described below are available to every Swiftask user, on any plan.
Step-by-step guide
1. Check the overview before sending your message
Before you type, Chat shows you which agent or model you're talking to, a short description, its available skills, and the estimated credit cost per word. This helps you know what to expect before you send anything.
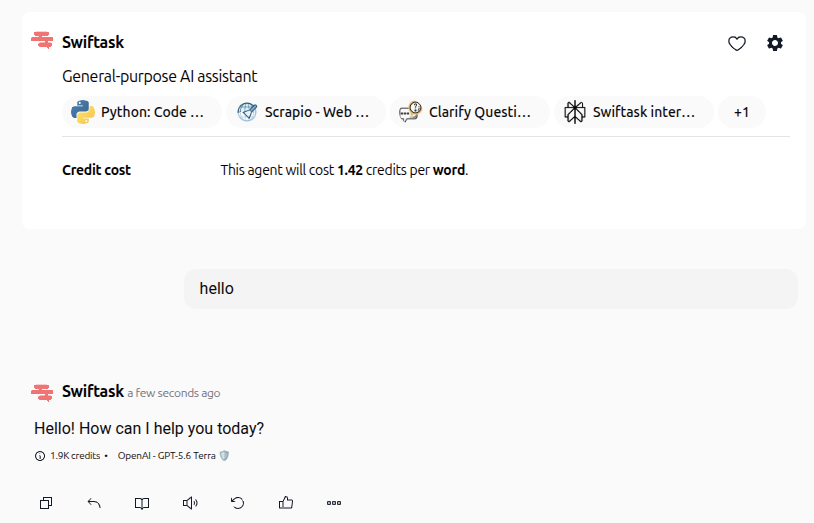
Once you send your message, it appears above the AI's reply, which shows its own credit cost and the model used (for example, "OpenAI - GPT-5.6 Terra").
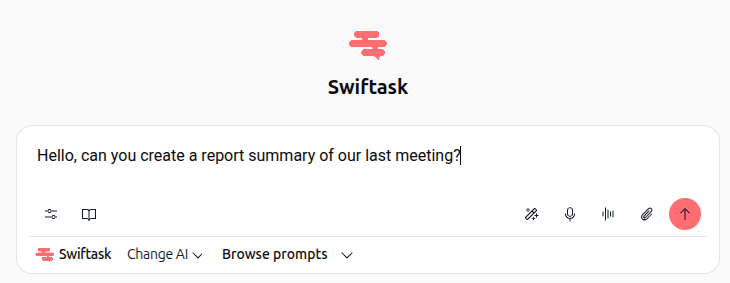
2. Enhance your question with AI
If you're not sure how to phrase your request, let AI improve it for you.
Type a rough draft of your question in the input field.
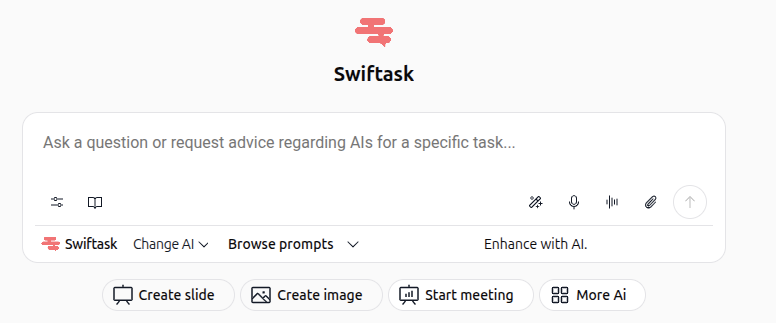
Click the magic wand icon ("Enhance with AI") in the toolbar, next to the microphone icon.
Swiftask rewrites your message to be clearer and more effective.
Review the enhanced version, edit it if needed, and send it.
3. Dictate your question with Start recording
Instead of typing, you can speak your prompt directly and have it automatically transcribed into text.
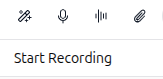
Click the microphone icon (Start Recording) in the input toolbar.
Speak clearly into your microphone. The recording bar displays an active timer, a live waveform of your voice, a cancel button (X), and a confirmation button (✓).
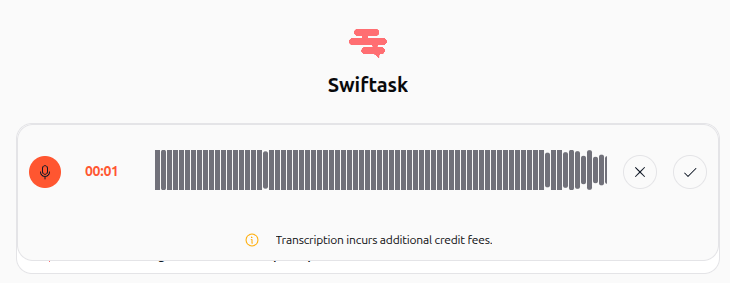
Note: Audio transcription incurs additional credit fees.
Click the checkmark button (✓) to stop recording and process the transcription. Click the X button if you want to cancel and discard the audio.
The transcribed text automatically populates the input field. Review or edit the text, then click the send button.
4. Attach files to your message
Click the paperclip icon ("Upload your files and much more") in the input toolbar to attach documents, images, or other files to your message.
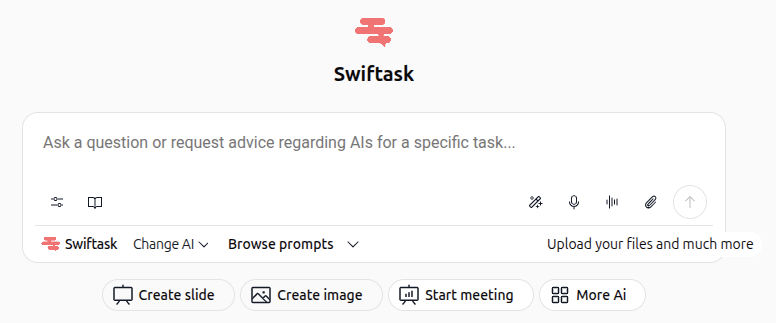
Each file must be under 100 MB. Swiftask supports a wide range of formats, including documents, code, spreadsheets, images, and archives:

You can attach multiple files at once. The AI analyzes them together based on your question.
5. Use the basic actions on any message
Every user message and AI response has a small action toolbar underneath it:
Copy – Copy the text of the message to your clipboard.
Reply – Quote the message and reply directly to it (see step 6).
Add to Knowledge base (book icon) – Save the message to your Knowledge base (see step 7).
Listen (speaker icon) – Have the message read aloud.
Regenerate (circular arrow icon) – Ask the AI to generate a new response to the same question.
Like (thumbs up) – Give positive feedback on the response.
More options (three dots) – Open additional actions, including Delete.
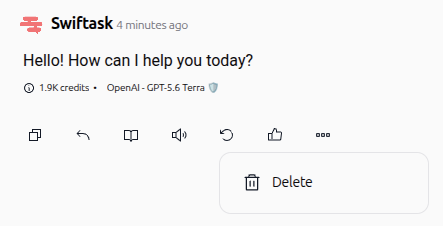
To delete a message, click the three dots icon, then select Delete and confirm.
6. Reply to or mention a bot
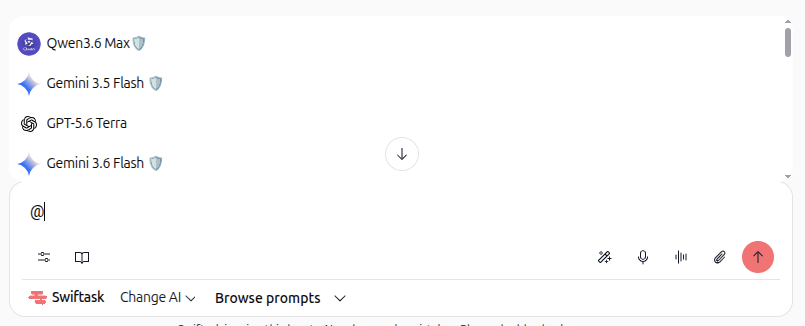
You can respond directly to a specific message, or call a particular AI model into the conversation using @.
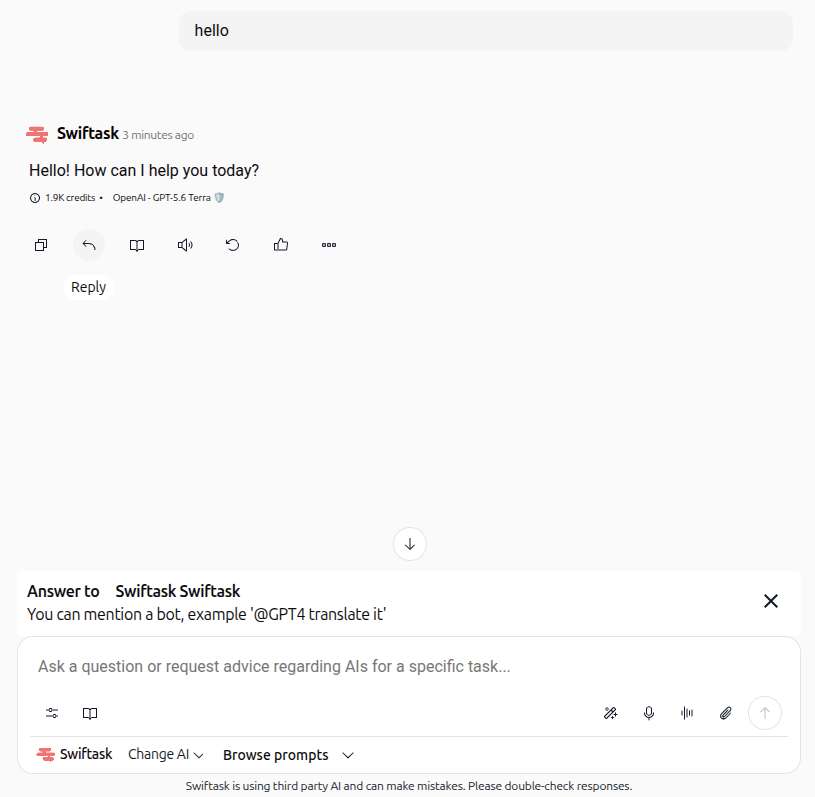
To reply to a message:
Click the Reply icon under the message you want to respond to.
A preview of that message appears above the input field.
Type your message and send it — Swiftask keeps the context of what you're replying to.
To mention a specific bot or model:
Type
@in the input field.A list of available AI models appears.
Select the model you want to address (for example,
@GPT4).Finish your message — the mentioned model will answer.
7. Add a message to your Knowledge base
If a question or an AI response is worth keeping, save it directly to your Knowledge base.
Under the message, click the book icon.
A window titled "Which folder should we save to?" opens.
Select the destination folder (for example, "Knowledge" or a specific project folder).
Click Continue to save the message.
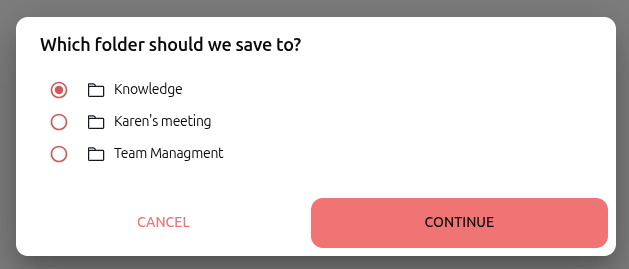
The saved content becomes available to your agents and teammates through Knowledge base.
Practical use cases
Hands-free prompting on the go
Click Start Recording, dictate a meeting summary request while multitasking, and review the transcribed text before hitting send.
Turning a rough idea into a clear prompt
Type a quick, unstructured request, click Enhance with AI, and get a well-formed question ready to send — useful when you're unsure how to phrase a complex ask.
Getting a second version of an answer
If an AI response isn't quite right, click Regenerate instead of rewriting your question from scratch.
Consulting a specialist model mid-conversation
Type @ and select a specific model (for example, a model better suited for code or translation) without leaving your current conversation.
Building a FAQ from real conversations
When the AI gives a particularly useful answer, click the book icon to save it straight to a "FAQ" or "Team knowledge" folder for future reuse.
Tips & best practices
Speak clearly and at a normal pace when recording audio to ensure high-accuracy transcription.
Enhance before sending important or complex requests — it often produces better answers on the first try.
Use Reply instead of a new message when you want to keep the AI focused on one specific point in a long conversation.
Save valuable answers immediately to your Knowledge base — it's easy to forget a great response once the conversation moves on.
Check file size and format before attaching — files over 100 MB or unsupported formats won't upload.
Additional resources
Chat – Attaching files & documents – Full guide on file uploads and supported formats
Chat - Prompt – Save and reuse your own prompt templates
Chat - Dict from microphone – In-depth guide on microphone dictation
Chat - Managing history / finding past conversations – Organize and find past chats
Chat - Generate / export files – Turn AI responses into downloadable documents
Was this helpful?
Still need help? Ask the team