Managing members
Written By Stanislas
Last updated 16 days ago
Overview
The Members section allows workspace administrators to control who has access to the workspace and define what each person can do. It centralizes member invitations, role assignments, group permissions, credit allocations, and activity monitoring.
Administrators use this dashboard to oversee user onboarding, inspect detailed member profiles, ensure security compliance, and remove departing users while managing seat capacity.
Prerequisites
Before managing workspace members, ensure you meet the following requirements:
Step-by-step guide
Accessing the members list
Navigate to Workspace administration in the left navigation sidebar.
Select the Members tab.
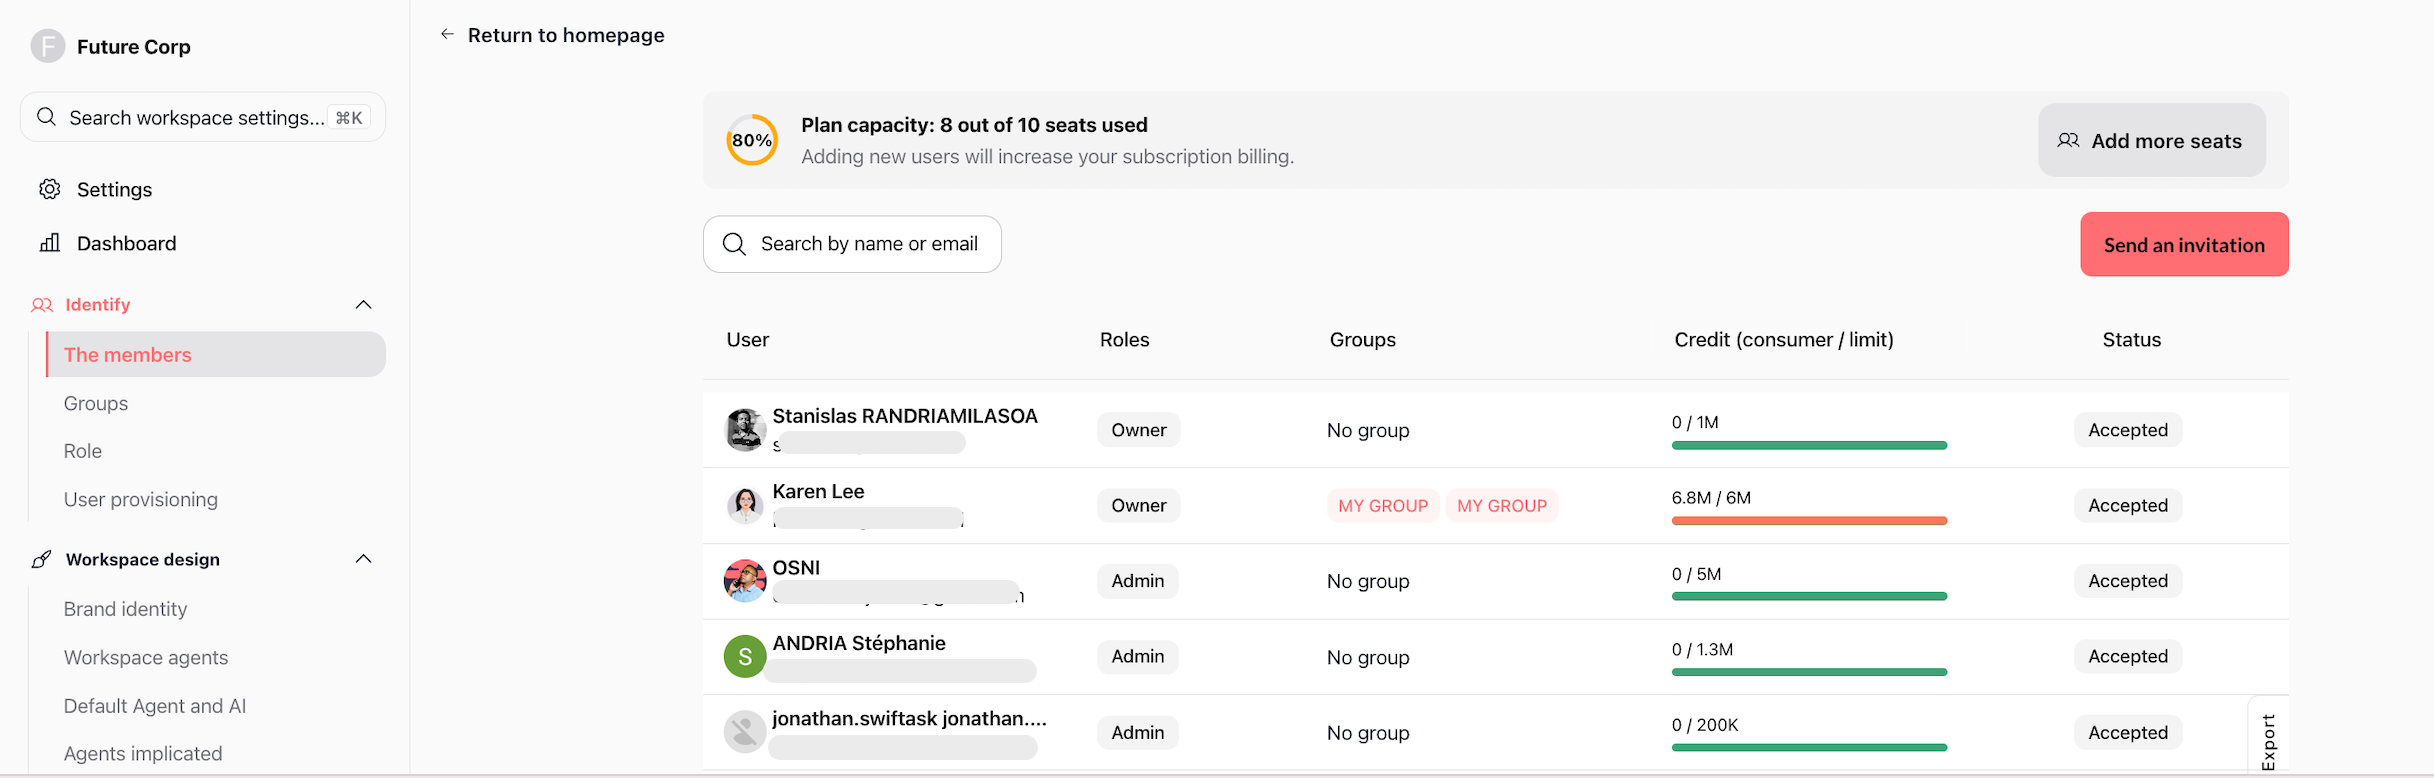
The members table displays all workspace collaborators along with their roles, group affiliations, credit usage versus limits, and invitation status. You can search by name or email, sort columns, and export the list. The top banner shows your current plan capacity (seats used versus total seats) and an Add more seats option.
Inviting team members
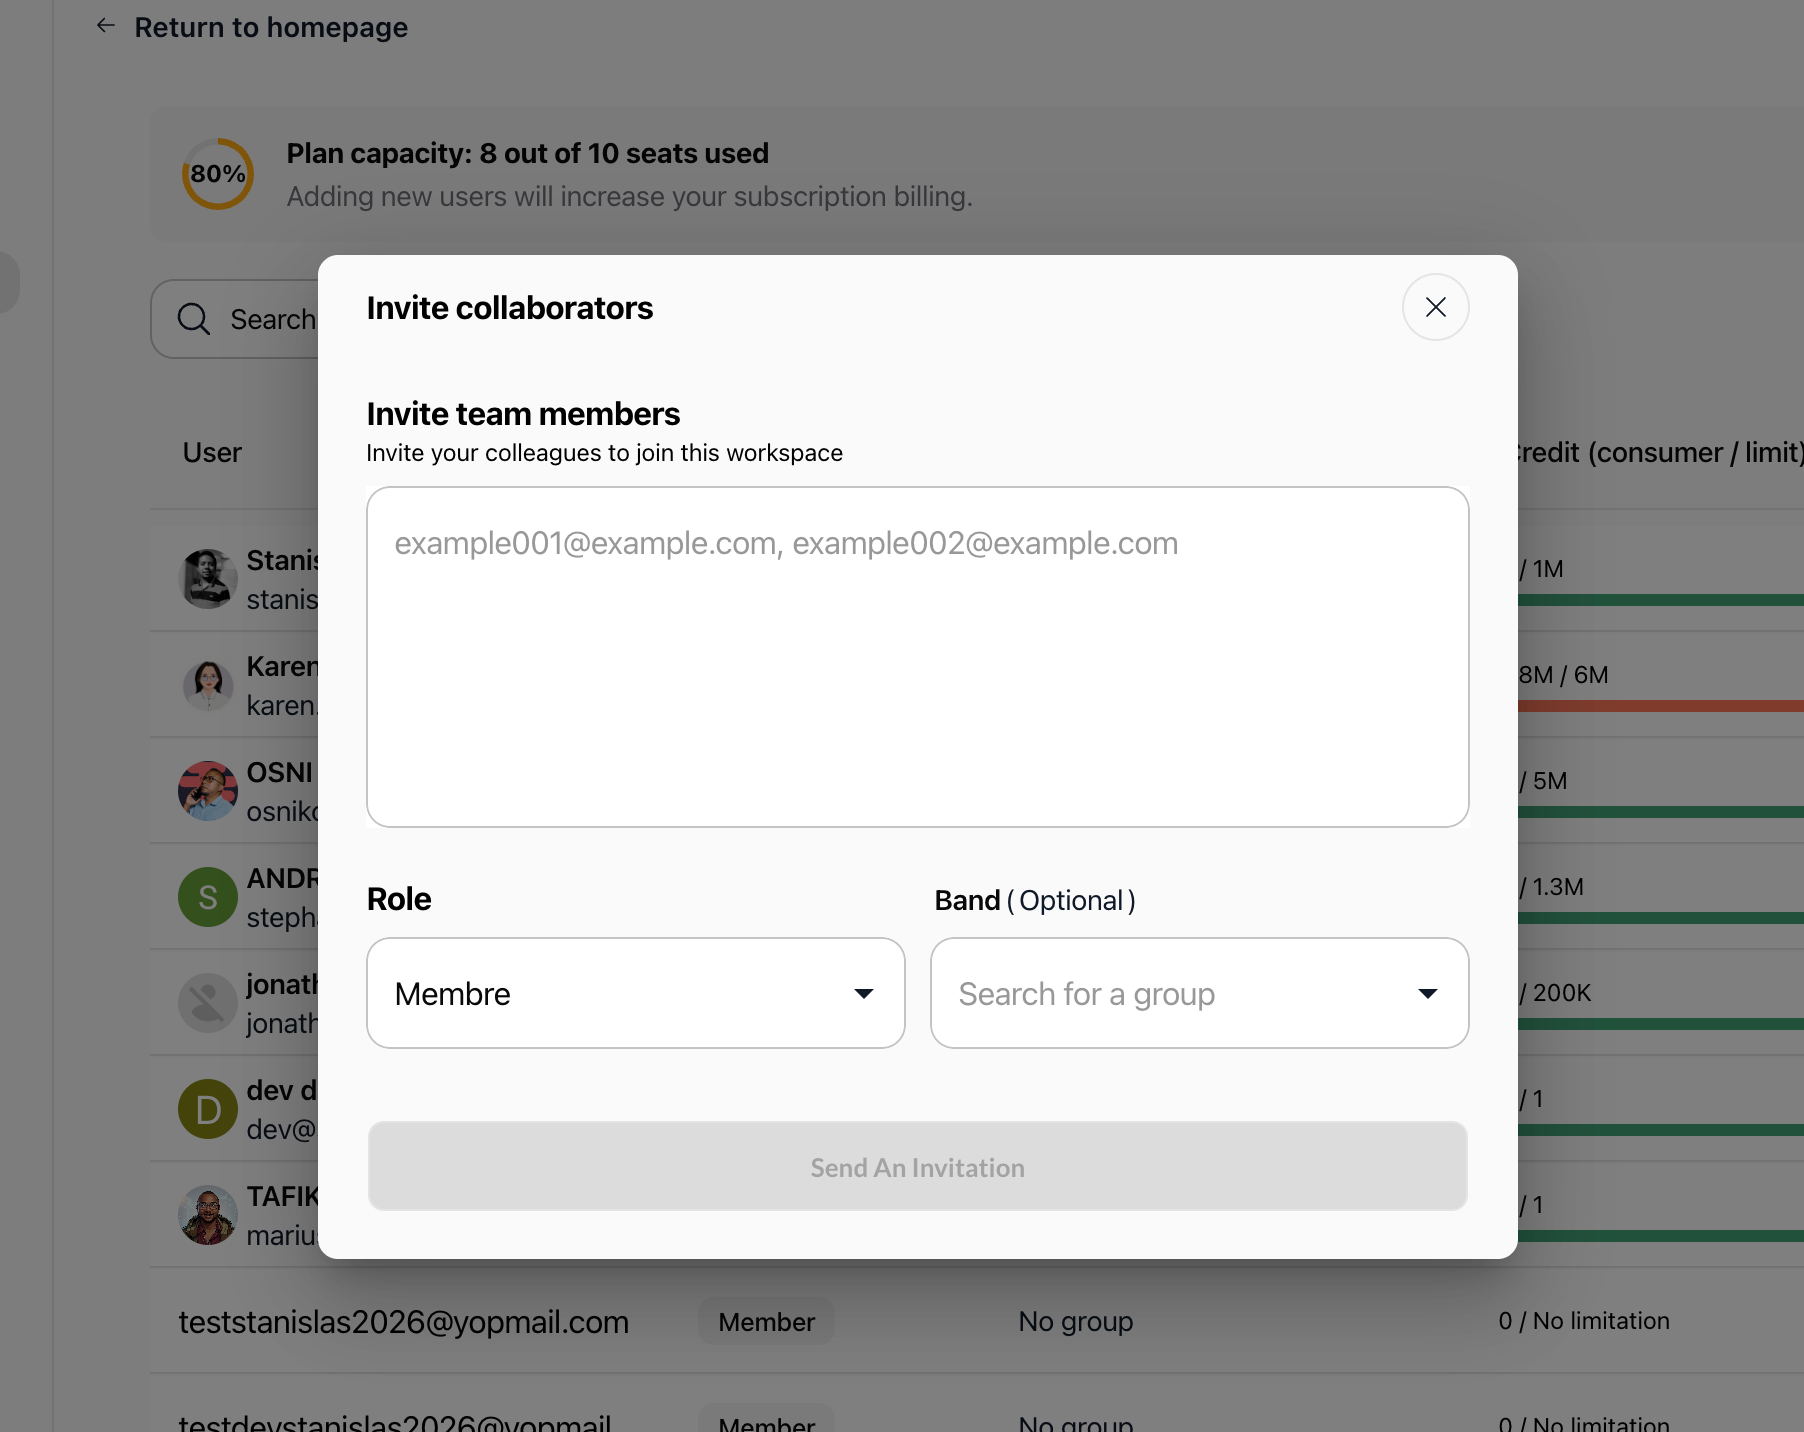
Click the Send an invitation button at the top right of the Members view.
Enter one or more email addresses separated by commas in the email input box.
Select an assigned Role (such as Member or Admin) from the dropdown. New members receive the workspace default role if not changed.
(Optional) Select a Band (Group) to immediately grant group-level permissions.
Click Send An Invitation.
Tip: For pending invitations, you can resend the invite notification via email or copy the direct invitation link directly from the members table.
Editing member roles, limits, and groups
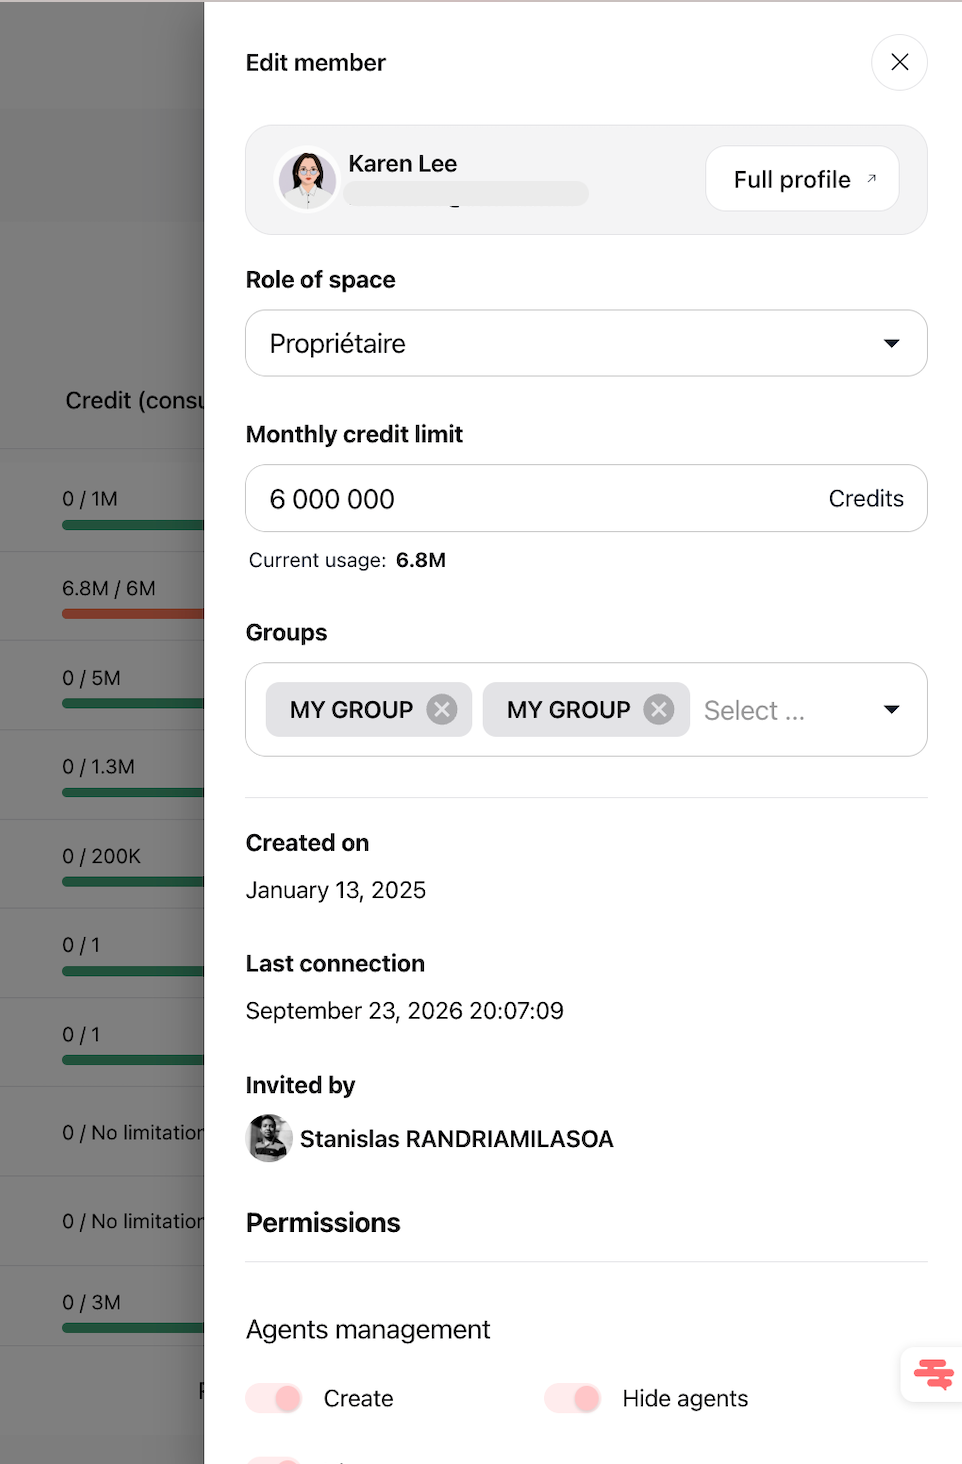
Click on the row of any member in the list to open their quick-edit drawer.
Change the Role of space using the dropdown menu. Role changes take effect immediately.
Enter a custom value in the Monthly credit limit field to regulate AI consumption.
Add or remove tags in the Groups field to adjust team permissions. Rights accumulate across direct roles and group memberships.
Consulting the Member 360 profile
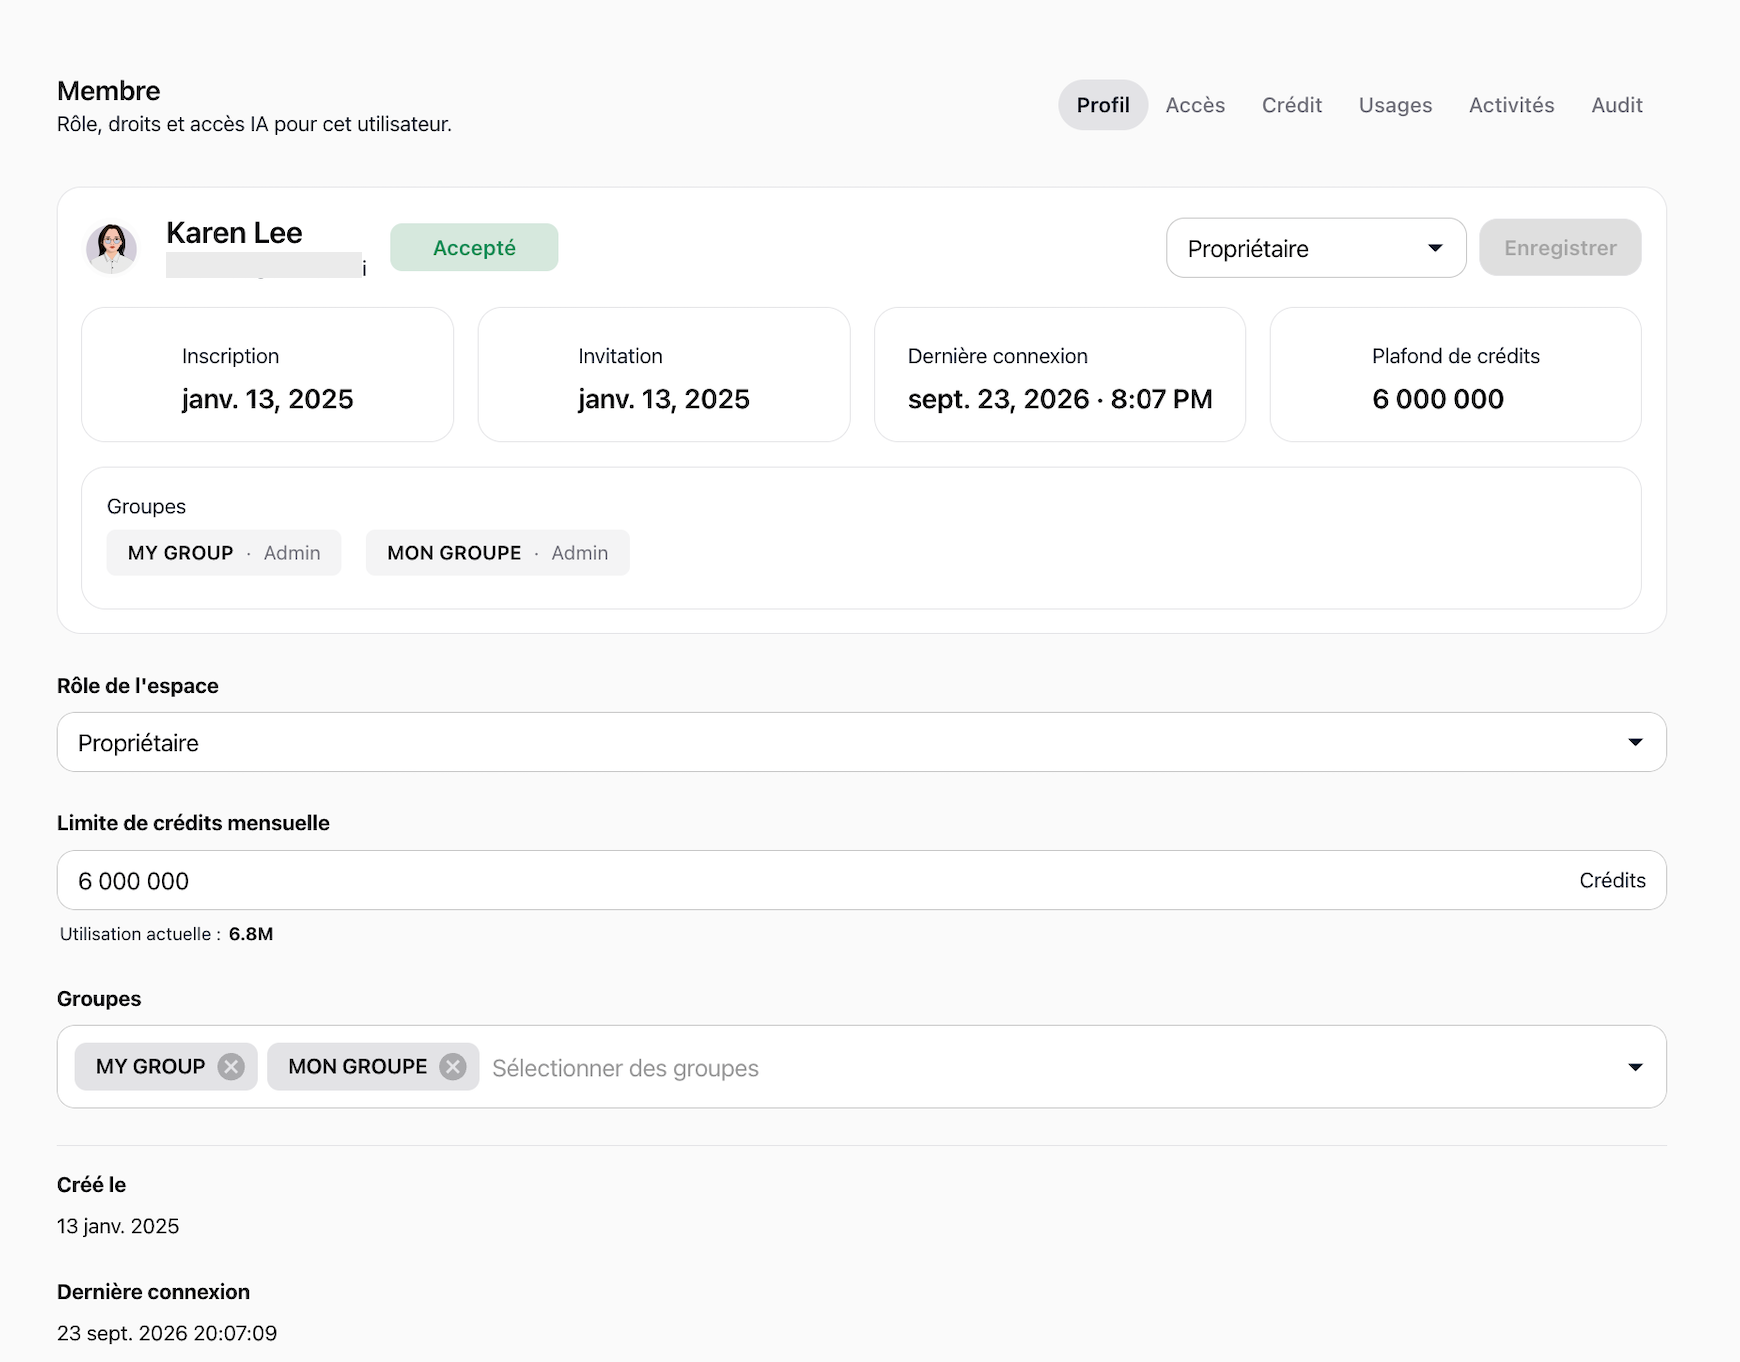
In the side drawer, click Full profile to open the comprehensive Member 360 view.
Navigate across the available tabs:
Profile: View registration date, invitation date, last connection timestamp, and trigger a password reset.
Access: Inspect the specific AI agents, models, knowledge data sources, and projects assigned to the member.
Credit: View and adjust monthly limits and temporary credits with expiration dates (Enterprise plans only).
Uses: Analyze credit consumption indicators and historical usage charts.
Activities: Review member metrics, including total sessions, messages sent, uploaded files, and triggered automations.
Audit: Examine the chronological log of administrative and operational actions taken by the member.
Removing a member
Open the member's quick-edit drawer or full profile.
Scroll down to the Danger zone section at the bottom.
Click Remove.
Confirm the removal when prompted.
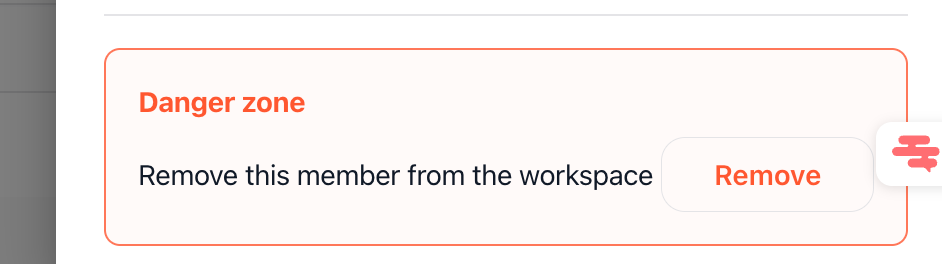
Important: Removing a member immediately revokes all workspace access, clears permissions, and frees up a licensed seat.
Practical use cases
Batch onboarding a department: An administrator invites ten marketing analysts simultaneously by pasting their emails, setting their default role to Member, and placing them in the Marketing group.
Controlling AI usage with spending caps: A team manager sets a monthly credit ceiling for a member to prevent budget overruns, while allocating temporary credits for a high-intensity quarterly campaign.
Offboarding audits: When a collaborator leaves the organization, an admin reviews their Member 360 access list and audit log before removing them to ensure secure handover of shared projects.
Tips & best practices
Combine roles with groups: Assign base workspace roles (such as Member) for general access, then use groups to grant specific agent and project permissions without inflating individual privilege levels.
Monitor the seat capacity gauge: Regularly check the seat consumption progress bar to anticipate license renewals before sending out large onboarding waves.
Identify automated accounts: Look for the dedicated SCIM badge on user rows to quickly distinguish single sign-on provisioned accounts from manually invited users.
Troubleshooting
Additional resources
Workspace roles and permissions: Comprehensive overview of differences between Owner, Admin, and Member roles.
Managing workspace groups: Guide to organizing team members and applying collective resource permissions.
Workspace credit management: Strategies for budgeting credits and setting automated thresholds.
Was this helpful?
Still need help? Ask the team