Direct email communication with AI
Written By Stanislas
Last updated 16 days ago
Overview
Direct email communication gives every Swiftask agent a dedicated email address to receive incoming emails and attachments. Sending an email to this address automatically triggers the agent to read, parse, and process your content using its configured instructions and knowledge base.
The agent automatically sends its response back to the user via email without requiring any external email tool or configuration. Agent owners and workspace administrators can monitor all triggered interactions, conversation threads, and credit usage directly in the session inbox.
Prerequisites
Before using direct email communication with your agent, make sure you have:
An active Swiftask account.
An existing agent created in your workspace.
Access to agent configuration settings.
The agent must be active in your workspace.
No external email tools or additional skill configurations are required; the agent is natively equipped to receive emails and send email replies.
Step-by-step guide
Step 1: Find your agent's email address in profile
Go to Agents in the left navigation menu.
Click the agent you want to communicate with.
In the agent configuration settings sidebar, select Profile.
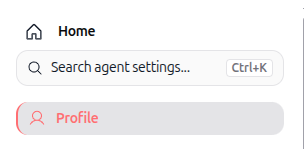
Scroll down to the Email this Agent section.
Copy the displayed email address (format:
unique-id@agent.swiftask.ai), or click the pencil icon to customize it.
Step 2: Send an email to the agent
Open your preferred email client (such as Gmail, Outlook, or Apple Mail).
Compose a new email message or forward an existing thread.
Enter the agent's unique email address in the To field.
Add a clear subject line and enter your message in the body.
Attach any relevant documents, spreadsheets, or images if needed.
Click Send.
Step 3: Receive the automatic email reply
Swiftask automatically parses your incoming message and runs the agent.
The agent generates a response based on its instructions and knowledge base.
The response is automatically emailed back to the sender's address.
The email conversation thread is preserved, allowing you to reply directly to continue the exchange.
Step 4: Monitor triggered sessions in Session & inbox
As an agent owner or administrator, navigate to Agent Observability and click Session & inbox.
Locate the execution log filtered under the Trigger channel with the title Email from external sender.

Click the entry to open the triggered session drawer.
View the sender details, email body, attachments, and the agent's generated answer under the Conversation tab.
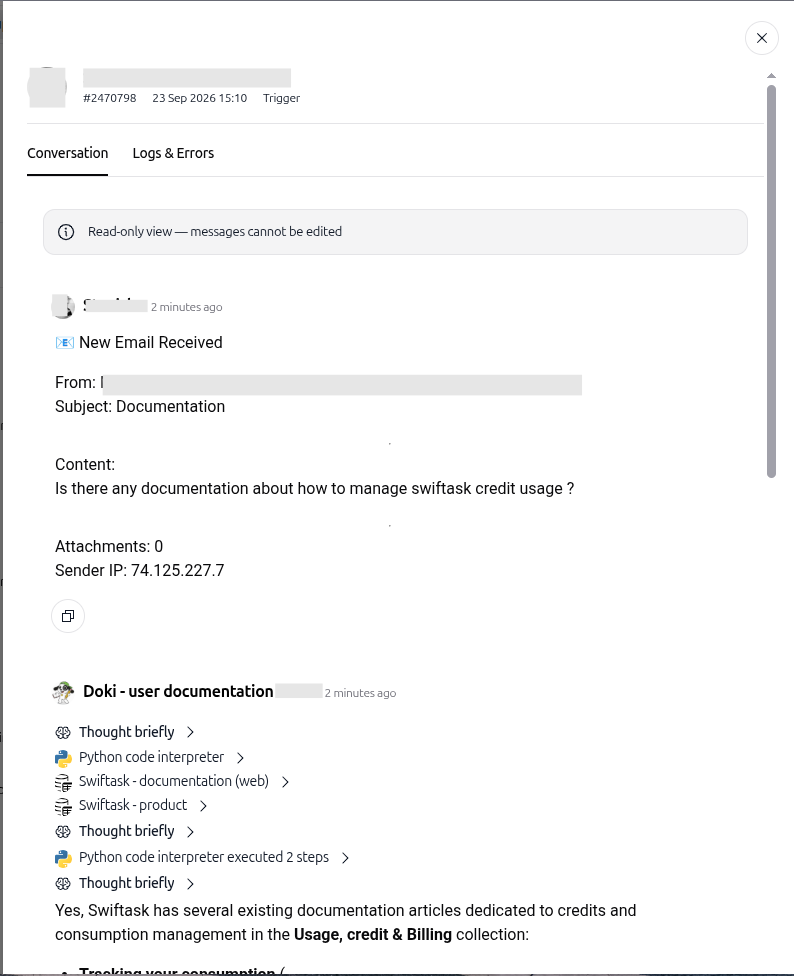
Switch to the Logs & Errors tab to inspect tool executions, system steps, and credit consumption.
Practical use cases
Customer inquiry handling
Customers send inquiries directly to the agent's email address. The agent reads the question, searches the connected knowledge base, and automatically replies to the customer with accurate information.
Invoice and receipt processing
Forward supplier invoices or receipts to your finance agent. The agent extracts invoice numbers, totals, and due dates, then emails you back a structured summary while logging the data.
Inbound lead qualification
Prospective leads email your sales agent directly or via a contact alias. The agent qualifies the lead against predefined criteria, replies with relevant resources, and records the interaction for the sales team.
Tips & best practices
Use clear subject lines: Clear subjects provide instant context and help your agent deliver targeted responses.
Attach relevant documents: The agent automatically parses PDFs, Word documents, images, and spreadsheets attached to incoming emails.
Maintain conversation threads: Reply directly to the agent's response emails to preserve full conversation context across multiple exchanges.
Review sessions regularly: Check Session & inbox periodically to audit response quality, verify execution logs, and monitor credit consumption.
Troubleshooting
The agent email address cannot be found
Cause: You are looking in an incorrect settings menu.
Fix: Go to Agents → your agent → Profile tab, and locate the Email this Agent section.
No email response is received after sending a message
Cause: The email address was mistyped, delivery was delayed, or the email ended up in spam.
Fix: Verify the recipient address in the agent's Profile section, check your email spam/junk folder, and review the execution status in Session & inbox.
The triggered session shows an error in Session & inbox
Cause: The attached file format is unsupported, instructions failed, or workspace credits are depleted.
Fix: Open the session in Session & inbox, view the Logs & Errors tab to identify the exact cause, and verify available credit balance.
Additional resources
Introduction to automating with agents – Learn how agent triggers and automations work.
Creating an automation with agents – Build custom automated agent workflows.
Triggers from webhook – Integrate external applications using webhook triggers.
Agent instructions and objectives – Configure your agent's behavior and knowledge base.
Was this helpful?
Still need help? Ask the team